Replace
Resin Tank
MIN
MAX
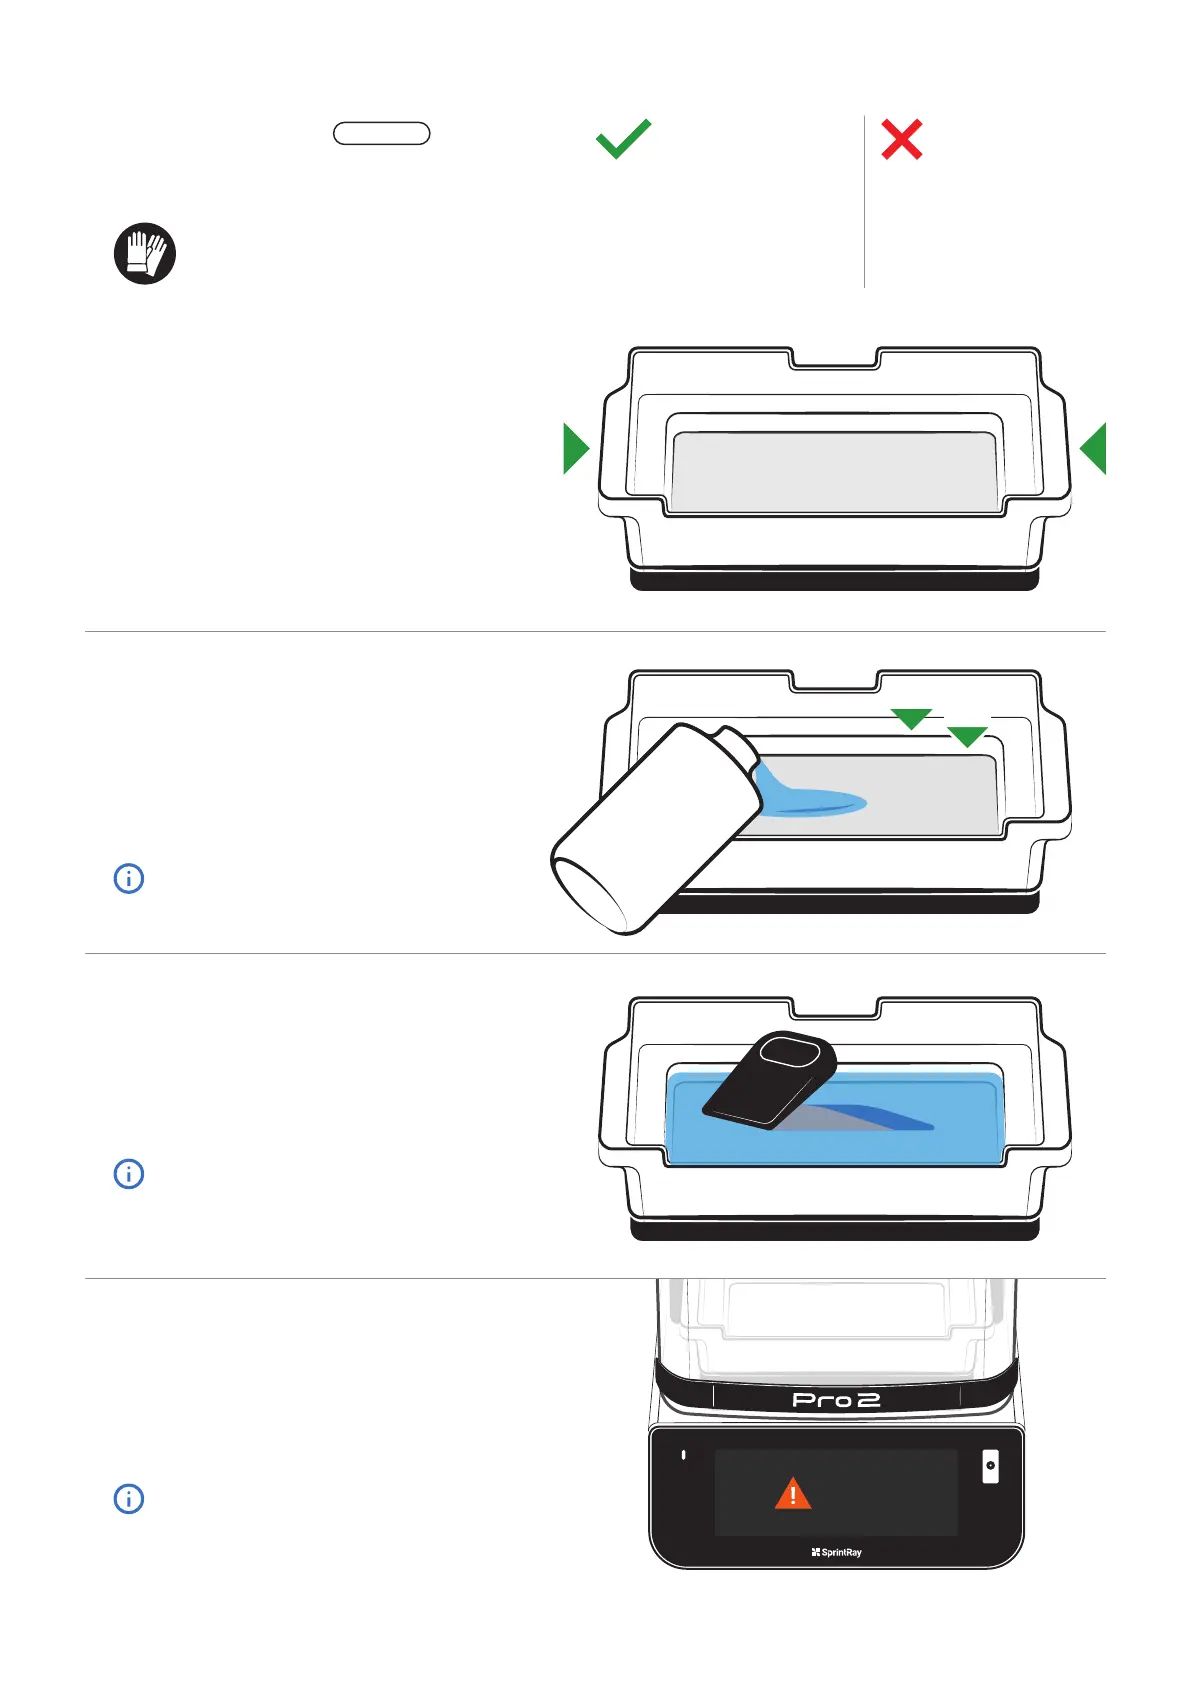
Use the handles
The resin tank is designed with handles on either
side. When you handle the resin tank, only hold it
by the handles.
Pour Resin into the Tank
To activate a new resin tank, follow the instructions
on the touchscreen to scan the bottle or select the
resin type manually.
Pour resin directly from the bottle into the tank, filling
until the resin is between the ‘Min’ and ‘Max’ lines.
Do not overfill.
Check Tank Before Printing
Before each print job, use the included resin squeegee to
stir the resin and check the bottom of the tank for cured
resin or other debris. Mix until the resin is uniform in color.
Mix until the resin is uniform in color.
Replace When Directed
The touchscreen on Pro 2 monitors resin usage and will
notify you when it’s time to replace a resin tank.
Failure to replace your resin tank in a timely manner may
cause catastrophic damage to your printer that may not be
covered under the warranty.
For best results, keep an extra tank on
hand and don’t switch resin types.
Do Don’t
▪ Use one tank for each resin type
▪ Keep away from light
▪ Hold by the handles
▪ Cover when not using
▪ Wear gloves while handling
▪ Change the resin type often
▪ Touch the film or underside
▪ Use sharp objects
▪ Puncture the film
Resin Tank
The resin tank holds liquid resin during the printing process.
When you’re not printing, cover the tank with the included
lid.
Wear Gloves
Always wear gloves when handling uncured resin.
CONSUMABLE