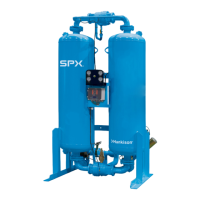
The JEMACO HXK Series Refrigerated Air Dryers, an SPX brand, are designed to remove moisture from compressed air through mechanical refrigeration. This manual covers models HX76K through HX601K, providing essential information for installation, operation, and maintenance.
Function Description:
These dryers utilize a refrigeration cooling process to condense entrained moisture from the air stream. Warm, saturated air first enters an air-to-air heat exchanger where it is pre-cooled by outgoing cold, dry air. This pre-cooling step condenses up to 65% of the moisture before the air reaches the refrigeration chiller, reducing the heat load on the refrigerant compressor and allowing for a smaller compressor. After passing through the chiller, the cold, dry air is reheated by the incoming warm air in the air-to-air heat exchanger. The refrigeration system is designed and fabricated according to recognized commercial/industrial practices, incorporating a compressor, controls, safety interlocks, and associated equipment for safe performance. All models use a constant pressure expansion valve that automatically modulates refrigerant flow in response to pressure changes, adjusted at the factory for fully automatic operation.
Important Technical Specifications:
The dryers are rated for specific capacities, power supplies, and input power, as detailed in Table 4 of the manual. For instance, the HX76K model has a rated capacity of 2.50 Nm³/min, a 230V/1/50Hz power supply, 0.58 kW input power, and uses R134a refrigerant. Larger models like the HX601K have a capacity of 18.02 Nm³/min, a 380~420V/3/50Hz power supply, 3.40 kW input power, and use R-407C refrigerant.
Dimensions vary by model, with heights ranging from 601mm to 811mm, widths from 363mm to 543mm, and depths from 861mm to 1321mm (Table 3). Inlet and outlet connections are typically 1 inch for smaller models and up to 2 1/2 inches for larger ones.
Operating conditions (Table 5) specify a maximum inlet air pressure of 16 barg and a minimum of 3 barg. Maximum inlet air temperature is 49°C, with a minimum of 4°C. Ambient air temperatures should range between 4°C and 43°C. Continuous operation outside these maximum and minimum conditions is not allowable.
Refrigerant pressure switch settings (Table 2) are crucial for proper operation. For HX76K~101K models, the fan pressure switch turns on at 12 ± 1 bar and off at 7 ± 1 bar. For HX151K~601K, these settings are 21 ± 1 bar (on) and 15 ± 1 bar (off). The high-pressure switch for HX76K~101K models cuts out at 21 ± 1 bar and requires a manual reset. Suction pressure values (Table 1) are provided for both without airflow and with airflow conditions, varying by refrigerant type (R-134a or R-407C).
Usage Features:
- Installation: Dryers should be located indoors, on a level base, in a clean, well-ventilated area with at least 6 inches of clearance on the sides and front for cooling airflow and service access. They should be installed downstream of an aftercooler and mechanical separator to prevent liquid water slugging. Inlet and outlet shutoff valves and depressurization valves are recommended for safety and convenience, allowing isolation for servicing. Bypass piping can be installed for uninterrupted airflow during service.
- Electrical Connections: Field wiring must comply with local and national fire, safety, and electrical codes, matching the voltage specified on the dryer data plate. Operation with improper line voltage can void the warranty.
- Drainage: Dryers are equipped with automatic drain valves and internal drain hoses. Users must install a discharge line to a waste disposal collection system, ensuring condensate can be seen as it drains.
- Start-up Procedure: Before starting, the dryer must be energized for 4 hours without the refrigeration compressor running to prevent non-warrantable compressor failure. The power switch should then be turned ON, and condensate discharge, drain valve timing, supply voltage, air line connections, ventilation, and inlet air conditions should be checked.
- Continuous Operation: The dryer is designed to run continuously, even when compressed air demand is interrupted, as it will not freeze up.
- Color Indicator (HX76K~151K): These models feature a color indicator. Red indicates initial startup or a need for checking, while green signifies normal operation. Red during normal operation suggests potential compressor damage and requires immediate shutdown and troubleshooting.
- Digital Control Board (DCB) (HX201K~601K): These models have an LED-type dew point indicator. Green LED indicates normal running, red indicates a need for condition checking, and all LEDs lit suggest a sensor malfunction. The DCB also allows adjustment of the automatic drain valve's open (0.5 to 9 seconds) and closed (0.5 to 15 minutes) times. A "G" button (drain test button) activates the drain port with an audible click.
Maintenance Features:
- General: Little maintenance is required for satisfactory operation. All refrigeration system maintenance should be performed by a competent refrigeration mechanic.
- Daily: Check the electronic drain valve operation at least once per 8-hour shift, ensuring condensate is discharging.
- Monthly: For air-cooled condensers, inspect and clean condenser coils monthly using compressed air (OSHA-approved nozzle, limiting discharge pressure to 2.1 kgf/cm²) to remove dirt and particles.
- Electronic Drain Valve Adjustment: The drain valve control time should be adjusted to minimize air losses, opening just long enough to discharge condensate. Recommended initial settings are 1-2 seconds open and 30 seconds closed. If liquid discharges as the port closes, adjust for a shorter cycle or longer opening.
- Electronic Drain Valve Disassembly and Servicing: The manual provides detailed steps for disassembling the drain valve for cleaning and maintenance, including removing hoses, screws, power supply connector, gasket, coil fixing nut, and lifting the solenoid coil housing. Internal parts should be inspected, cleaned, or replaced as needed. The timer should not be disassembled or repaired; replace if defective.
- Safety Precautions: Before any work, ensure the electrical supply is locked and tagged, and internal pressure is vented. Work on the refrigeration system must be done by a licensed mechanic. Fluorocarbon refrigerants must not be released to the atmosphere or discharged into floor drains. No mineral oils should be introduced into the refrigeration system.
- Troubleshooting (Field Service Guide): The manual includes a comprehensive guide for common problems like water downstream of the dryer, excessive pressure drop, and no condensate from the drain valve, listing possible causes and remedies.