17
© SPX
Form No. 1000572
Rev. 0 February 8, 2012
Draining And Flushing The Reservoir
1. Clean the pump exterior before the pump interior is
removed from the reservoir.
2. Remove the screws fastening the motor and pump
assembly to the reservoir. If equipped with a 2-gallon
reservoir the screws need to be discarded.
3. Remove the motor assembly and place aside.
Caution: Do not damage the pump lter or pressure
regulating valves when lifting the pump and motor off
the reservoir.
4. Clean the inside of the reservoir, and fill with Power
Team hydraulic fluid. Rinse the filter clean.
5. Place the pump and motor assembly back onto
the reservoir, and secure with two machine screws
assembled on opposite corners of the housing.
6. Place the hydraulic flow control valve in the neutral
position. If the pump is equipped with a valve that has
only an advance or retract position.
7. Run the pump for several minutes.
8. Disconnect the motor and pump assembly, and drain
and clean the inside of the reservoir.
General Maintenance continued
when the system is not operated regularly indoors.
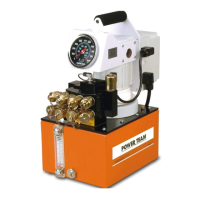
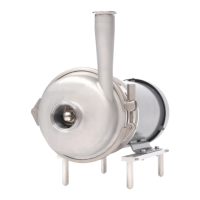
Item Description
1 Accumulator (Not used on
all models)
2 High Pressure Relief Valve
3 Filter
4 Pressure Regulating Valve
Figure 8. Pump Assembly
9. Fill the reservoir with Power Team hydraulic fluid.
10. For pumps with 2-gallon reservoir, use new screws: Place the pump and motor assembly (with new
gasket) on the reservoir, and install the new screws. Tighten screws securely and evenly.
For pumps with small reservoirs: Place the pump and motor assembly with clean gasket on the
reservoir, and install the screws. Tighten screws securely and evenly.
Adding Hydraulic Fluid To The Reservoir
1. Retract the cylinder(s) devices.
2. Disconnect the power supply.
3. Clean the entire area around the filler plug.
4. Remove the filler plug, and install a clean funnel with a filter.
5. Use only Power Team hydraulic fluid AW 46 47 cSt @ 38°C (247 SUS @ 100°F). If low temperature
requirements are needed, use hydraulic fluid 5.1 cSt @ 100°C (451 cSt @ -40°C).
 Loading...