11
95-03028
09/2019
Waukesha Cherry-Burrell
®
Brand Colloid Mill Maintenance
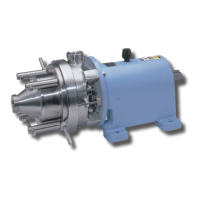
6. Remove the rotor retaining nut, then remove the O-ring from
the nut. (See Figure 10.)
7. Slide the rotor o the shaft, making sure to handle it with care
to avoid damage to the rotor or to the seal seat, which is con-
tained in the rotor. (See Figure 11.)
Figure 13
Figure 10
Springs
Figure 14
Figure 12
Figure 11
Figure 15
Figure 16 Figure 17
Figure 18
O-ring
Lip seal
O-ring
8. Gently pull the seal seat from the back of the rotor and re-
move the O-ring. (See Figure 12.)
9. Remove the seal assembly from the shaft. (See Figure 13.)
10. Remove the four 1/2-13 hex nuts which secure the body to
the bearing case and slide the body forward o the shaft. (See
Figure 14 and Figure 15.)
O-ring
Seal seat
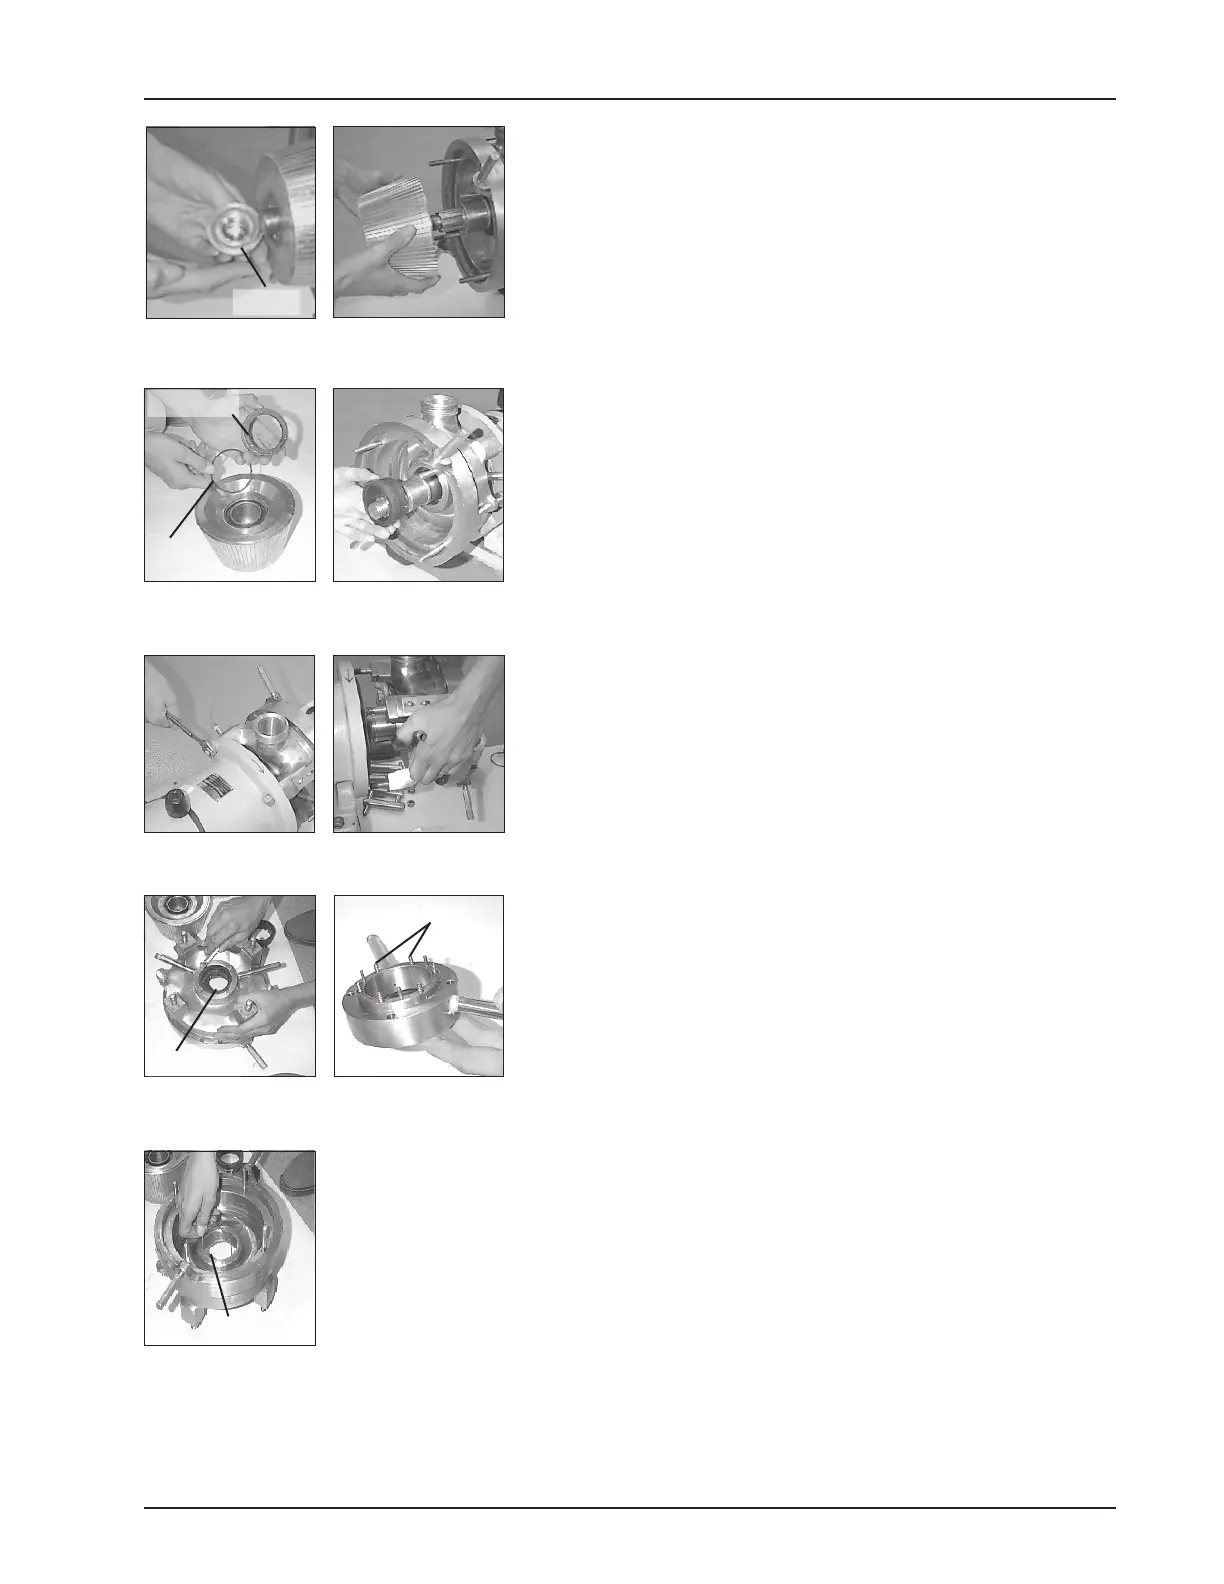
11. Remove the four capscrews from the gland on the back side
of the body and disassemble the gland.
NOTE: There are six loose springs in the gland.
The gland lip seal can be pressed out if replacement is re-
quired. (See Figure 16 and Figure 17.)
12. Remove the O-ring from inside the body. Use the O-ring
removal tool (part no. AD0096001) if necessary. (See Figure
18.)
NOTE: Clean and inspect all parts thoroughly. DO NOT reuse
the seal or seal seat if it is scratched, chipped or worn.