95-03028
09/201914
Waukesha Cherry-Burrell
®
Brand Colloid MillMaintenance
Tools required for seal and/or bearing replacement:
• Assorted hand tools including soft hammer.
• Bearing puller or press.
• Hook tool for seal removal.
• Spanner wrench for bearing retainer nut removal
• Rotor Nut Wrench part no. GD0019000
• Anti-seize compound and seal lubricating grease.
• 2 quarts DTE BB Mobil oil or equivalent.
Service Preparation
1. Shut OFF and lock out all power.
2. Remove all product and ushing from the mill.
3. Disconnect all piping to the mill.
4. Remove the pump anchor screws and slide the gearcase o
the motor coupling.
5. Place the mill on a sturdy work surface.
6. Disassemble the wet end of the mill completely. (See “Disas-
sembly” on page 10.)
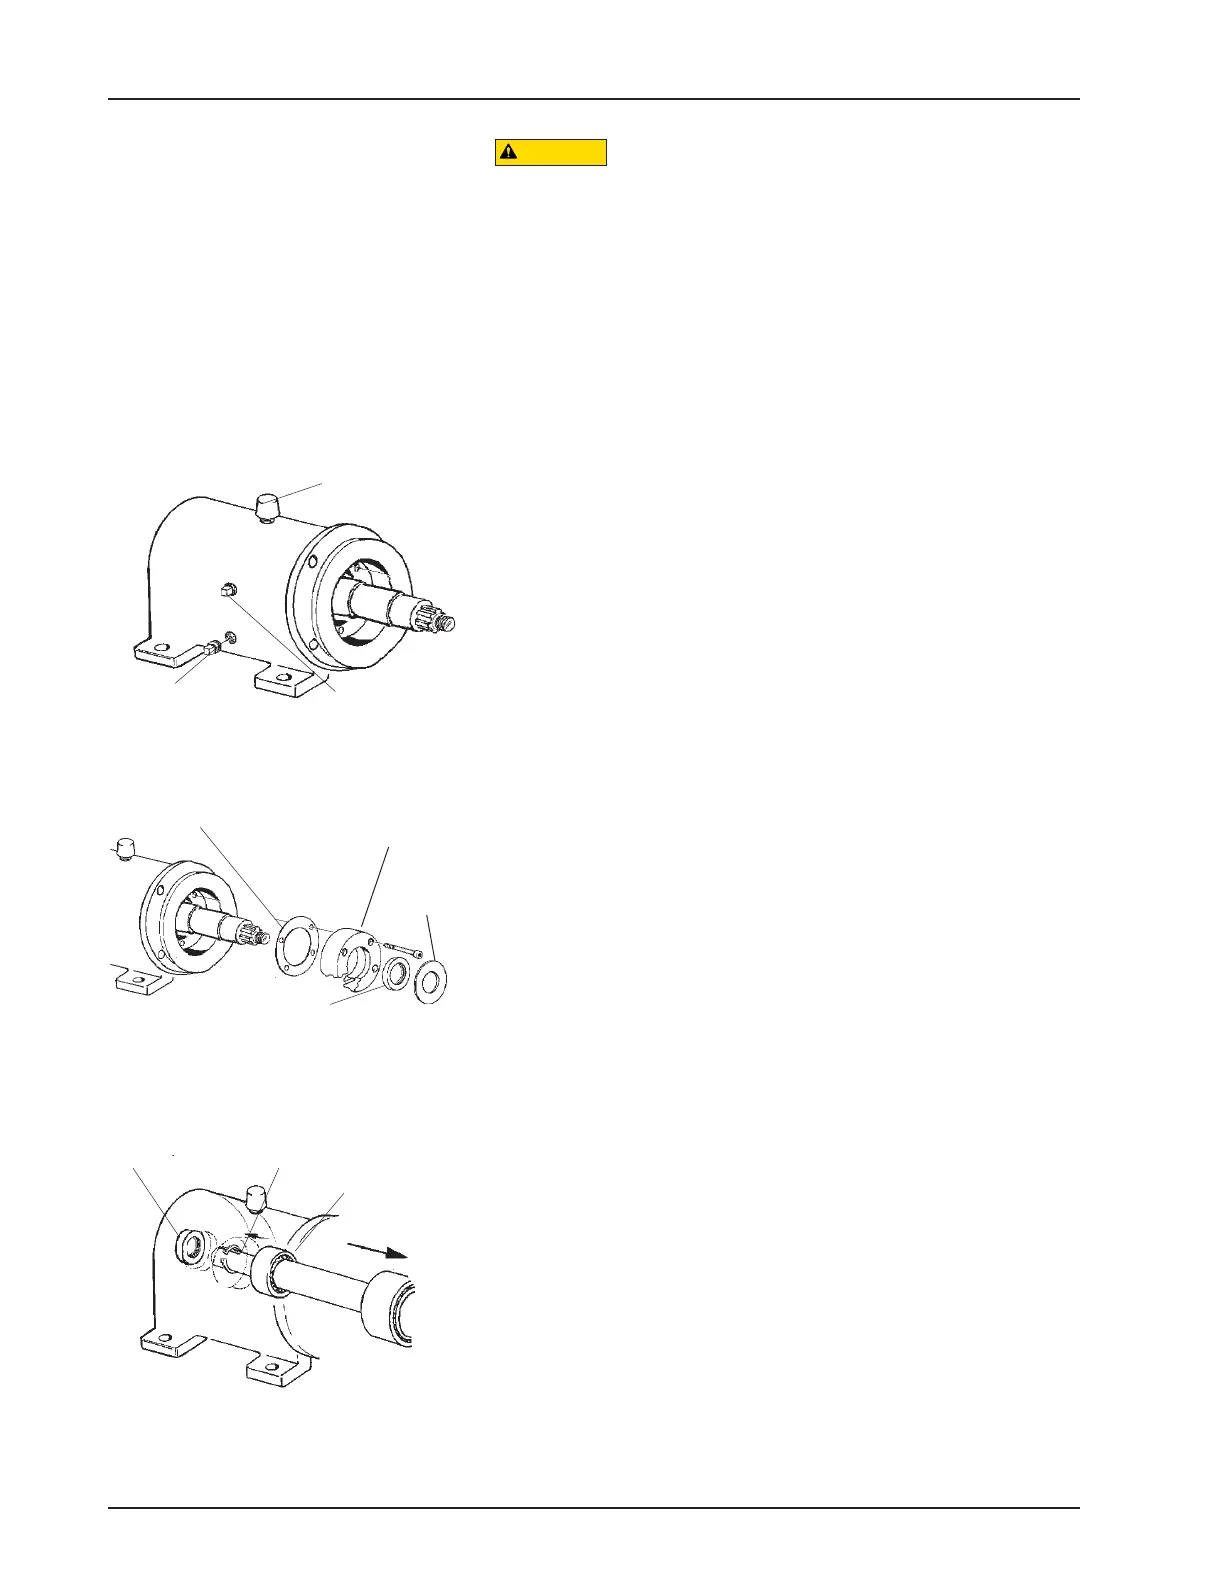
7. Drain the oil from the gear case (Figure 25).
Front Seal Replacement
1. See Figure 26. Pull o the slinger.
2. Remove the four capscrews, then remove the bearing retainer
assembly (front seal inside).
3. Note the seal lip position and knock out the old seal
4. Place lubrication around the new seal and press it into the
bearing retainer. Replace the gasket, if necessary. Lubricate
the seal lip and install the bearing retainer and slinger.
Rear Seal Replacement
1. See Figure 27. Pull the rear oil seal o the drive shaft with a
hooked tool.
2. Place tape over the shaft keyway and install a new seal. (Lu-
bricate the seal lip before sliding it onto the shaft.)
Bearing Replacement
1. Remove the rear seal. Remove the rear bearing retaining ring.
Press the drive shaft out through the front of the gear case
(through the rear bearing) (Figure 27).
2. Remove the bearing locknut from the shaft (counter-clock-
wise) and press o the front bearing (Figure 26).
3. Press the rear bearing out of the front of the gear case (Figure
27).
Gear Case Service
CAUTION
To avoid a cutting injury, wear gloves and handle
parts carefully.
Figure 25
Oil level
Breather cap
Oil drain
Figure 26
Bearing retainer
assembly
Gasket
Front seal
Slinger
Figure 27
Rear seal
Retaining
ring
Rear
bearing