9
PUMP SERVICE
Pump should only be serviced by qualified personnel.
Be sure to prime pump (Pg. 7) before starting.
Before removing trap cover:
1. STOP PUMP before proceeding.
2. CLOSE GATE VALVES in suction and discharge pipes.
3. RELEASE ALL PRESSURE from pump and piping system.
4. NEVER tighten or loosen clamp while pump is operating.
To avoid dangerous or fatal electrical shock hazard, turn OFF power to
motor before working on pump or motor.
Aside from lubricating trap cover O-Ring, no lubrication or regular mainte-
nance is needed beyond reasonable care and periodic cleaning.
If shaft seal is worn or damaged, repair as follows:
Pump Disassembly/Removing Old Seal
Disconnect power to pump motor.
Be sure gate valves on suction and return piping are closed before start-
ing work.
Release all pressure by opening all vents before starting work.
1. Drain pump by removing drain plugs on bottom of pump body and trap
body.
2. Be sure there is no pressure in trap body; remove cover (unscrew by turn-
ing counterclockwise).
3. Remove clamp holding pump halves together. Motor and seal plate as-
sembly can now be pulled away from pump body.
4. Remove five screws and washers holding diffuser to seal plate. Remove
diffuser.
5. Remove motor canopy. Being careful not to touch capacitor terminals,
loosen capacitor clamp and move capacitor to one side.
6. Hold shaft with 7/16" open-end wrench on motor shaft flats.
7. Unscrew impeller from shaft (turn counterclockwise when facing it).
NOTICE: On models with impeller screw, remove impeller screw (left
hand thread - turn clockwise) and gasket before removing impeller.
Inspect gasket for damage, cracks, etc. Replace if damaged.
8. Pull rotating member of seal off of impeller sleeve; clean sleeve.
9. Remove four screws holding seal plate to motor.
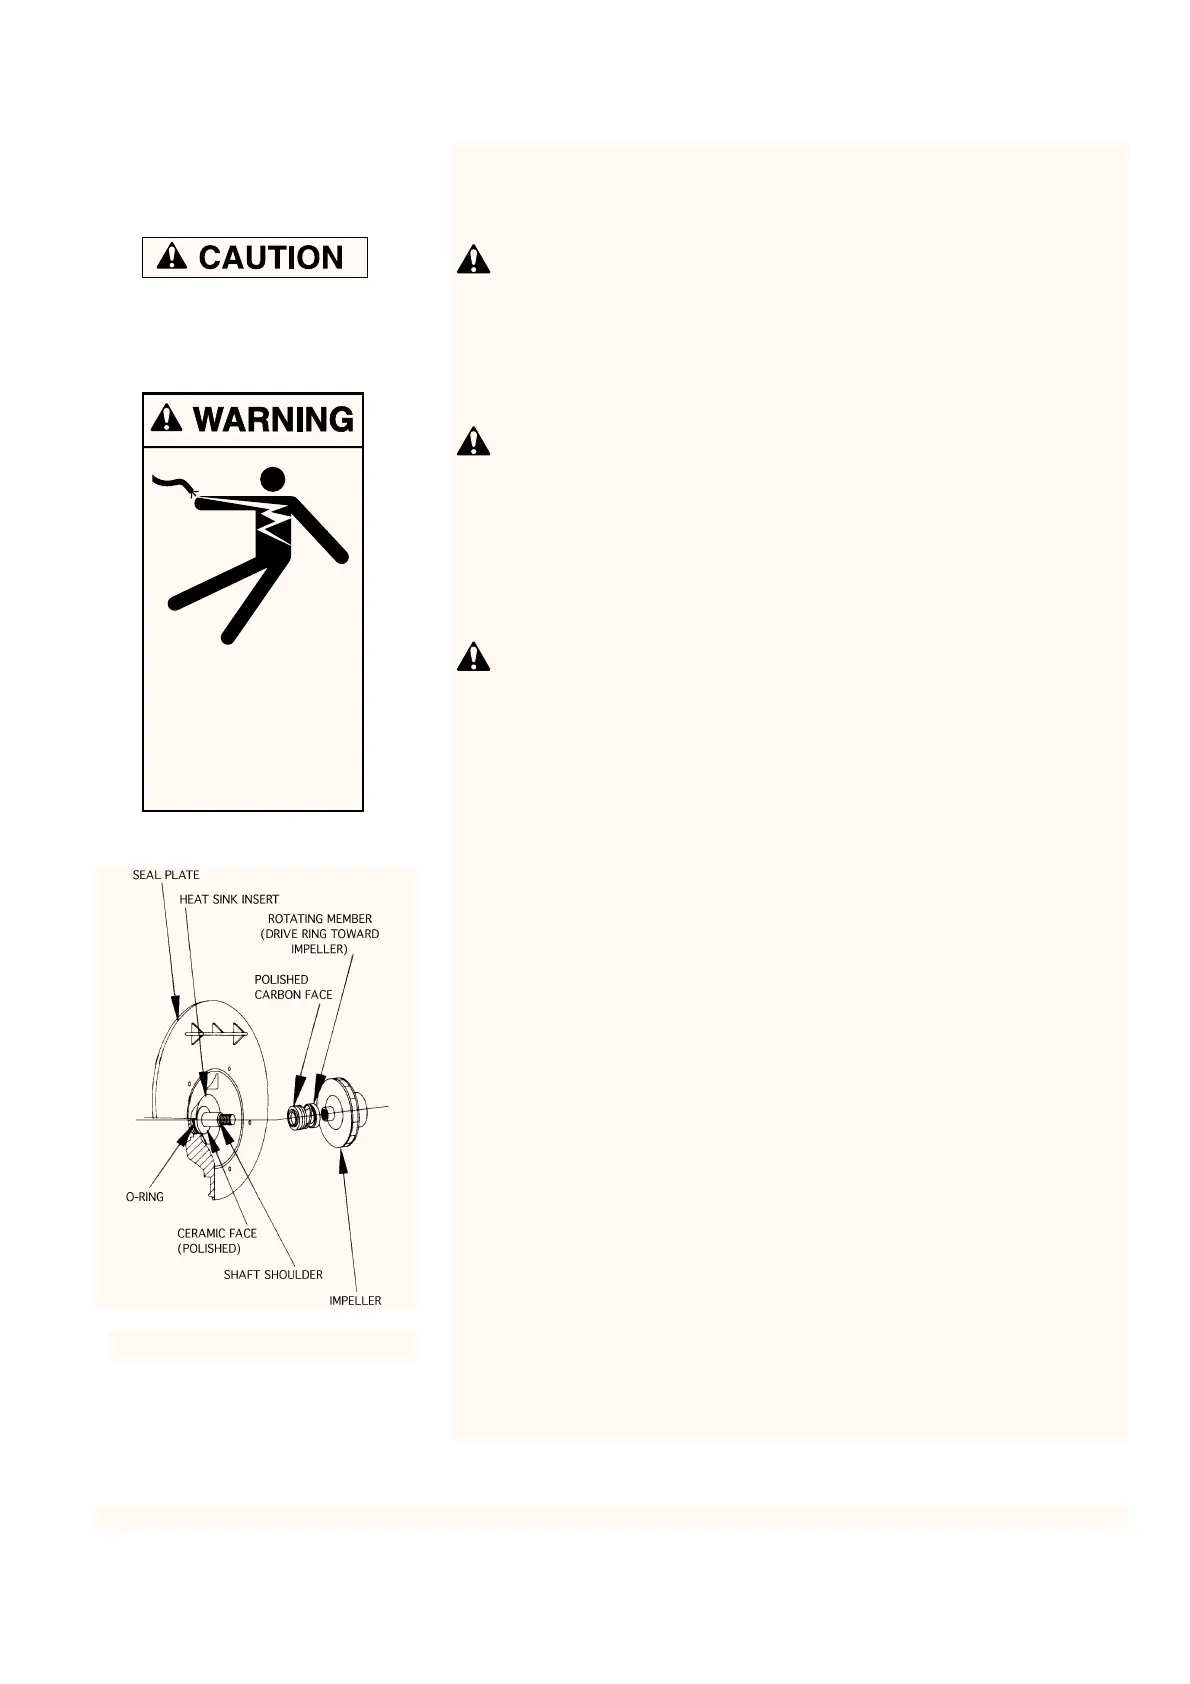
10. Place seal plate face down on flat surface and tap out ceramic seat.
NOTICE: Do not force out heat sink insert (Key No. 7, Page 13 through
15). If insert has moved, pump will leak; see “Installing Insert”, Page 11.
11. Clean seal cavity in seal plate and clean motor shaft.
Hazardous voltage.
Can shock, burn,
or cause death.
Disconnect power
before working
on pump or motor.
Figure 4