P a g e | 6P a g e | 6 DOC 001 REV A DOC 001 REV A P a g e | 7
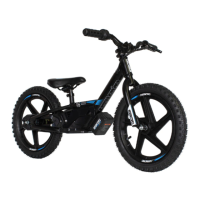
ACCEPTABLE RIDING PRACTICES AND CONDITIONS:
Always check and obey any local laws or regulaons, which may aect the loca-
ons where the stability cycle may be used. Keep safely away from cars and motor
vehicle trac at all mes, and only use where allowed and with cauon. Never
ride your STACYC Stability Cycle on public streets, roads, highways, at night or when
visibility is limited.
Do not acvate the speed control on the hand grip unless you are on the stability cy-
cle and in a safe, outdoor environment suitable for riding. The maximum speed of the
bike is limited by the selected power mode (See Throle Operaon secon below).
Avoid excessive speeds that can be associated with downhill rides. Maintain a grip on
the handlebars with both hands at all mes. Do not touch the brake or motor on your
stability cycle when in use or immediately aer riding, as these parts can become very
hot. Ride defensively. Watch out for potenal obstacles that could catch your wheel or
force you to swerve suddenly or lose control. Be careful to avoid pedestrians, skat-
ers, skateboards, scooters, bikes, children or animals who may enter your path, and
respect the rights and property of others. These stability cycles are intended for use
on at, dry surfaces, without loose debris, such as sand, leaves, rocks or gravel. Wet,
slick, bumpy, uneven or rough surfaces may impair tracon and contribute to possible
accidents. Do not ride your stability cycle through mud, over ice, through puddles, in
wet or icy weather and never immerse or wash the stability cycle with water, as the
electrical and drive components could be damaged by water or create other possi-
bly unsafe condions. Never use near steps or swimming pools. Avoid sharp bumps,
drainage grates, and sudden surface changes. Do not aempt or do stunts or tricks on
your stability cycle. These stability cycles are not made to withstand abuse from mis-
use, such as jumping, curb grinding or any other type of stunts. Racing, stunt riding, or
other maneuvers also enhance risk of loss of control, or may cause uncontrolled rider
acons or reacons. Never allow more than one person at a me to ride the stability
cycle. Do not ride at night or when visibility is limited. Never use headphones, a cell
phone or text when riding. Never risk damaging surfaces, such as carpet or ooring,
by use of a stability cycle indoors. Never tow anything or anyone with or allow your
STACYC Stability Cycle to be towed by any other person or vehicle, motorized or not.
POWERED & ROTATING PARTS WARNING:
Never operate the stability cycle without the side panels and chain guard properly
installed. Do not allow hands, feet, hair, body parts, clothing, or similar arcles to
come in contact with any rotang or moving parts, wheels, or drive train components
and chain while the motor is running or while the wheels and res are rotang.
PROPER RIDING ATTIRE:
Always wear proper protecve equipment, such as an approved and properly t-
ted safety helmet (with chin strap securely buckled), eye protecon, athlec shoes
(lace-up shoes with rubber soles) elbow pads and kneepads. Keep shoelaces ed and
out of the way of the wheels, motor and drive system. Never ride barefooted or in
sandals. Long-sleeved shirt, long pants, and gloves are recommended. Furthermore,
a helmet may be required by local law or regulaon in your area. Your child’s brain is
their most valuable asset, MAKE THEM WEAR AN APPROVED, PROPERLY FITTED AND
BUCKLED HELMET!
THE STARTING PROCESS: SIT, PUSH, COAST, BRAKE, PRACTICE
(Perform under adult supervision, wearing protecve equipment, in an open and
safe area)
Non-powered training: (Turn Power Switch to the “OFF” posion and remove baery)
1. Sit on bike with feet on ground. Familiarize rider with seat, foot plaorm,
brake(s), handlebars , throle and their funcon.
2. Push bike around with feet on ground learning balance and condence.
3. Coast and pracce controlled turning with feet on plaorm.
4. Brake to a safe stop using hand brake while maintaining control.
5. Pracce standing and stopping while maintaining control without falling.
Powered Mode Qualifying Checklist:
Can rider push and coast safely with feet on plaorm?
Can rider maintain control while on standing on plaorm?
Can rider control bike from start to stop?
Can rider use hand brake to stop on command?
Can rider coast and turn while navigang mild hills and obstacles?
Has rider demonstrated enough control to move to powered riding
without being a risk to themselves and others?
If so move to Powered Mode training!
Power Mode :
• Training Mode:
1. Turn Power Switch to the “OFF” posion.
2. Install Baery.
3. Turn Power Switch to the “ON” posion.
4. Ensure RED LED is lit, indicang “Training Mode” selected. If
not see Throle operaon and Changing Power Mode
secons in this manual.
5. Have child carefully push STACYC forward and pracce slightly
twisng throle learning to feel the STACYC beginning to
move forward under power.
6. With feet on ground have child progressively increase throle
use unl moving forward balancing on their own.
7. Have child pracce rolling throle on and o as well as safe
stops with hand brake.
8. As child gains balance and demonstrates throle and brake
skills, advance to riding with feet on the plaorm.
9. Coach child to maintain a safe distance from obstacles and
other riders.
 Loading...