16
• Turning Track On for the SRP64 allows Live™ to playback and control any device
connected to the physical MIDI ports.
• When used with Ableton® Live, the 8x8 grid of RGB LED Pads will give intuitive
visual feedback on your clips as you launch, stop, edit, and record them. Conversely,
you can see these Pads on your Live screen inside a colored 8x8 rectangular "ring".
The color of the "ring" changes depending on which Control Surface choice is
selected in Live.
• Pressing a Pad on the SRP64 triggers a clip (if one exists) in the corresponding slot in
Live. However, pressing an empty clip slot on an unarmed track will stop clip
playback on that track. If the track is armed, pressing a Pad begins recording into an
empty clip slot.
• When used with Ableton Live, the top 8 buttons default as Scene Launch buttons,
which can be assigned to other functions, as desired. When used as Scene Launch
buttons, pressing the Scene Launch buttons on the right side of the SRP64 will
trigger horizontal rows of clips, also known as "Scenes". The buttons allow you to
launch, stop, and/or record multiple clips with one button, making them ideal for
live performances. As with the 8x8 grid of Pads, the Scene Launch buttons match
the scene colors on your Live screen.
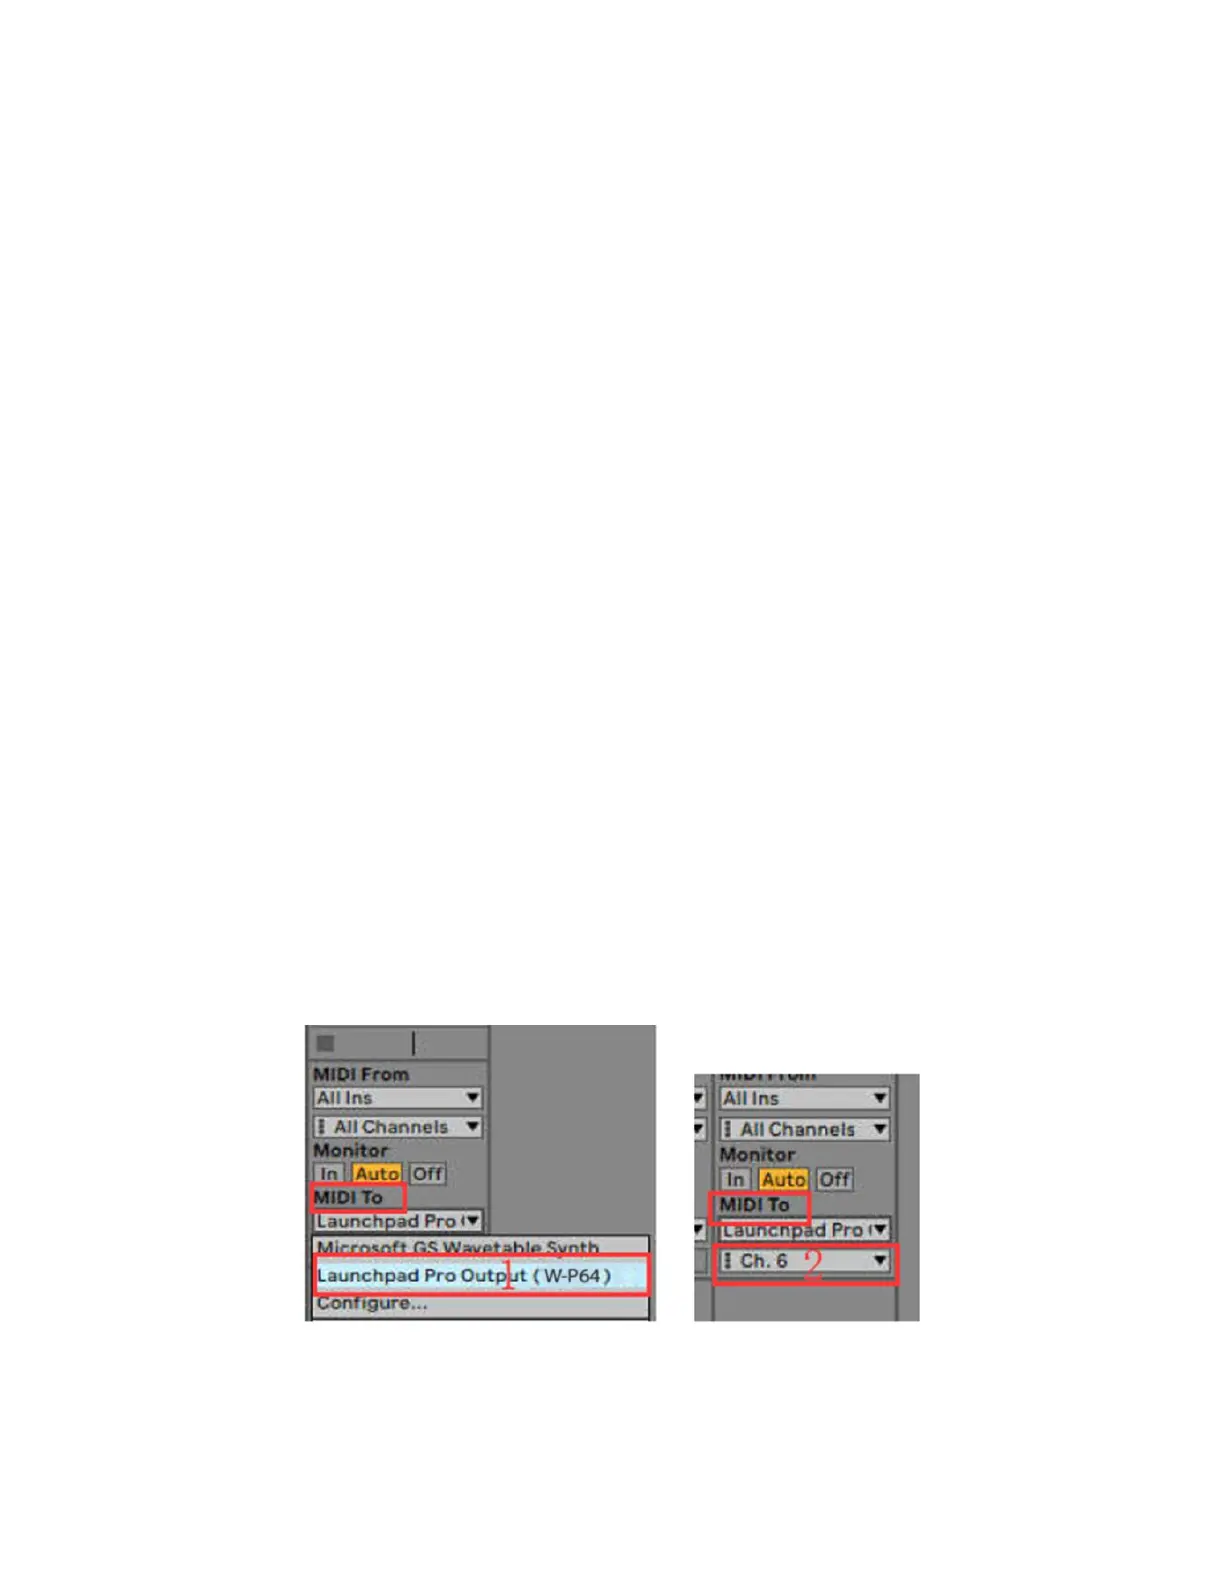
• To play the session in Ableton Live, you have to set the device and channel for Light
track by 1) selecting W-P64 for the MIDI TO value and 2) selecting CH.6 for Channels,
as shown below.
If you find that features described in this manual do not function as expected, recheck your
MIDI port settings.