EasyManua.ls Logo

StandDesk PRO - Assembly Step 8: Adjusting Crossbar; Prepare Crossbar Width; Assembly Step 9: Attaching Crossbar; Mount Crossbar to Legs

StandDesk PRO
20 pages
Print Icon
To Next Page IconTo Next Page
To Previous Page IconTo Previous Page
Loading...
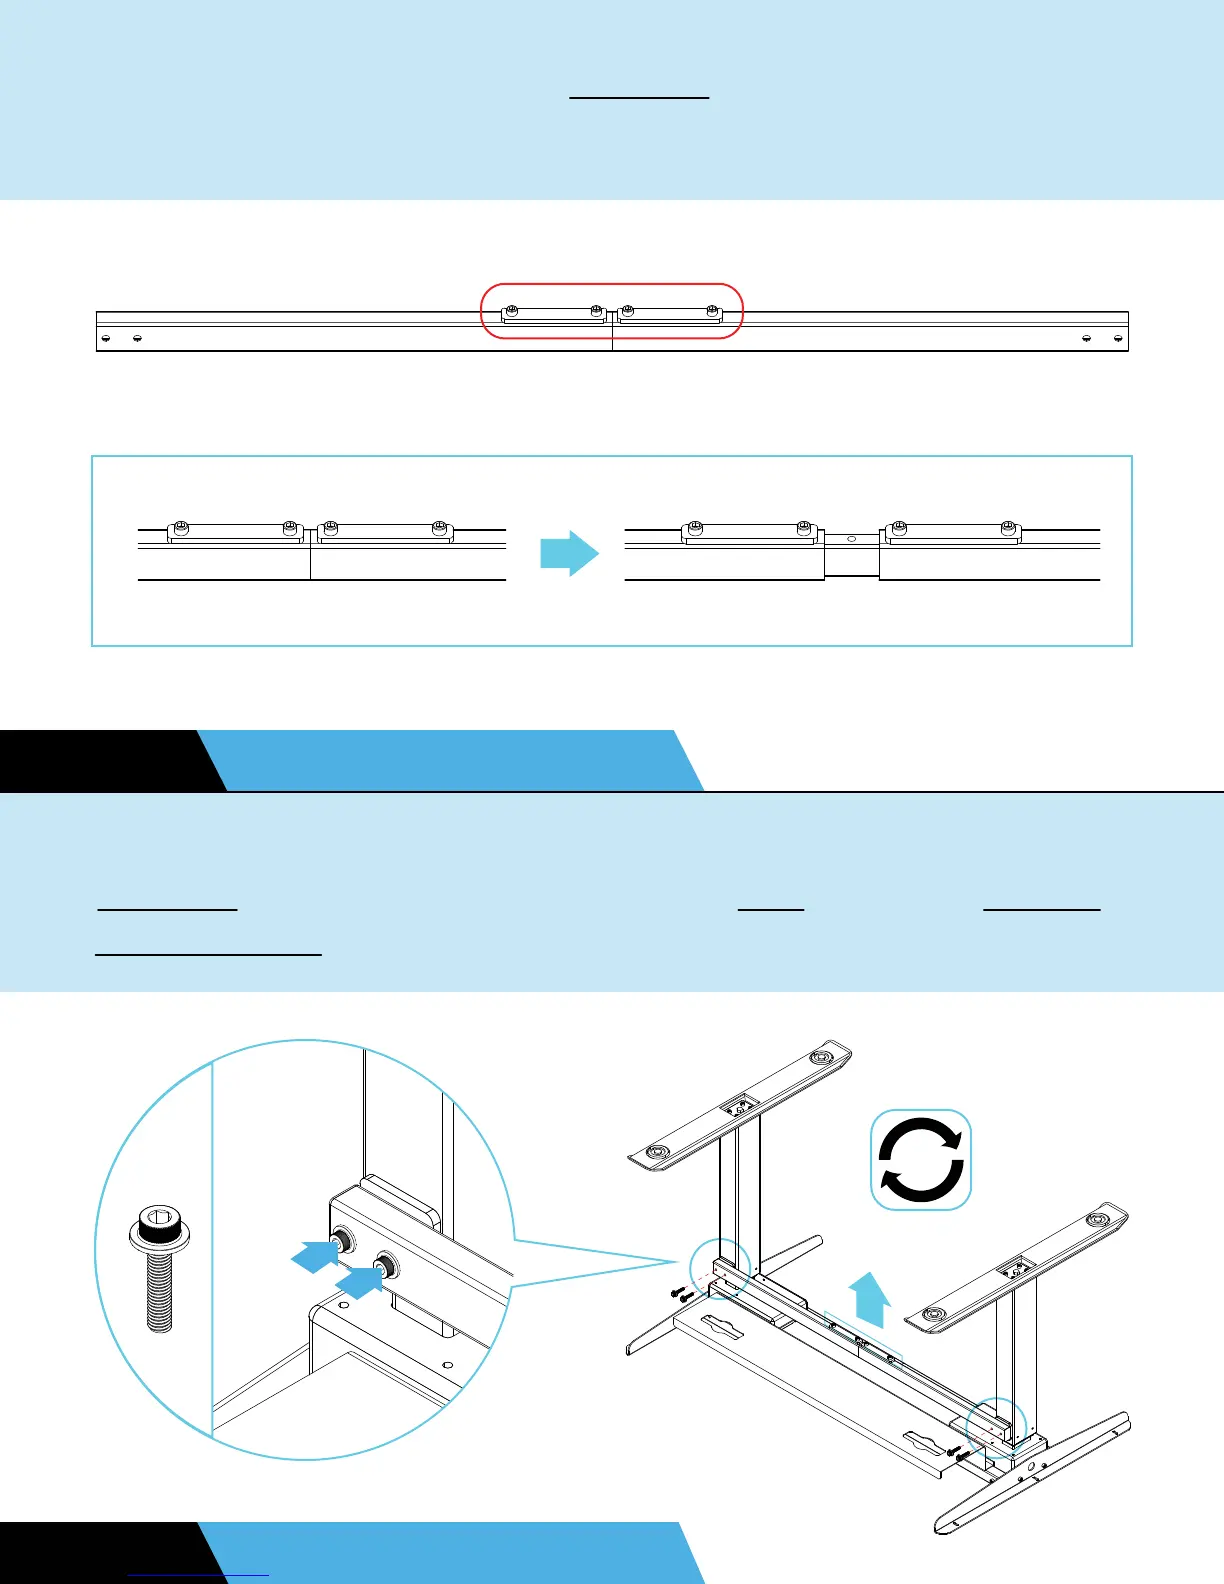
If you purchased the optional crossbar, loosen but don’t remove
the pre-installed bolts in the middle. Then, adjust the width.
STEP 8 OPTIONAL UPGRADE
Ensure that the raised bolt holes are facing out. Attach the
crossbar to the holes on the back of the legs using four M6x25
anti-slip bolts. Tighten the middle bolts once done.
STEP 9 OPTIONAL UPGRADE
H8

Related product manuals