G
B
17
Warning!
For your protection if this product is to be used outdoors it
shouldnotbeexposedtorainorusedindamplocations.Do
not place the product on damp surfaces, use a workbench
ifavailable.Foraddedprotectionuseasuitableresidual
currentdevice(R.C.D.)atthesocketoutlet.
Note: If the mains cable requires replacing it must be
replacedwithanidenticaloneandttedbyaqualied
person.
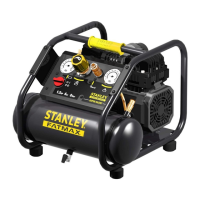
6.2 Start-up and use
● Check for correspondence between the compressor
platedatawiththeactualspecicationsoftheelectrical
system.Avariationof±10%withrespectoftherated
valueisallowed.
● Insert the plug of the power cable in a suitable socket
checking that the I/O switch located on the compressor
is in the OFF «O»position.
● Atthispoint,thecompressorisreadyforuse.
● Operating on the I/O switch, the compressor starts,
pumpingairintothereceiverthroughthedeliverypipe.
● When the upper calibration value (set by the manufacturer)
hasbeenreached,thecompressorstops.
When air is used, the compressor restarts automatically
when the lower calibration value is reached (2 bar between
upperandlower).
● Thecompressorcontinuestooperateaccordingtothis
automatic cycle until the I/Oswitchisturned.
● Always wait at least 10 seconds from when the compressor
hasbeenswitchedoffbeforerestartingthis.
● Thecompressoristted witha pressurereducer (ref.
7).Operatingontheknobwiththetapopen(turningitin
a clockwise direction to increase the pressure and in a
counterclockwise direction to reduce it), air pressure can
beregulatedsoastooptimizeuseofpneumatictools.
● Thevaluesetcanbecheckedonthegauge(ref.6).
● The set pressure can be taken from the quicklock
coupling(ref.5).
● Please check that the air consumption and the
maximum working pressure of the pneumatic tool
to be used are compatible with the pressure set on
the pressure regulator and with the amount of air
supplied by the compressor.
● Always pull out the plug and drain the receiver once you
havecompletedyourwork.
7. CLEANING AND MAINTENANCE
Warning!
Pull the power plug before doing any cleaning and
maintenance work on the appliance.
Warning!
Wait until the compressor has completely cooled
down. Risk of burns!
Warning!
Always depressurize the tank before carrying out any
cleaning and maintenance work.
7.1 Cleaning
● Keep the safety devices free of dirt and dust as far as
possible.Wipetheequipmentwithacleanclothorblow
itwithcompressedairatlowpressure.
● We recommend that you clean the appliance immediately
afteryouuseit.
● Do not use cleaning agents or solvents; these may be
aggressivetotheplasticpartsintheappliance.Ensure
thatnowatercangetintotheinterioroftheappliance.
● You must disconnect the hose and any pneumatic tools
fromthecompressorbeforecleaning.Donotcleanthe
compressorwithwater,solventsorthelike.
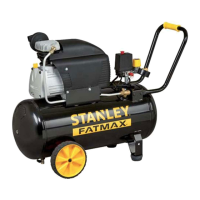
7.2 Condensation water (Fig. 2)
The condensation water must be drained off each day
byopeningthedrainvalve(ref.3)(onthebottomofthe
pressurevessel).
Warning!
Dispose of the condensation water in an
environmentally compatible manner at the appropriate
collection point.
7.3 Safety valve (ref. 10)
Thesafetyvalvehasbeenset for the highest permitted
pressureofthepressurevessel.
It is prohibited to adjust the safety valve. Actuate the
safety valve from time to time to ensure that it works when
required. Turn the nut until it is completely loose. Then
pull the nut with sufcient force until you can hear the
compressedairbeingreleased(Fig.3).Thenreleasethe
nut,andscrewitbackon.
Always keep the safety valve and the surrounding area
cleanandfreeofobstructions.
MAINTENANCE RESUMPTIVE TABLE
FUNCTION
AFTER THE FIRST
100 HOURS
EVERY 100 HOURS
Cleaning of intake lter and/or
substitution of ltering element
● ●
Draining tank condensate Daily and at the end of work
 Loading...