8
ENGLISH
(Original instructions)
u Use this setting for the remaining screws.
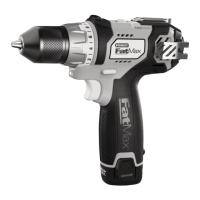
Dual range switch (Fig J)
The dual range feature of your drill allows you to shift gears
for greater versatility.
u To select low speed, high torque setting (position1),
turn tool off and permit to stop. Slide gear shifter button (4)
away from the chuck.
u To select the high speed, low torque setting (position
2), turn tool off and permit to stop. Slide gear shifter
button back toward the chuck.
Note: Do not change gears when tool is running. If you are
having trouble changing gears, make sure that the dual range
gear button is either completely pushed forward or completely
pushed back.
Screw driving
u For driving fasteners, the forward/reverse button should
be pushed to the left.
u Use reverse (button pushed to the right) for removing
fasteners.
Note: When moving from forward to reverse, or vice versa,
always release the trigger switch rst.
Drilling
u Use sharp drill bits only.
u Support and secure work properly, as instructed in the
Safety Instructions.
u Use appropriate and required safety equipment, as
instructed in the Safety Instructions.
u Secure and maintain work area, as instructed in the
Safety Instructions.
u Run the drill very slowly, using light pressure, until the
hole is started enough to keep the drill bit from slipping out
of it.
u Apply pressure in a straight line with the bit. Use enough
pressure to keep the bit biting but not so much as to stall
the motor or deect the bit.
u Hold the drill rmly with two hands, one hand on the
handle, and the other gripping the bottom around the
battery area or the auxiliary handle if provided.
u DO NOT CLICK THE TRIGGER OF A STALLED DRILL
OFF AND ON IN AN ATTEMPT TO START IT. DAMAGE
TO THE DRILL CAN RESULT.
u Minimize stalling on breakthrough by reducing pressure
and slowly drilling through the last part of the hole.
u Keep the motor running while pulling the bit out of a drilled
hole. This will help reduce jamming.
u Make sure switch turns drill on and off.
Drilling in wood
Holes in wood can be made with the same twist drill bits used
for metal or with spade bits. These bits should be sharp and
should be pulled out frequently when drilling to clear chips
from the utes.
Drilling in metal
Use a cutting lubricant when drilling metals. The exceptions
are cast iron and brass which should be drilled dry. The cutting
lubricants that work best are sulphurized cutting oil.
Drilling in masonry
For drilling in masonry, set the collar (3) to the hammer
drilling position by aligning the symbol with the marking. Use
carbide tipped masonry bits. . Keep even force on the drill. A
smooth, even ow of dust indicates the proper drilling rate.
LED work light (Fig H)
When drill is activated by pulling the trigger switch (1), the
integrated LED work light (8)will automatically illuminate the
work area.
Note: The work light is for lighting the immediate work surface
and is not intended to be used as a ashlight.
Troubleshooting
Problem Possible cause Possible solution
Unit will not start. Battery pack not
installed properly.
Battery pack not
charged.
Check battery pack
installation.
Check battery pack charg-
ing requirements
Unit starts immedi-
ately upon inserting
battery
The switch has
been left in the “on”
position.
The switch must be
moved to “off” to prevent
the tool from immediately
starting when battery is
inserted.
Battery pack will not
charge.
Battery pack not
inserted into charger.
Charger not plugged
in.
Surrounding air
temperature too hot or
too cold.
Insert battery pack into
charger until LED lights.
Plug charger into a work-
ing outlet.
Move charger and battery
pack to a surrounding air
temperature of above 40
degrees F (45ºC) or below
105 degrees F (+40.5ºC)
Unit shuts off
abruptly.
Battery pack has
reached its maximum
thermal limit.
Out of charge. (To
maximize the life of
the battery pack it is
designed to shutoff
abruptly when the
charge is depleted
Allow battery pack to cool
down.
Place on charger
and allow to charge.
 Loading...