6
ENGLISH (Original instructions)
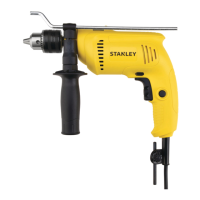
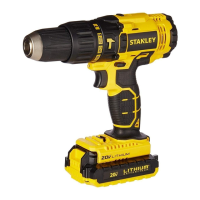
Setting the drilling depth (fig.B)
• Slacken the side handle (7) by turning the grip counter
clockwise.
• Set the depth stop(6) to the desired position. The
maximum drilling depth is equal to the distance between
the tip of the drill bit and the front end of the depth stop.
• Tighten the side handle by turning the grip clockwise.
Switching on and off
• To switch the tool on, press the variable speed switch(1).
The tool speed depends on how far you press the
switch. As a general rule, use low speeds for large
diameter drill bits and high speeds for smaller diameter
drill bits.
• For continuous operation, press the lock-on button (2)
and release the variable speed switch. This option is
available only at full speed in both forward and reverse
modes.
• To switch the tllo off, release the variable speed switch.
To switch the tool off when in continuous operation,
press the variable speed switch again and release it.
• Based on the different applications, turn around the
speed dial(11) to control the maximum speed.
Drilling in metal
Start drilling with slow speed and increase to full power while
applying firm pressure on the tool. A smooth even flow of
metal chips indicates the proper drilling rate. Use a cutting
lubricant when drilling metals. The exceptions are cast iron
and brass which should be drilled dry.
NOTE: Large [5/16” (8 mm) to 1/2” (13 mm)] holes in steel
can be made easier if a pilot hole [5/32” (4 mm) to 3/16” (5
mm)] is drilled first.
Drilling in wood
Start drilling with slow speed and increase to full power while
applying firm pressure on the tool. Holes in wood can be
made with the same twist drills used for metal. These bits
may overheat unless pulled out frequently to clear chips
from the flutes. Work that is apt to splinter should be backed
up with a block of wood.
Drilling in masonry
When drilling in masonry, use carbide-tipped bits rated for
Impact drilling and be certain that the bits are sharp. Use a
constant and firm force on the tool to drill most effectively. A
smooth, even flow of dust indicates the proper drilling rate.
Screwdriving
Select forward or reverse rotation.
Accessories
The performance of your tool depends on the accessory
used. STANLEY accessories are engineered to high quality
standards and designed to enhance the performance of your
tool. By using these accessories you will get the very best
from your tool.
Maintenance
Your tool has been designed to operate over a long period of
time with a minimum of maintenance. Continuous
satisfactory operation depends upon proper tool care and
regular cleaning.
Warning! Before performing any maintenance, switch off
and unplug the tool.
• Regularly clean the ventilation slots in your tool using a
soft brush or dry cloth.
• Regularly clean the motor housing using a damp cloth.
Do not use any abrasive or solvent-based cleaner.
Notes
• STANLEY’s policy is one of continuous improvement to
our products and as such, we reserve the right to change
product specifications without prior notice.
• Standard equipment and accessories may vary by
country.
• Product specifications may differ by country.
• Complete product range may not be available in all
countries. Contact your local STANLEY dealers for range
availability.
Service Information
STANLEY offers a full network of company-owned and/ or
authorized service agents throughout your country. All
STANLEY Service Centers are staffed with trained personnel
to provide customers with efficient and reliable power tool
service. Whether you need technical advice, repair, or
genuine factory replacement parts, contact the STANLEY
location nearest to you.