© 2018, Obelis S.A Registered Address: Bd. Général Wahis, 53
1030 Brussels, Belgium
NEVER LEAVE HEATER UNATTENDED WHILE CONNECTED TO A POWER SOURCE
Operation
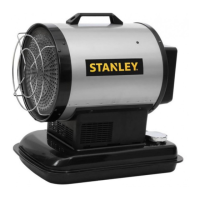
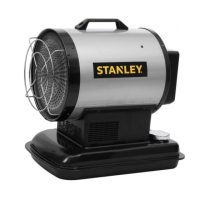
This heater is factory-tested for use with 1-K kerosene/paraffin,
no. 1 & no. 2 diesel, JP8/Jet A Fuel, and no. 1 & no. 2 fuel oil.
TO START THE HEATER:
1. Fill the tank with paraffin until fuel gauge points to “F”.
2. Be sure fuel cap is secure.
3. Plug power cord into electrical outlet.
4. Turn thermostat control knob to desired temperature setting
(70/125/175/215 only). The setting range is from 5
°
C to 45
°
C. Push the Power switch to the “ON” position. The power
indicator lamp and room temperature display (125/175/215
only) will light and the heater will start.
Optimum pressure occurs when the nose cone is cherry red
and there are no extending flames from the heater.
NOTE: The room temperature display (125/175/215 only) will
indicate the following:
- When temperature is less than -17
°
C, display says “LO”.
- When temperature is above 37
°
C, display says “HI”.
- Between -17
°
and 37
°
C display shows actual temperature.
TO STOP THE HEATER: Turn the Temp. Setting Knob to left,
turn the Power Switch to “OFF” position, and unplug the Power
Cord.
TO RESTART THE HEATER
1. Wait ten seconds after shutting off heater.
2. Turn the Power Switch to “ON” position.
3. Be sure to follow all starting procedure precautions.
LONG TERM STORAGE
Drain Fuel Tank
1. For models ST-45/70T-KFA-E, drain fuel through the
fuel cap opening using an approved siphon. For models
ST-125/175/215-KFA-E, drain fuel through the Drain Plug at
the bottom of the Fuel Tank.
2. To remove the Drain Plug (125/175/215), pull the Plug Grip
downward and remove seal head from drain hole in tank.
3. Rinse and completely empty the tank.
4. To replace, push the drain head fully into the drain hole and
secure by pushing the seal cap fully into the head hole.
IMPORTANT: Never store leftover fuel over the summer.
Using old fuel can damage your heater.
Store heater in a dry, well-ventilated area! If your heater
cannot be stored indoors, a tarp or weatherproof cover must be
used to protect the heater.
Be sure that the storage area is free of dust and corrosive
vapors. Repack the heater in the original shipping material. Keep
the Users Manual in an easily accessible place.
Maintenance
Always service heater in a clean, flat, dry area. Never service
heater while it is plugged in or while hot!
Never service heater in wet conditions. In an emergency, be
sure heater has completely cooled before servicing using a
tarp or weatherproof cover, to ensure heater or electronics
inside heater are not exposed to wet conditions. Do not
service heater while plugged in under any circumstance.
FUEL/FUEL TANK: Flush every 200 hours of operation or as
needed with paraffin.
AIR FILTERS: Open heater lid to access filters. Filters should
be replaced every 500 hours of operation, or less, depending on
conditions. See figure 7.1 on page 7 for detailed view.
FAN BLADES: Open heater lid to access fan blades. Blades
should be cleaned at least once per heating season. See figure
6.1 on page 7 for detailed view.
NOZZLES: Open heater lid and remove burner head to access
nozzle. Nozzles should be cleaned or replaced at least once per
heating season. See figure 3.1 on page 7 for detailed view.
SPARK PLUG: Open heater lid to access spark plug. Clean and
re-gap every 600 hours of operation, or replace as needed.
Re-gap the terminals to 3.5mm. See figure 3.1 on page 7 for
detailed view.
PHOTOCELL: Open heater lid to access photocell. The Photocell
should be cleaned at least once per heating season or more
depending on conditions. See figures 4.1 and 5.1 on page 7 for
detailed view.
After servicing your heater you should perform the following
function check before commissioning this heater:
- check the air and fuel lines for leaks using a 50/50 soap
solution
- check extension cord for wear, cracks or cuts
- check to see igniter lines are connected securely to spark plug
Improper maintenance can lead to poor combustion and
soot production. Never alter or modify the heater. Use
only genuine parts from the manufacturer or sales agent
for repair and maintenance on your heater, and contact the
manufacturer or sales agent before replacing parts other
than those specified or recommended.
PUMP PRESSURE ADJUSTMENT:
While heater is operating, turn relief valve clockwise to increase,
counterclockwise to decrease. Use flat blade screwdriver to turn
valve. Correct pump pressure is on page 2.
This appliance is not intended for use by persons
(including children) with reduced physical, sensory or
mental capabilities, or lack of experience and
knowledge, unless they have been given supervision
or instruction concerning use of the appliance by a
person responsible for their safety. Children should
be supervised to ensure that they do not play with the
appliance.
If the power cord is damaged, it must be replaced by
the manufacturer, its service agent or similarly
qualified persons in order to avoid a hazard.
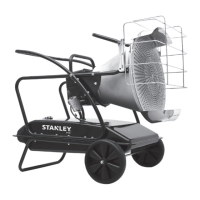
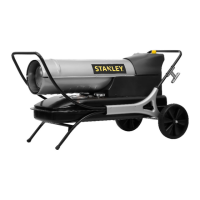
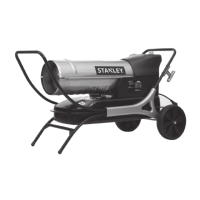
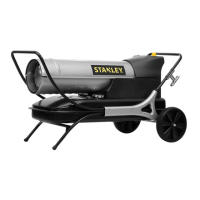
Figure 2. Start The Heater
On / Off Switch
LED Operating
Time/ Temp
Temp Setting Knob
LED - Fuel Gauge
 Loading...