INTRODUCTION
This device is a generator inverter current (DC) suitable to
the MMA welding. Thanks to the inverter technology which
allows achieving high performances while keeping small
size and weight, the welder is portable and easy to
handle. The device is suitable for welding with coated
electrodes rutile and can be connected to power
generators with power equal to or higher than that
reported in Table 2. It is equipped with "HOT START",
"ARC FORCE" and "ANTI STICK” functions (for more
details please refer to the GENERAL PART manual
included in the package).
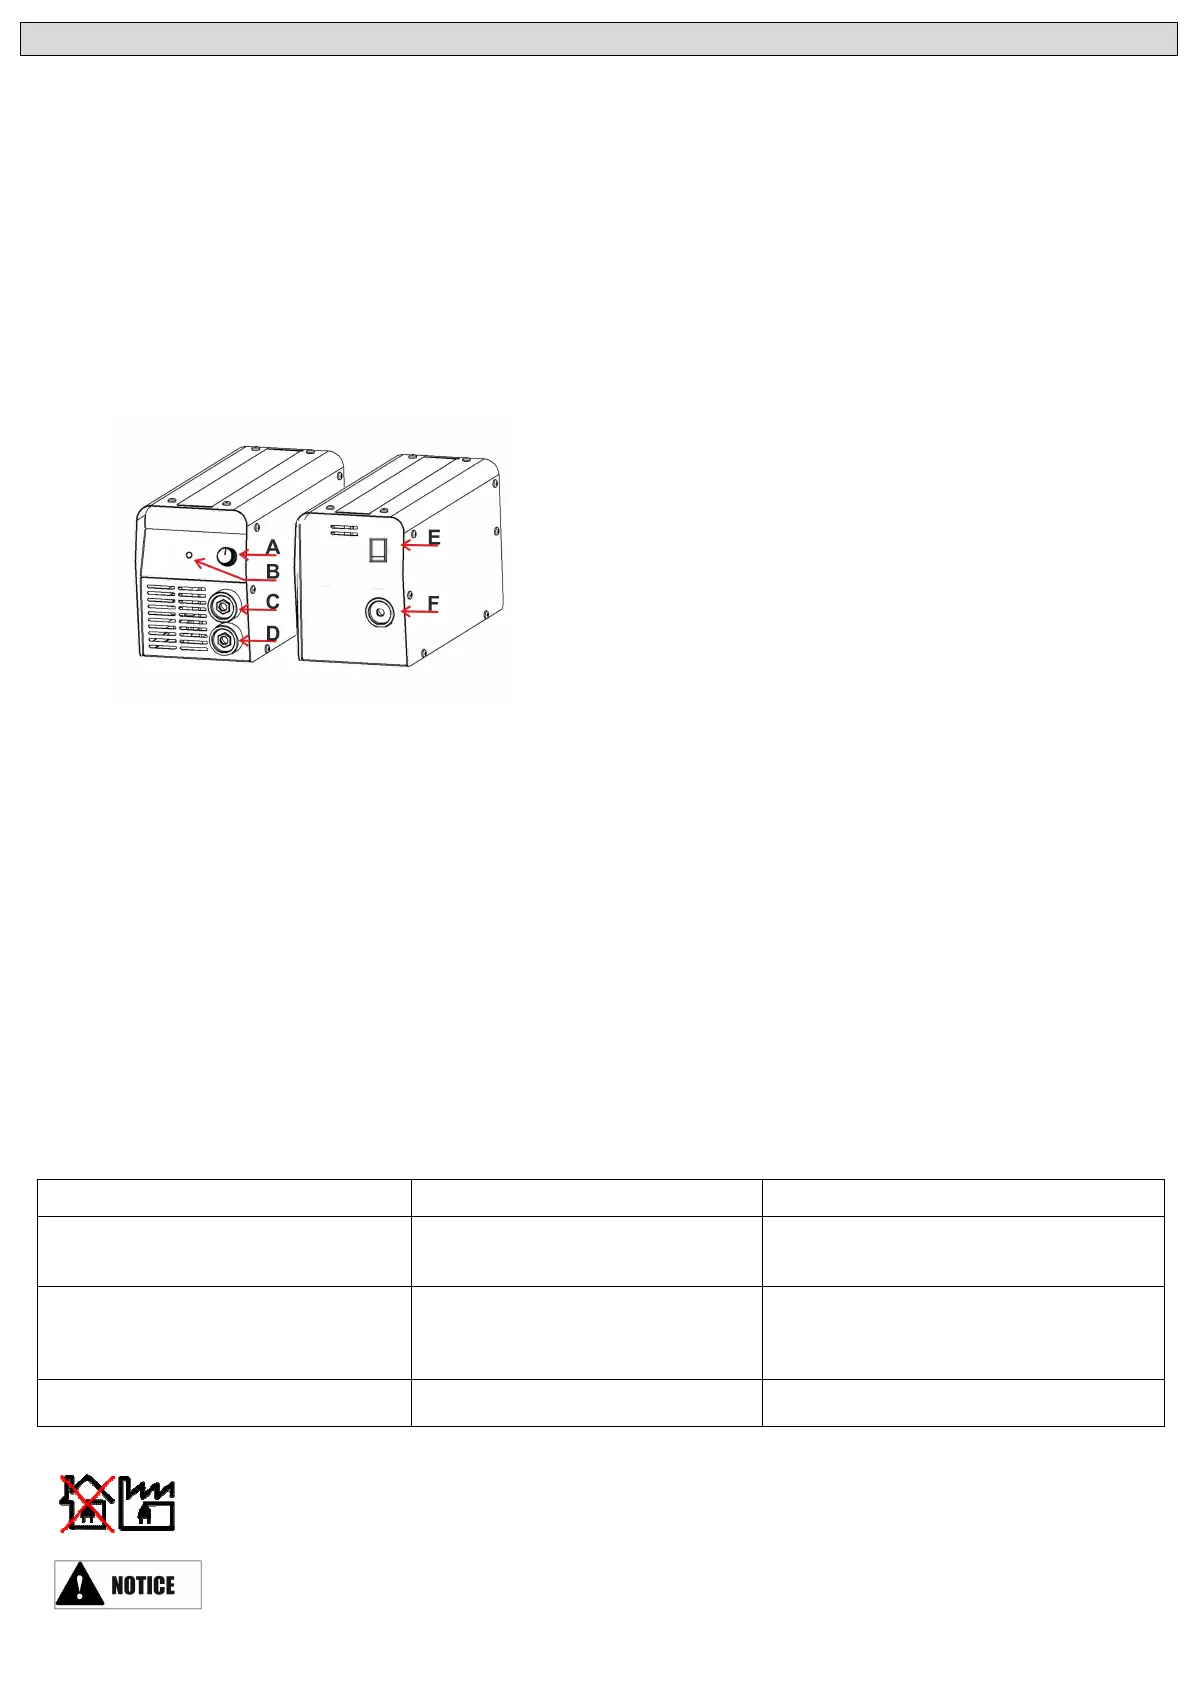
DESCRIPTION OF THE MACHINE
Fig 1
A Welding current Knob.
B Ther
mal protection LED indicator.
C Negative pole (-).
D Positive pole (+).
E ON-OFF switch.
F Power Cord.
INSTALLATION
The installation must be made by trained personnel in
compliance to the standard IEC 60974-9 and the current
and local legislation. To lift the machine it must be used
the handle positioned on top of the product with the
machine in OFF position. The input voltage must match
the voltage indicated on the technical plate located on the
product.
Use the machine on electric system having supply
features and power protection (fuse and / or differential
switch) that are compatible with the current required for its
use. For more details see the information on the plate
placed on the machine.
HOW USE IT
Warning: Use all precautions required in the safety
general manual before operating the welder, reading
carefully the risks linked to the welding process.
• Connect the plugs of the earth clamp and the
electrode holder to the connectors of the machine (Fig 1,
C and D) rotating the attack in order to ensure a good grip.
Choose the polarity Fig.2 (1. forward or 2. reverse)
depending on the coating of the electrodes (for more
information see the information on the electrodes
packaging).
• Connect the earth clamp to the work piece to be
welded trying to establish a good point of contact between
the metal and the clamp, as close as possible to the area
to be welded, insert the electrode into the electrode
holder.
• Insert the plug into the power outlet and turn on the
welding machine by pressing the switch (Fig 1, E) to the
ON position.
• Select the welding current (FIG 1, A) as a function
of the type of electrode selected (Tab. 1).
• Start the welding operation using all the necessary
protections for the security.
• When welding is completed, turn off the machine
and release the electrode from the electrode holder
THERMAL PROTECTION
If the machine is used for hard work cycle, the thermal
protection device will protect the machine from over
heating. The yellow LED ON indicates that the thermal
protection is on. It is possible to start welding again once
the LED is off.
MAINTENANCE
The all maintenance services must be done from qualified
personnel in compliance to the norm (IEC 60974-4).
ANOMALIES CAUSES REMEDIES
The device is not delivering current
and the yellow indicator LED of
thermal protection lights up.
The welder thermal
protection has turned on.
Wait for the end of the cooling
time, around 2 minutes. The
indicator led turns off.
The device is on but it is not
delivering current.
The cable of the earth
clamp or electrode holder
is not connected to the
welder.
Turn off the machine and check the
connections.
Your unit does not weld correctly. Polarity error
. Check the polarity advised on the
electrodes packaging.
The symbol indicates that the machine is not equipped with PFC device.
Agree with the operator and in accordance with the standard IEC 60974-9 that the welding machine
can be connected to the public low voltage.
This welding machine is for professional use only and is reserved for the industry.
ENGLISH
TROUBLESHOOTING
4
 Loading...