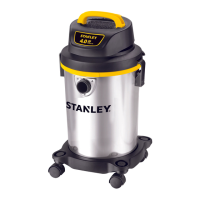
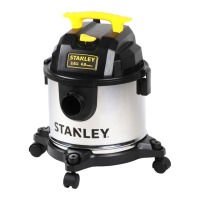
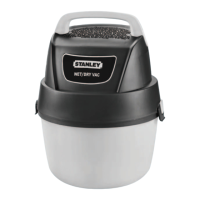
7 INFORMATION ON USE OF THE APPLIANCE (PAGE 6)
7.1 Controls
- Starter device (A1).
See fig. 8.
Set the starter device switch on (ON/I).
If there is a pilot light on the starter device, it should light up.
Set the starter device switch on (OFF/0) to stop the appliance.
If there is a pilot light on the starter device, it should go out.
Warning - danger!
During operation the appliance must be positioned as shown on a
firm, stable surface. See fig. 8.
7.2 Start-up
7.2.1 Dry suction.
See fig. 9.
Only work with the lters (B2 - B11) dry! Before using them,
check the lters for damage and replace them if necessary.
To suck up dry dirt, adjust the oor brush as appropriate and
t the corresponding accessories (use brush B13).
When sucking up dry dirt, if necessary an additional
lter bag, which may be in paper (B11) or in fabric (B10)
(optional), may be used.
Filter bag guidelines:
- The level to which the lter bag is lled depends on the
type of dirt being collected.
- For ne dust, sand, etc., replace the lter bag often.
- A worn lter bag may burst, so it should be replaced in
good time!
Warning - danger!
Only suck in cold ash.
7.2.2 Sucking in liquids
See fig.10.
Warning - danger!
If foam forms or liquid overows, switch the appliance off at
once or disconnect the mains plug! Do not use a lter bag
(either paper or fabric)!
Warning
When the tank is full, a oat switch shuts off the suction inlet
and the motor starts to race. Switch the appliance off at once
and empty the tank.
To suck up damp or dry dirt, adjust the oor brush as appropriate
and t the corresponding accessories (use brush B6).
7.2.3 Working with power tools.
See fig 11.
The assembly sequence is illustrated in fig.11.
Switch on the appliance (automatic vacuuming switch turned
left to
or 2 button switch on II) and start working.
Warning: As soon as the power tool switches on, the suction
fan starts up after a 0.5 second delay.
When the power tool is switched off, the suction fan keeps
running for about a further 6 seconds to suck up the dirt left
in the suction hose.
7.2.4 Blower function.
See fig 12.
For cleaning inaccessible points or where suction is not
possible, such as removing leaves from gravel.
Fit the suction hose to the connection provided. The blower
function is now active.
For more effective blowing, use of the crevice nozzle B8 is
recommended.
7.3 Stopping operation (Pauses)
Switch off the appliance. See fig. 8.
Connect the oor brush in the stowed position.
7.4 Finishing work
Switch off the appliance. See fig. 8.
Disconnect the plug.
7.5 Empty the tank
For dry dirt and dust: remove the nozzle from the appliance and empty
the tank. See fig 13.
For liquids: use the drain screw if featured (see fig. 14), or proceed
as above.
8 MAINTENANCE (PAGE 135)
Warning - danger!
All installation and assembly operations must be performed with the appliance
disconnected from the mains power supply.
The assembly sequence is illustrated on page 135.
Always switch the appliance off and disconnect the plug before any servicing
or maintenance work. Repairs and work on electrical systems may only be
carried out by the authorised service centre.
Warning - danger!
Never use abrasive detergents, glass detergents or universal detergents!
Never immerse the cover
with motor (A10)
in water. Clean the appliance
and plastic accessories with a standard synthetic material detergent. Rinse
the tank and accessories with water if necessary and dry them before reuse.
8.1 Cleaning the cartridge filter (B2). See fig 15.
Open the vacuum-cleaner by releasing the catches (A6).
Turn the cover with motor (A10) upside down and remove the
cartridge lter (B2).
Rinse carefully under running water and leave to dry. Do not
reassemble until dry.
8.2 Replacing the paper filter bag (B11). See fig 17.
Open the vacuum-cleaner by releasing the catches (A6).
Remove the full lter bag (B11), throw it away and t a new one.
8.3 Cleaning the fabric filter bag (B10) (Optional). See fig 16.
Open the vacuum-cleaner by releasing the catches (A6).
Remove the lter bag (B10). Empty the lter bag, rinse carefully
under running water and leave to dry. Do not reassemble until
dry.
9 END-OF-SEASON STORAGE (PAGE 135)
Warning - danger!
All installation and assembly operations must be performed with the appliance
disconnected from the mains power supply.
After finishing work, clean the appliance and then put it and the accessories
away as shown in
fig.18.
Store the appliance in a dry place.