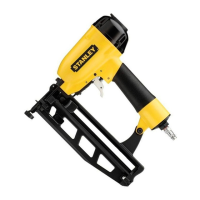
TT46 User Manual ◄ 13
To check or charge the accumulator, the following
equipment is required:
• Accumulator tester (Part Number 02835).
• Charging assembly (Part Number 15304) (includes a
gauge w/snub valve, hose and tting).
• Nitrogen bottle with a 800 psi/56 bar minimum charge.
1. On charge valves containing 5/8 inch hex locking
nuts, rst loosen the locking nut 1-1/2 turns.
2. Holding the chuck end of the Stanley tester
(Part Number 02835), turn the gauge fully
counterclockwise to ensure the stem inside the
chuck is completely retracted.
3. Thread the tester onto the charging valve of the
tool accumulator (do not advance the gauge end
into the chuck end. Turn as a unit). Seat the chuck
on the accumulator charging valve and hand
tighten only.
4. Advance the valve stem by turning the gauge- end
clockwise.
5. Connect the charge tting on the hose to the
charge valve on the 02835 Tester.
6. With the gauge and snub valve attached to the
nitrogen bottle, and with the snub valve closed,
open the nitrogen bottle valve.
NOTE: It may be necessary to adjust the charge
at 650-700 psi/45-48 bar to overcome any
pressure drop through the charging system.
7. While watching the pressure gage, open the snub
valve allowing the gauge to read 600 to 700 psi/42
to 48 bar. Close the snub valve on the charging
assembly and also on the nitrogen bottle. Remove
the charging assembly from the accumulator tester.
8. Turn the gauge end of the tester fully
counterclockwise to retract the plunger in the
chuck. Then remove the tester from the charge
valve.
9. On charge valves containing 5/8 inch hex locking
nuts, tighten the locking nut.
TESTING THE ACCUMULATOR
PRESSURE
1. Follow instructions 1 through 4 under “CHARGING
THE ACCUMULATOR” on page 14.
2. Read the pressure on the gauge (pressure should be
between 500 & 600 psi/35 & 42 bar).
3. If the pressure is low, recharge the tool.
CHARGING THE ACCUMULATOR