EasyManua.ls Logo

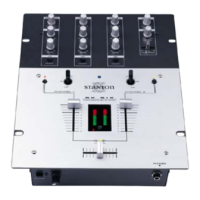
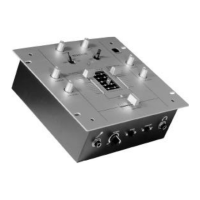
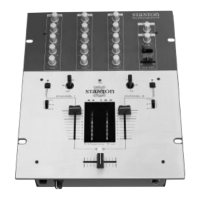
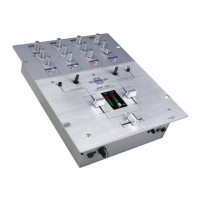
Stanton Professional Performance Mixer SK ONE User Manual

Stanton Professional Performance Mixer SK ONE
4 pages
To Next Page IconTo Next Page
Page #1 background imageLoading...
Page #1 background image
SK ONE
Professional performance mixer
STANTON MAGNETICS, LLC
2821 Evans St. Hollywood, FL 33020
(954) 929-8999 - Fax: (954) 929-0333
info@stantonmagnetics.com
OWNER’S M A N U A L
FA DER CLEA N I N G
The SK ONE faders may need lubrication from time to time. This will extend the
fader life and eliminate any potential damage due to extended heavy usage.
R E P LAC E M E N T PA RTS
To replace the cross or channel faders, follow steps 1 and 2 of the cleaning
instructions. The following replacement parts are available from Stanton or your
local Stanton dealer.
ROTATING AND REPLACING THE INPUT TOGGLE SWITCHES
Cleaning Instructions
1. Remove the 3 fader knobs and 4 screws
located in the corners of the PROTEKT™
(see “ ” inside) panel
and take the panel off the mixer.
2 . Remove the fader to be cleaned by
unscrewing the 2 outer screws (removing
the 2 inner screws will detach the fader
from the fader plate) and disconnect the
cable coming from the mixer.
3. Spray a small amount of cleaner or
lubricant into both ends of the fader and
slide the fader back and forth a few times
to spread the fluid evenly throughout the
fader.
4. Shake and wipe off excess fluid before
re-assembling the fader.
PL-SK1 Two way input toggle switch
3PL-SK1 Three way input toggle
switch with FLASH™
LF-SK1 Channel input fader
CF-SK1 Crossfader
PP-SK1 PROTEKT™ panel
PS-13US US Power Supply (110v)
PS-13EU European Power Supply (220v)
PS-13UK UK only Power Supply (240v)
ROTATING I NST RU C TI O N S
1 . Remove the PROTEKT™ panel
2. Remove the 2 outer screws from the tog-
gle switch plate (removing the 2 inner
screws will detach the switch from the
plate)
3. Rotate the plate to the desired position
and tighten the screws back in the top and
bottom holes
R E PLAC I N G I N ST RU C TI O NS
1. Remove the PROTEKT™ panel
2. Remove the 2 outer screws from the tog-
gle switch plate (removing the 2 inner
screws will detach the switch from the
plate)
3. Remove the switch assembly and dis-
connect the cable coming from the mixer.
4. Set the replacement switch assembly in
the desired position and place the screws
back in the top and bottom holes.
© 1999, Stanton Magnetics, LLC
Question and Answer IconNeed help?

Do you have a question about the Stanton Professional Performance Mixer SK ONE and is the answer not in the manual?

Stanton Professional Performance Mixer SK ONE Specifications

Outputs and Inputs IconOutputs and Inputs
headphone output1/4 inch, 32 - 200 ohms recommended
line inputs2 (RCA), 150 mV / 27K ohm
phono inputs2 (RCA), 3 mV / 47K ohm
master output1 (1/4” TRS Balanced/RCA unbalanced), 775 mV / 1K ohm
record output1 (RCA), 245 mV / 10K ohm
Audio Performance IconAudio Performance
frequency response20 Hz - 20 kHz, +/- 2 dB
tone control+ 9/-26 dB (Hi, Low)
gain control0-20dB
signal to noise ratioLess than 70dB
total harmonic distortionless than 0.2%
Weight and Dimensions IconWeight and Dimensions
dimension13 [6/8]” x 7 [2/8]” x 4” (350 x 184 x 102 mm)
weight7 lbs (3.2 Kg)

Summary

Fader Cleaning and Maintenance

Fader Cleaning Instructions

Step-by-step guide for cleaning the faders to extend their life and eliminate damage.

Replacement Parts

Input Toggle Switches Operation

Rotating Input Toggle Switches

Instructions on how to rotate the input toggle switch plate to a desired position.

Replacing Input Toggle Switches

Instructions for removing and installing a new input toggle switch assembly.

Product Usage Precautions

Troubleshooting Common Issues

Description of Mixer Functions

Mixer Functions and Specifications

Technical Specifications

Detailed technical specifications including inputs, outputs, frequency response, and dimensions.

Warranty Information

Details on the product warranty, coverage, and registration requirements.

Special Protekt Protection Panel

Description of the PROTEKT™ panel designed for easy field replacement of parts.

Related product manuals