Copyright © 2016 Sharp Media Group LLC
***NOTE do not update the router to the most recent firmware, it changes the password and
makes you manually connect via ethernet to change settings
3. 1. Open web browser and type in IP of the TP Link router (192.168.0.254)
4. Login to the router using:
a. Login as: admin
b. Password is: admin
5. 2. Select ”Quick Setup” from the menu on the left side of your screen. Click “Next”.
6. 3. Select “Client Mode”. Click “Next”.
7. 4. Once the survey window opens up (see below), Identify your WiFi network and click
“Connect”.
8. 5. Enter your network name / SSID, Select your security option and enter your password, Click
on “Survey” (see below image).
9. Complete the step mentioned below. Once completed, Select your security options, Enter
password, then Click “Next”.
10. 6. Reboot router to save changes
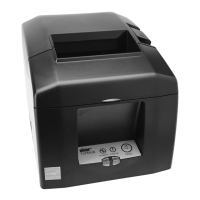
LINKS: http://www.starmicronics.com/wifipowerpack/
Windows Setup
1. Download TSP FuturePrint Software from Star Micronics website
2. Install FuturePrint Software
3. Once installed go to programs and open Ethernet Setup Tool under Star Micronics Folder
4. Allow the program to view both public and private networds (if it ask)
5. Press Scan for Devices
6. Under “Devices and Printers” make the Star Micronics Printer the default printer.
7. Select the Star Micronics Printer and near the top of the window select “Print server properties”
8. Scroll down through the paper sizes and select 72mm x 200mm
9. Click “Create a new form”
a. Enter Form a form name that you will recognize, in this case I use 72mm x 50mm
b. Change the paper size Height to 3.5in
c. Press OK
10. Enter Google Chrome
11. Press Control & p or select print to bring up the print dialog box
12. Change the destination to the Star Micronics Printer
13. Click “+ More settings” and change the Paper size to 72mm x 50mm (or whatever your paper
name is)
14. Uncheck “Headers and footers”
15. Press Cancel, the settings are now saved in Chrome
LINKS: http://www.starmicronics.com/printer/thermal_printers/tsp100