Do you have a question about the Star Micronics TSP143LAN and is the answer not in the manual?
Prepare the thermal printer, adjust dip-switch, and connect all cables loosely for easier access.
Mount the TP Link Micro-Router and Wi-Fi adapter to the printer using double-faced tape.
Connect loose cables to the Micro-router and mount the printer to the wall with the bracket.
Locate the router light and connect a device to the micro-router's SSID and password.
Log in to the router, select Client Mode, identify your Wi-Fi network, and enter credentials.
Download and install FuturePrint Software, then scan for devices and set the printer as default.
Create a new custom paper form with specified dimensions (e.g., 72mm x 50mm).
Adjust Chrome's print settings for paper size and disable headers/footers.
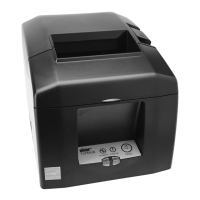
This document outlines the setup and configuration process for a Take-A-Number Printer system, primarily featuring a Star Micronics TSP143LAN Thermal Printer, a TP-Link N300 Micro-Router, and optionally, a Star Micronics Wi-Fi Power Pack for older printer versions. The system is designed to provide a reliable and efficient solution for printing queue numbers or similar small-format tickets in various service environments.
The core function of this system is to enable wireless printing of small-format tickets, such as take-a-number tickets, using a thermal printer. The Star Micronics TSP143LAN Thermal Printer is a direct thermal printer, meaning it uses heat to produce an image on thermal paper, eliminating the need for ink or toner cartridges. This contributes to lower running costs and simpler maintenance. The TP-Link N300 Micro-Router acts as a crucial bridge, allowing the thermal printer to connect to a Wi-Fi network and receive print commands wirelessly from a computer, phone, or tablet. For older versions of the TSP143LAN printer that lack integrated Wi-Fi or a USB port for Wi-Fi adapters, the Star Micronics Wi-Fi Power Pack serves as an external Wi-Fi adapter, enabling wireless connectivity. The entire setup is designed to be compact and easily mountable, making it suitable for environments with limited space.
The system's workflow involves a client device (computer, phone, or tablet) connecting to the micro-router's Wi-Fi network. Once connected, print commands are sent to the thermal printer via the micro-router. The printer then rapidly produces the desired ticket. The software component, specifically the Star Micronics FuturePrint Software and the Ethernet Setup Tool, facilitates the initial discovery and configuration of the printer on a Windows operating system. This software allows users to set up network parameters, define custom paper sizes, and ensure the printer is recognized and ready for use. The ability to define custom paper sizes is particularly useful for tailoring the output to specific ticket formats, ensuring that only the necessary information is printed without wasting paper.
The system offers several usage features designed for ease of deployment and operation. The physical setup is straightforward, involving minimal tools (a Phillips screwdriver) for initial preparation. The instruction to connect all cables loosely at first, then secure them, is a practical tip that simplifies the process, especially when dealing with multiple connections in a confined space. The use of 3M Double Faced Tape for mounting the micro-router and optional Wi-Fi adapter ensures a secure and integrated setup, keeping the components together and reducing clutter. The supplied bracket for wall mounting the thermal printer further enhances its versatility, allowing it to be placed in an optimal location for user access and visibility.
The micro-router's pre-configured SSID and password, noted on its back, simplify the initial wireless connection process. Users can quickly connect their devices to the router's Wi-Fi network without complex configuration steps. The router's "Client Mode" functionality is key, allowing it to connect to an existing Wi-Fi network, thereby integrating the printer into the broader network infrastructure. This means that once configured, the printer can be accessed by any device on the main Wi-Fi network, not just devices directly connected to the micro-router's own network. This flexibility is crucial for larger establishments where multiple devices might need to send print jobs to the same printer.
The Windows setup process is guided by the Star Micronics FuturePrint Software, which automates much of the printer discovery and configuration. The "Scan for Devices" feature simplifies the identification of the thermal printer on the network. The ability to define custom paper forms, such as "72mm x 50mm," directly within the printer's properties allows for precise control over the printed output. This is particularly important for applications like queue numbering, where tickets often have specific dimensions to fit dispensers or for ease of handling. The instruction to uncheck "Headers and footers" in Google Chrome ensures that only the intended content is printed, preventing unnecessary information from appearing on the small tickets and saving paper. The system's design prioritizes a seamless user experience from physical installation to software configuration and daily operation.
Maintenance for this system is designed to be minimal, primarily due to the nature of thermal printing and the robust components used. The Star Micronics TSP143LAN Thermal Printer, being a direct thermal printer, does not require ink or toner cartridges, which significantly reduces ongoing maintenance tasks. The only consumable is thermal paper, which is easy to load and replace. The instruction to open the printer and turn Dip-switch 3 OFF during initial setup is a one-time configuration that ensures optimal performance and compatibility. Once set, this switch typically does not require further adjustment.
The TP-Link N300 Micro-Router is a low-maintenance device. Its primary requirement is a stable power supply and occasional reboots to resolve minor network issues, as indicated by the instruction to "Reboot router to save changes." The document explicitly advises against updating the router to the most recent firmware, as this can complicate password management and require manual Ethernet connections for configuration. This advice is a crucial maintenance tip, as it prevents users from inadvertently introducing issues that would require more complex troubleshooting. By keeping the firmware as recommended, the router's stable operation is maintained.
The software components, including the Star Micronics FuturePrint Software and the Ethernet Setup Tool, are generally stable once configured. Regular software updates are typically not required for the printer's basic functionality, although checking the manufacturer's website for critical updates or drivers might be prudent in the long term. The system's reliance on standard network protocols (Ethernet, Wi-Fi) means that troubleshooting network connectivity issues can often be done using standard IT practices. The compact and integrated design, with components securely mounted, also contributes to reduced physical wear and tear, as cables are less likely to be dislodged or damaged. Overall, the system is built for reliable, long-term operation with minimal intervention, making it an ideal solution for environments where consistent performance is critical.
| Print Technology | Direct Thermal |
|---|---|
| Interface | LAN |
| Print Speed | 200 mm/sec |
| Resolution | 203 dpi |
| Weight | 1.5 kg |
| Power Supply | AC 100-240V, 50/60Hz |
| Auto Cutter | Yes |
| Printer Type | Thermal Printer |
| Paper Width | 80 mm |