Do you have a question about the Star Micronics TSP654II and is the answer not in the manual?
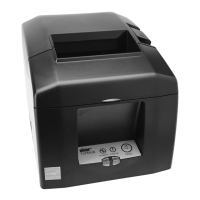
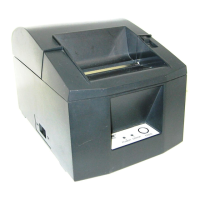
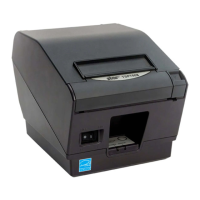
Identify key parts of the printer: cover, power switch, cover open lever, and control panel.
Use the cover open lever and pull back to unlatch and open the printer cover.
Load a new paper roll with correct orientation and pull a flap out.
Securely close the printer cover by pushing on both sides.
Ensure Bluetooth is enabled in iPad's settings.
Turn on printer, press and hold PAIR button for 5 seconds until LED flashes green.
Select 'Star Micronics' from iPad's Bluetooth Devices list to pair.
Enable receipt printing in the UberEATS dashboard settings.
Tap the print icon for an individual order within the UberEATS dashboard.
This document outlines the setup, paper loading, Bluetooth pairing, and order printing procedures for the Star Micronics Printer, designed for use with the Uber Eats platform.
The Star Micronics Printer is a thermal receipt printer primarily used for printing Uber Eats orders. It connects wirelessly to an iPad via Bluetooth, allowing for seamless order processing and receipt generation. The printer is equipped with a control panel that features indicator lamps for printer status and a button for operational control.
Setting Up the Printer: To begin using the printer, ensure it is placed on a stable surface. The printer has a power switch located on the side, which is used to turn the device on and off. The printer cover, which needs to be opened to replace paper, should not be opened while the printer is actively printing to avoid damage or interruptions.
Loading Paper: The printer utilizes thermal paper that is 3 ½ inches in width. It is recommended to use a longer roll of paper to minimize the frequency of paper changes.
Pairing the Printer via Bluetooth: The printer connects to an iPad using Bluetooth technology.
Printing Orders: The Star Micronics Printer is integrated with the Uber Eats dashboard for printing orders.
Paper Replacement: Regularly check the paper roll level to ensure continuous operation. When the paper roll is low, follow the paper loading instructions to replace it with a new roll. Using a longer roll can reduce the frequency of this maintenance task.
Printer Cover: The printer cover is designed for easy access to the paper compartment. Always ensure the cover is properly latched after loading paper to prevent dust ingress and ensure proper printing. Avoid opening the cover while the printer is actively printing to prevent paper jams or damage to the printing mechanism.
Power Management: The power switch allows for easy control over the printer's power state. Turn off the printer when not in use for extended periods to conserve energy and prolong the device's lifespan.
Bluetooth Connection: Periodically verify the Bluetooth connection between the printer and the iPad. If printing issues arise, re-checking the Bluetooth settings on both devices and re-pairing if necessary can resolve connectivity problems. The flashing green LED on the printer indicates its pairing status, which is a useful diagnostic feature.
Control Panel Indicators: The control panel features lamps that indicate the printer's status. Familiarize yourself with these indicators to quickly diagnose any operational issues, such as low paper or error states. The button on the control panel can be used for various printer operations, as indicated by the status lamps.
| Print Method | Direct Thermal |
|---|---|
| Print Resolution | 203 dpi |
| Interface | USB, Serial, Ethernet |
| Auto Cutter | Yes |
| Print Speed | 300 mm/sec |
| Paper Width | 80 mm |
| Power Supply | AC 100-240V |
| Power Consumption | 60 W |