8 9
PUMP TO PRESSURE TANK CONNECTION (DISCHARGE PIPE)
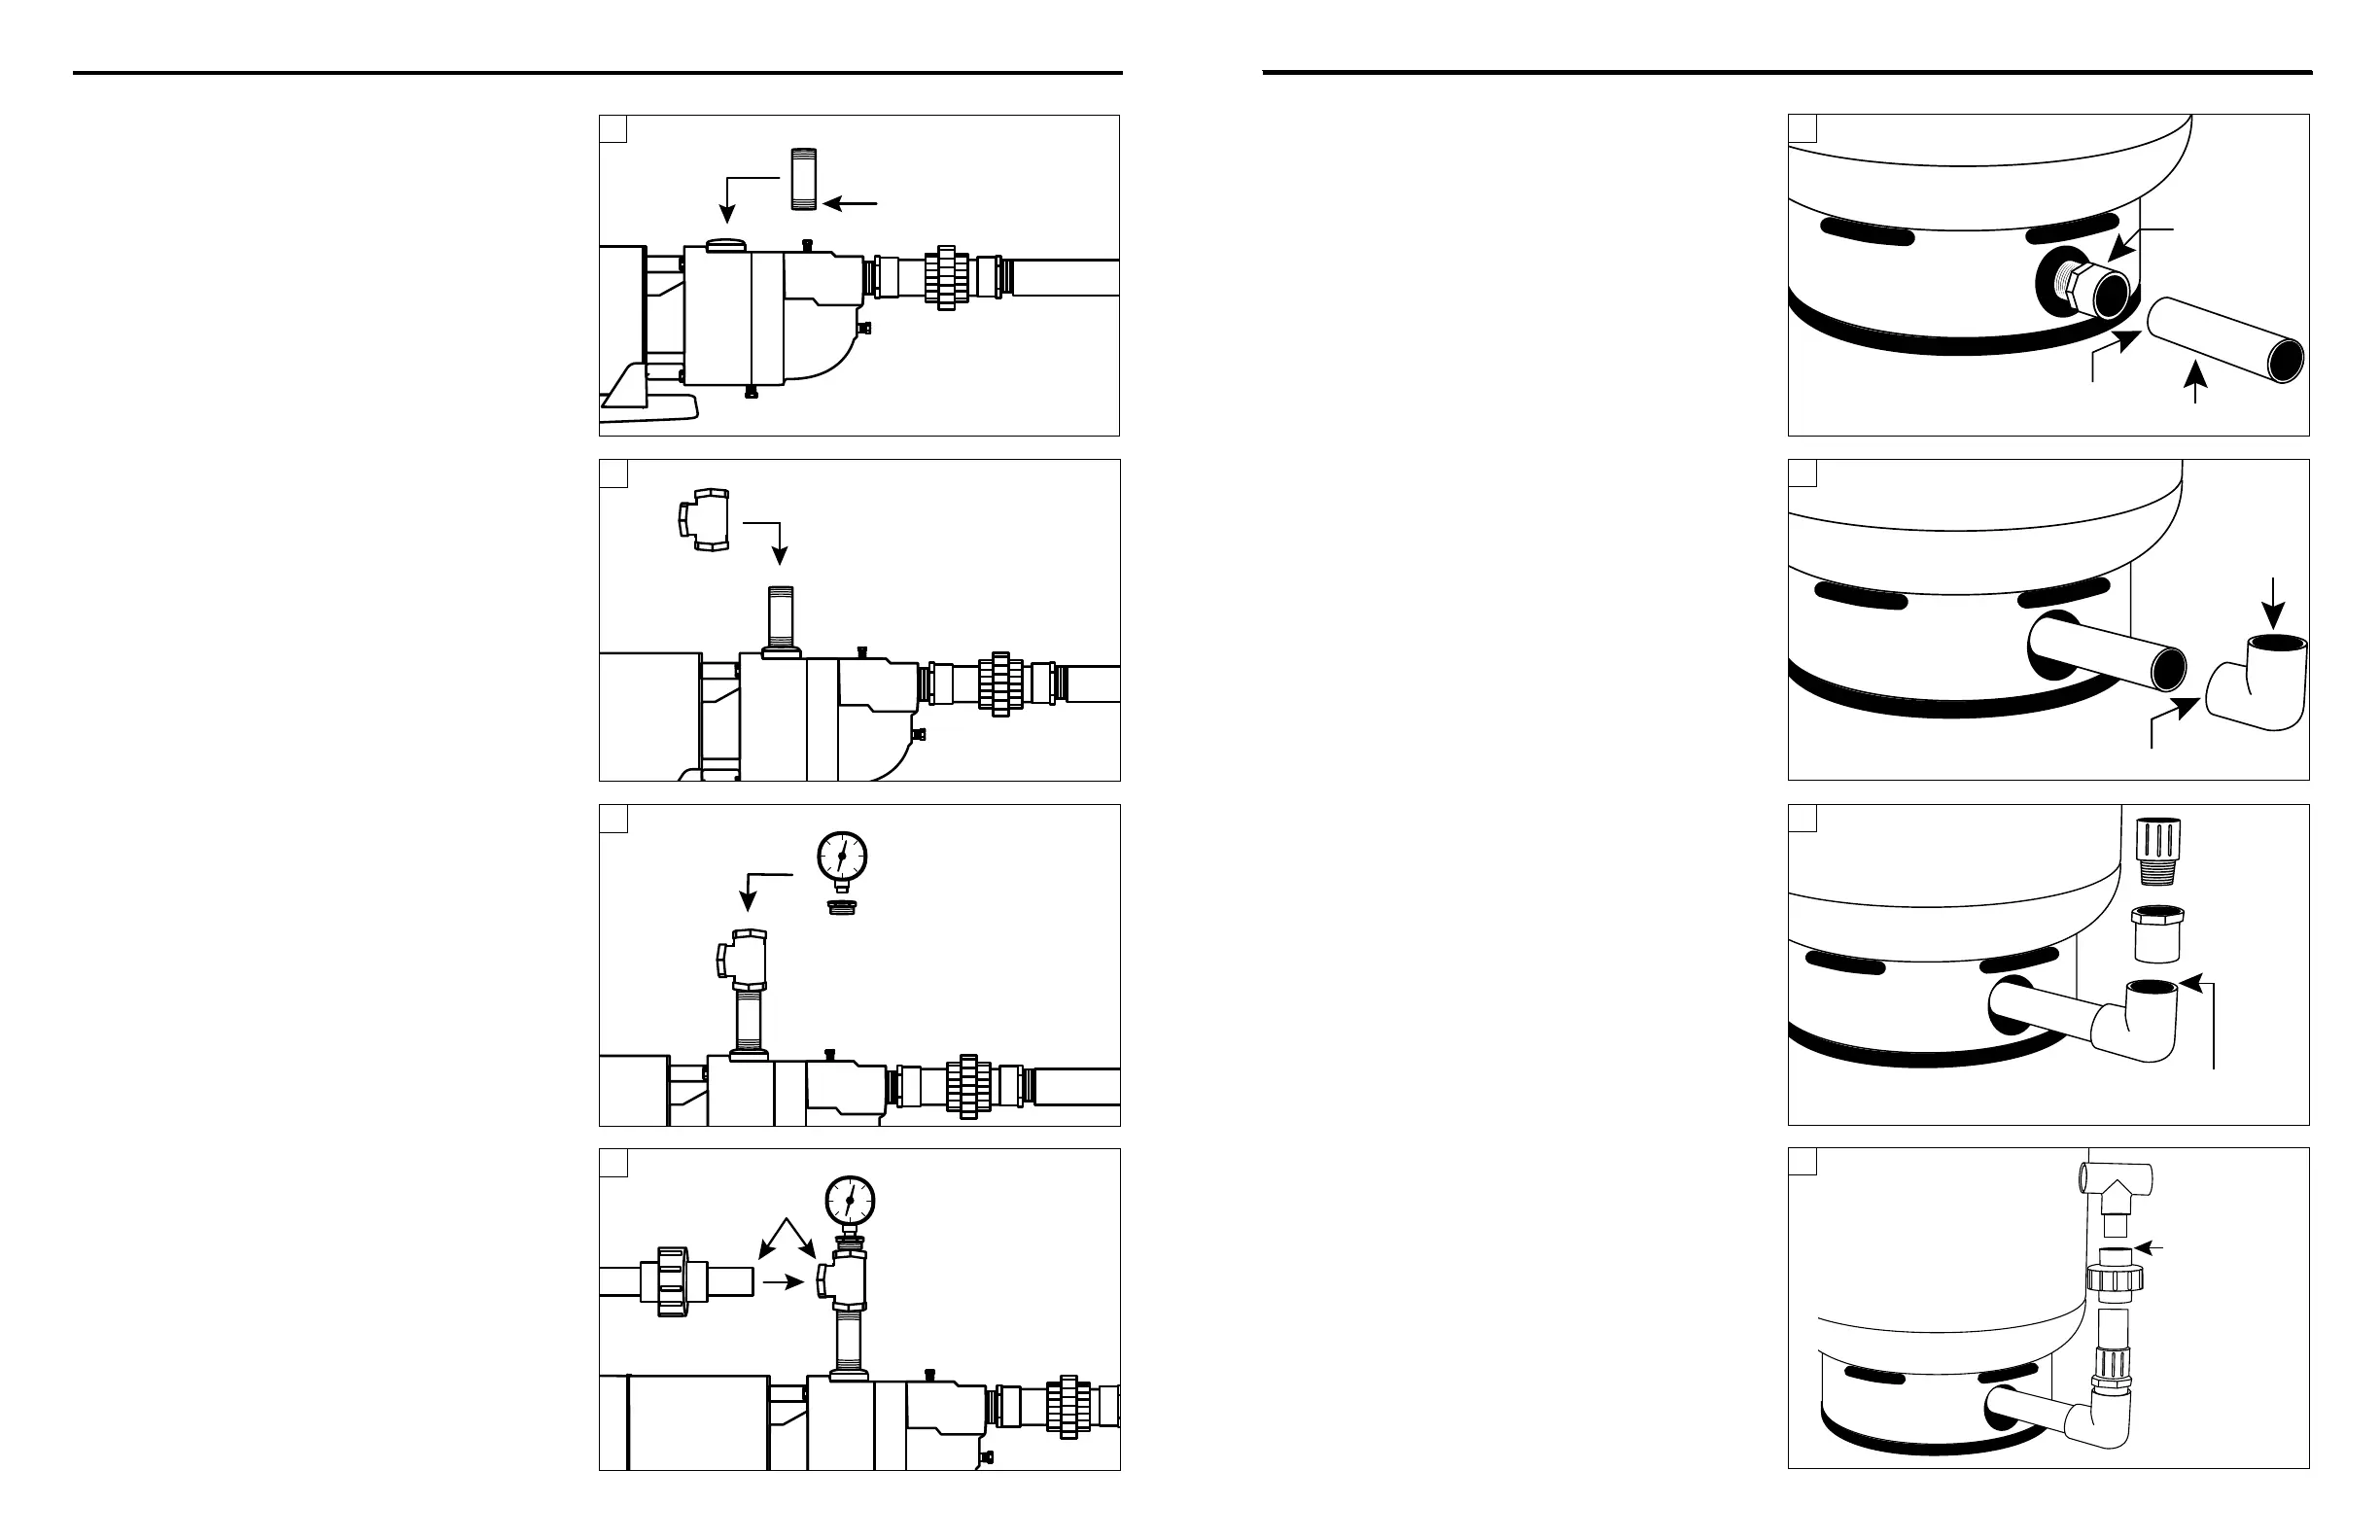
1. Begin the connection to the pressure tank.
Using a 3/4 in. x 3 in. galvanized nipple,
wrap the threads 5 times with pipe tape or
apply pipe paste (pipe dope) and install in
top of pump. (Fig. 1)
NOTE: 1 and 1-1/2 HP models will require 1 in.
discharge ttings in place of 3/4 in. discharge
ttings throughout these steps.
IL1361
Tape
1
2
3
4. Continue with ttings and pipe to the
pressure tank. A 3/4 in. union (optional)
is recommended for easy connection and
disconnection. (Fig. 4)
3. Install a 3/4 in. MPT x 1/4 in. FPT galvanized
bushing and pressure gauge (optional), or a
pipe plug. Do not tighten, as you will prime
your pump later at this location. (Fig. 3)
2. Install a 3/4 x 3/4 x 3/4 in. galvanized tee
tting. (Fig. 2)
Glue
4
TANK TO HOUSE CONNECTION
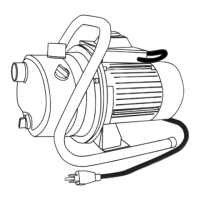
1. Most pressure tanks will have a 1 inch inlet
elbow on the bottom. Connect to this elbow
with a 1 in. MPT x 1 in. slip (glue) adapter
and short piece of pipe. (Fig 1)
4. Attach a 3/4 in. pipe to the reducer bushing.
Install an optional 3/4 in. union and continue
with pipe and 3/4 in. x 3/4 in. x 3/4 in. tee.
(Fig. 4)
3. Attach a 1 in. pipe to the elbow and a 1 in.
x 3/4 in. reducer bushing to the pipe.
(Fig. 3)
2. Install a 1 in. elbow. (Fig. 2)
Glue
Adapter
Pipe
1
Glue
Adapter
Coupling
3
Glue
Tee
Union
4
Glue
Elbow
2