Instruction manual
6
a number of shortcuts and displays some status information. All of the functions
included in the toolbar are also available in the drop-down menus located across the
top of the screen.
Move or detach the toolbar
Do one of the following:
• To detach the toolbar, drag the handle on the top-left edge of the screen.
When the toolbar is detached, click the red X or circle to close the toolbar.
• To move the toolbar, drag the handle on the top-left edge of the screen. When
you drag or move the toolbar, you can leave it on the top or bottom edge of
the screen if you’re in horizontal mode, or on the left or right edges of the
screen if you’re in vertical mode.
About the toolbar status information
When the system is running, the system statistics are displayed on the far-right side of
the toolbar. The rst number that is displayed is the USB bandwidth in bits per second.
When no motion is detected by the hardware video compression, no bits are sent.
“Noisy” video cards and ongoing video animations cause a constant stream of USB
trac.
The next two numbers in the toolbar indicate the achieved frame rates for the
hardware and software components respectively. The hardware information is
measured in Hz and range from 1 to 85 Hz, but is typically 30 or 60 Hz. The software
information is measured in fps (frames per second) and is limited to a maximum of 60
fps. The software information that is displayed varies depending on what processes the
other software on your laptop is running.
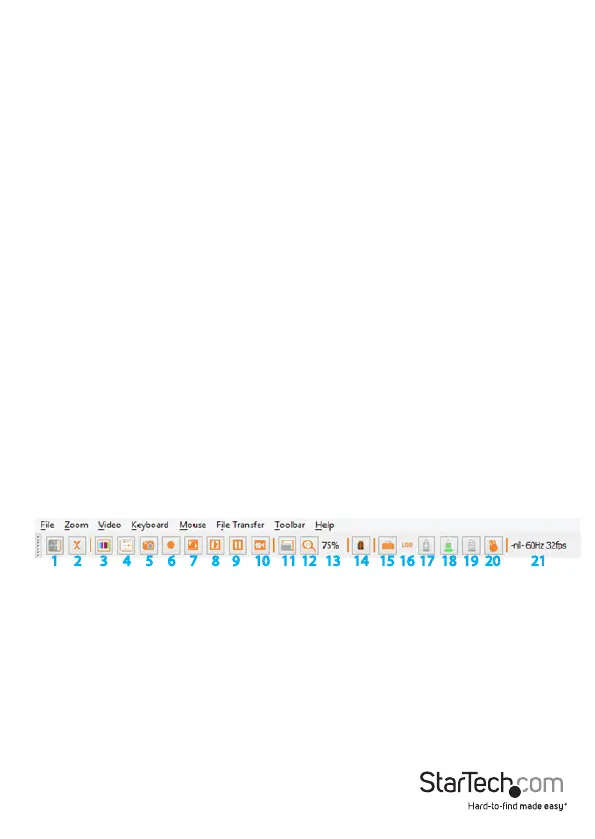
Toolbar options
1 2
3 4 5 6 7 8 9 10 11 12 13 14 15 16 17 18 19 20 21
1. Click to change the orientation of the tool bar to vertical or horizontal.
2. Click to immediately exit the pocket console application.
3. Click to ne-tune the video picture.
4. Click to open the video-related settings screen.
5. Click to take a screen shot and save it as a PNG, JPG, or BMP le.
6. Click to record (video capture).
7. Click to loop record (video capture).
8. Click to play previously recorded video.