15
Basic Set-up
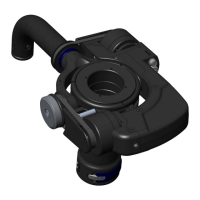
This adjustment fine-tunes the location of the center of mass to the optimum point just below the pivot
point of the Gimbal. We call this the ‘Z’ axis, or vertical balance. Note that your Merlin was shipped
from the factory with the Guide unscrewed (counterclockwise) three full turns. (You’ll need to push the
Latch again and rotate the Ring around a full turn each time as the Latch button detents facing forward).
WARNING: The Guide can be difcult to rotate if screwed
all the way in. Also, tightening the Guide all the way can make
the latch difcult to release.
The Gimbal contains delicate bearings. Excessive force will
cause the Gimbal Ring to break.
DO NOT use the Grip as a lever for turning the Guide. Also,
DO NOT use the tongue as a lever for turning the Guide.
Now watch Section 5 of the DVD, Installing Dovetail Plate.
Then continue with the Manual.
Now depress the latch and gently rotate the Guide two turns clockwise, pressing in
the latch each time it comes to the front of the unit. It should rotate easily. You may be
able to rotate it part of a third turn but DO NOT ATTEMPT to force or tighten it.
After determining that the Guide is screwed all the way in clockwise, back it off to
the first detent position (latch forward). Then rotate it counterclockwise the number of
turns specified in the “Cookbook” for your camera.
Always leave the Guide Ring with the latch and tongue in the forward position,
locked into place. If the Guide Ring is left with the tongue at the rear, the handle will
strike it and may snap off the tongue when the unit is folded into travel mode.
You have now preset the rough vertical balance of the Z (vertical) axis. After
the camera is mounted, this balance will be further adjusted.
more bottom heavy
less bottom heavy