11
730927 | Z04 | 1440
X First connect the L+ load cable to the correct pole of the right pair of ter-
minals on the solar charge controller (with the lamp symbol), then connect
the L– cable.
X Replace the load fuse or switch on the load.
4th step: final work
X Fasten all cables with strain relief in the direct vicinity of the solar charge
controller (clearance of approx. 10 cm).
4.2.3 Grounding
Grounding of the controller and connected components in stand-alone systems
is not necessary, not standard practice or may be prohibited by national regula-
tions (e.g.: DIN 57100 Part 410: Prohibition of grounding protective low voltage
circuits). The following grounding possibilities are available if required:
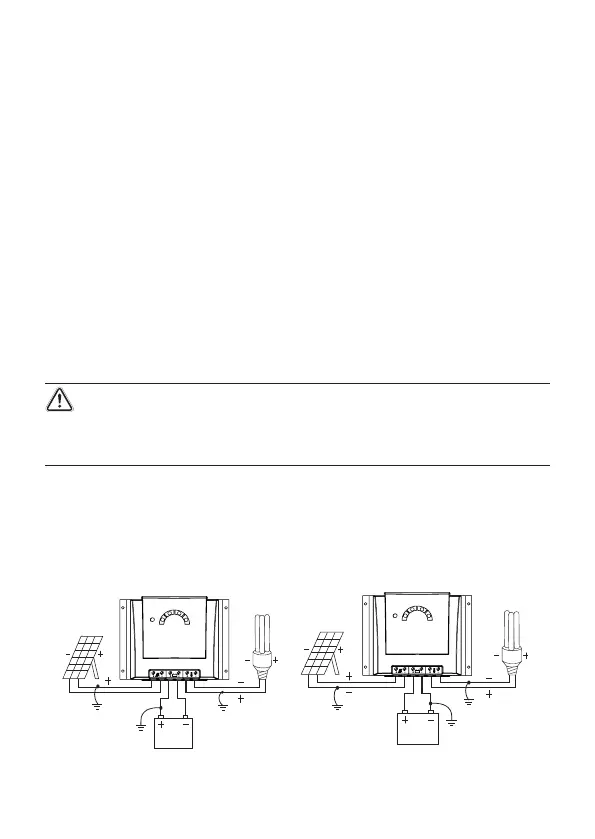
• Positive grounding: One or more of the negative controller terminals can be
grounded.
• Positive grounding: Only one of the positive controller terminals may be
grounded.
CAUTION
X Simultaneous grounding of multiple positive controller terminals will result in
malfunctions or damage to the charge controller.
Consult the technical manual for more information.
positive grounding: negative grounding:
 Loading...