EasyManua.ls Logo

Steelcase 442 Gesture User Manual

Steelcase 442 Gesture
9 pages
To Next Page IconTo Next Page
Page #1 background imageLoading...
Page #1 background image
If you have a problem, question, or request, call
your local dealer, or Steelcase Line 1 at
888.STEELCASE (888.783.3522)
for immediate action by people who want to help you.
(Outside the U.S.A., Canada, Mexico, Puerto Rico,
and the U.S. Virgin Islands, call: 1.616.247.2500)
Or visit our website: www.steelcase.com
©
2013 Steelcase Inc.
Grand Rapids, MI 49501
U.S.A.
Printed in U.S.A.
®
Page 1 of 9
939544203 Rev C
442 Gesture
Chair - Control Replacement
Pneumatic Cylinder
Removal Tool
Back Release
Tool
Safety Pin
Holding Block
T-30
TORX
Question and Answer IconNeed help?

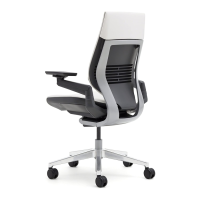
Do you have a question about the Steelcase 442 Gesture and is the answer not in the manual?

Steelcase 442 Gesture Specifications

General IconGeneral
BrandSteelcase
Model442 Gesture
CategoryIndoor Furnishing
LanguageEnglish

Summary

Back and Can Cover Removal

Initial Control Adjustments

Adjust back tension, back stop, seat height, and seat depth controls to prepare for removal.

Disengaging Seat Buckle Latch

Use the back release tool to disengage the seat buckle latch and remove the bottom cover.

Removing Back Frame and Assembly

Remove screws from the back frame, then compress the spring and remove the back assembly.

Seat Removal Procedure

Preparing for Seat Removal

Lay chair on its side, depress the seat catch spring, and adjust the seat depth knob.

Detaching the Seat Cushion

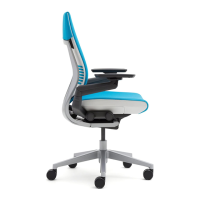
Position the chair upright and pull the seat off the mechanism.

Arm Component Removal

Removing Arm Covers

Pry up the corners of the arm cover and pine tree fasteners to remove the cover.

Detaching the Chair Arms

Use a Torx T-30 driver to remove screws attaching arms to the chair frame.

Control Unit Separation

Securing Cylinder Removal Tool

Secure the cylinder removal tool to the cylinder to separate the control.

Separating Control Unit from Cylinder

Apply lifting force and strike the tool to detach the control from the cylinder and base.

Chair Reassembly: Control and Arms

Installing New Control Unit

Place the new chair control onto the cylinder.

Attaching Chair Arms

Slide arms into place and attach with screws and new pine tree fasteners.

Chair Reassembly: Seat and Back

Reinstalling Seat Cushion

Slide seat cushion on, adjust depth knob until seat stops moving backward.

Assembling Can Cover

Slide the can cover on from the front and snap it into place.

Installing New Back Frame

Insert back frame, compress spring, remove safety pin, and secure with screws.

Final Cover and Cylinder Setting

Replace bottom cover, snap lower back, and set cylinder taper by sitting in chair.

Related product manuals