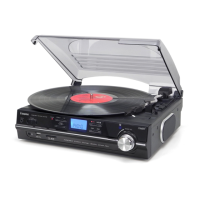
NOTE: Always handle the Stylus with care as the needle tip is easily damaged. When transporting the
turntable it is advisable to refit the protective needle cover until the unit is going to be used again. When
removing or re-fitting the stylus, always be careful not to put too much pressure on the Stylus Holder and the
Tone Arm Cartridge, to avoid causing any possible damage to them.
PLAYBACK OF MP3/WMA SONGS VIA USB STORAGE MEDIA OR SD/MMC MEMORY CARDS
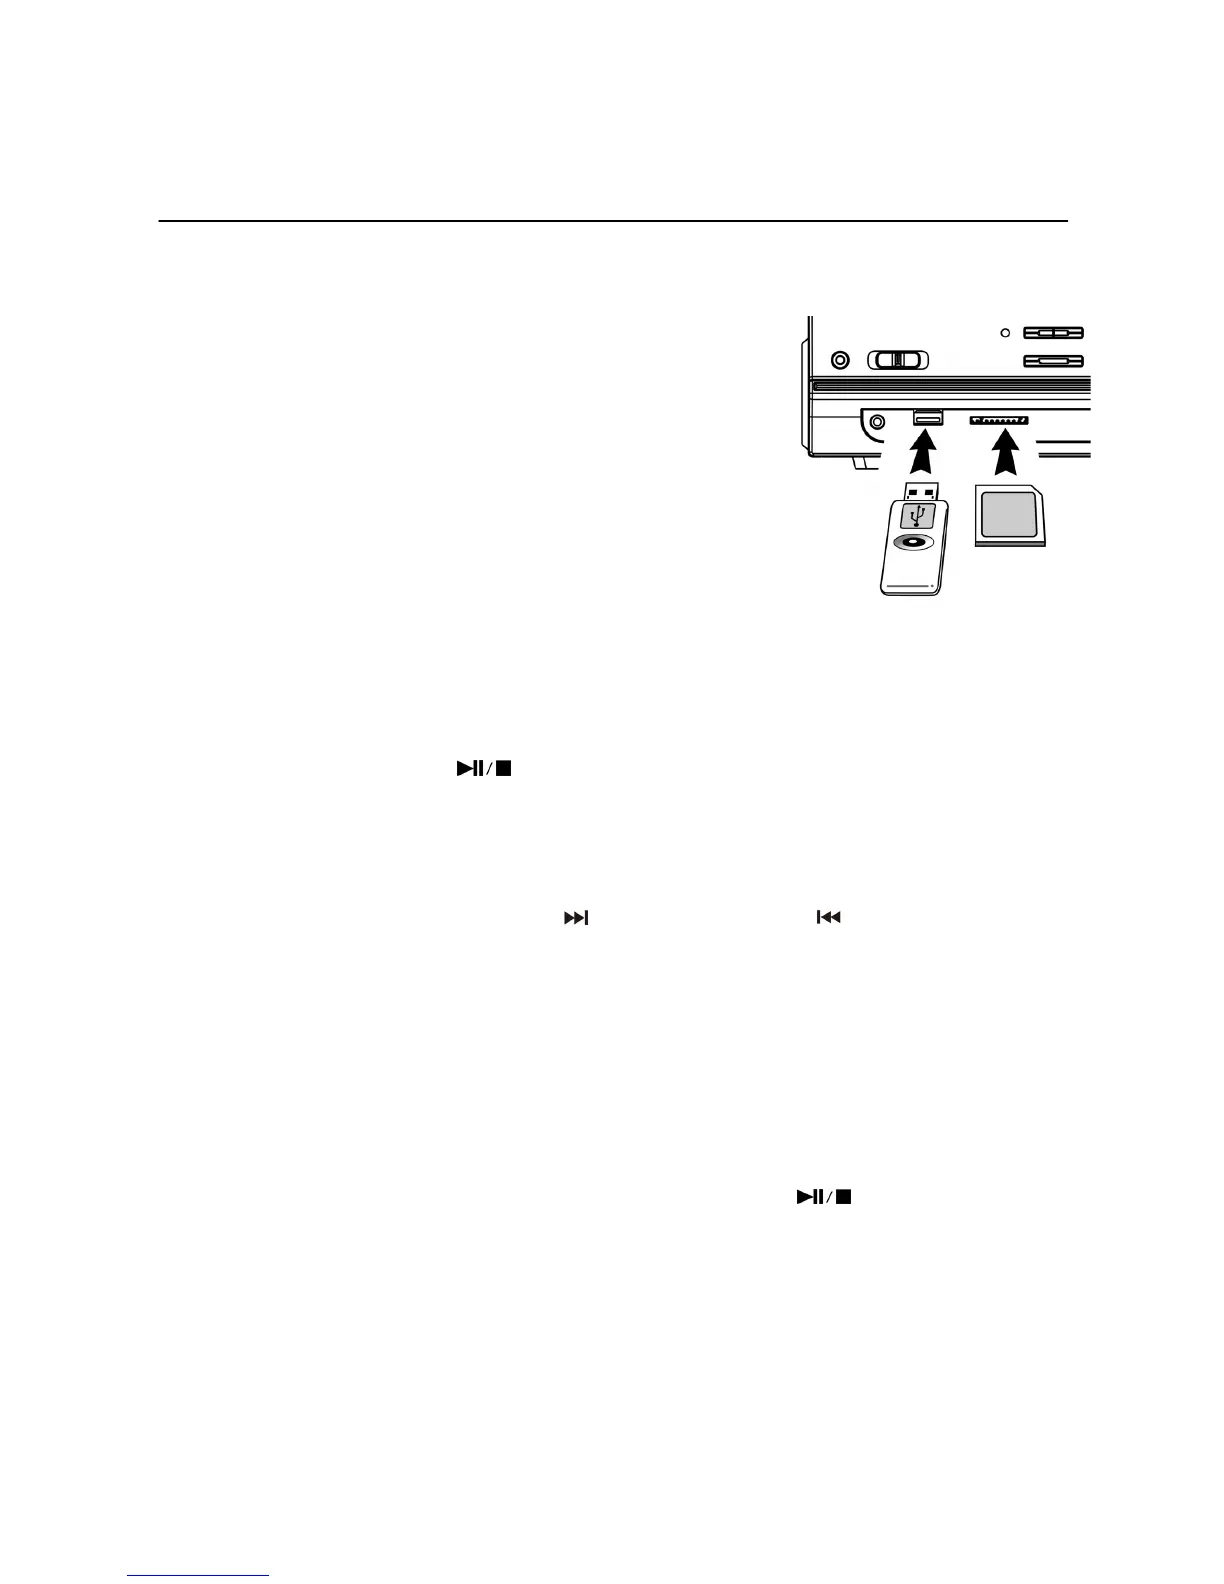
CONNECTING
The system is able to decode and play back MP3/WMA music files stored in the memory of a device with a USB
connecting plug or on an SD/MMC memory card (size up to 2GB max. – not supplied).
1.
Slide the Function Selector (9) to USB/SD Mode and then press the
Source Button (4) to select either “USB” or “SD” Mode. If nothing is
connected, “NO USB” or “NO CARD” will show on the display.
2. Plug-in the USB device face side up and make sure it goes in
completely or, if using a Memory Card, insert this in the direction of
the arrow as shown on the marking underneath the memory card Slot.
Insert it straight without bending it.
z Connecting the USB/SD card upside-down or back-to-front
could damage the audio system or the storage device (USB
Flash Drive/SD/MMC card). Before connecting, double check to
make sure the direction of insertion is correct.
3. The system will start reading a storage device automatically after
connection and the LCD Display will show the total number of
MP3/WMA files and the total number of folders detected.
Important Notes:
• It is not possible to connect an MP3 Player or Flash Drive to the USB Port via a USB Extension Cable.
• The USB Port is not designed for connection to a Computer.
z PLAY / PAUSE / STOP MODE
1. Press the “Play/Pause/Stop” button (14) to start playback, the first track will start playing.
2. To interrupt the music, press the “Play/Pause/Stop button (14) once, the playing time will freeze & flash on
the LCD Display (2) and the music will pause temporarily.
3. Press the button again to resume normal playback.
4. Press and hold the “Play/Pause/Stop button (14) for 2 seconds during Playback Mode – playback will stop.
z SKIP/SEARCH MODE (SKIP/SEARCH UP / SKIP/SEARCH DOWN )
1. During either Play or Pause Mode, press the “Skip Up” Button (19) to skip to the next track - the track number
will be displayed – it will either play that track or remain in Pause Mode.
2. During Play or Pause Mode, press the “Skip Down” Button (20) once to go back to the beginning of the track,
the original track number is displayed – it will either play that track or remain in Pause Mode.
3. After Step 2, press the “Skip Down” Button (20) again to go to the previous track – it will either play that track
or remain in Pause Mode.
4. If you press and hold the “Skip Up/Down” button (19/20) during playback, the playing track will fast forward
or backward until the button is released – then carry on playing that track.
z FOLDER UP CONTROL
1. Press the “Folder Up” Button (3), the folder number will go up.
2. Press the “Skip Up” Button (19) or “Skip Down” button (20), the track number will change (up or down).
3. When the desired track has been selected, press the “Play/Pause/Stop”
Button to start playback.
NOTES:
- The system can detect and read files in MP3 or WMA format only through the USB Port or SD Card Slot.
- Due to variances in MP3 encoding format, you may find some MP3 Players will not work when
connected to the USB socket. Please note this is not a malfunction of the system.
- Only MP3 Players/Flash Drives/SD/MMC Cards up to 2GB size can be read by the system.
ID3 (TRACK/ALBUM TITLE) FUNCTION (BY REMOTE HANDSET)
1. Press the “INFO” Button during playback of an MP3/WMA track, the song title will be displayed.
2. Press the “INFO” button again to disable this function.
E-3