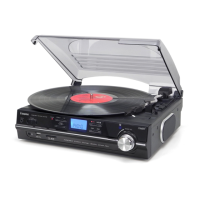
A) ENCODING FROM PHONO (Turntable)
1) Switch the Function Button (9) to “PHONO” and then press the “
Rec” Button (13) on the front of the unit or
‘REC’ on the remote control (RC).
2) The word ”USB CARD” will flash on the LCD Display(2), then press the “Skip/Search Up
” or
“Skip/Search Down
Buttons (19/20) to select the desired Source (USB or SD) for encoding.
3) Then press the “
Rec “ Button (13) (or REC on the RC), “ “ & “ “ will flash on the LCD Display
(2), and the system will start the encoding Mode after a few seconds.
4) Start playback of the first track on the record you wish to record to USB or SD.
5) After the recording has finished, press and hold the “
Rec “ Button (13).
NOTES:
- The recording speed is 1:1 and according to the actual playing time of the record.
- The system will create an “AUDIO” folder and then store the encoding track in it.
- The recording format is preset at – MP3 bit rate: 128 KBPS, sampling rate: 44.1kHz.
- To interrupt the recording, press the “
Rec “ Button (13) again during recording Mode.
B) COPYING OF MP3/WMA FILE
The system allows copying of music files from a USB source to SD/MMC Card (or vice versa) by a “one touch”
press of the “REC” button. Select the source which you wish to copy the music file from (for example: if you
want to copy the file from USB to SD Card, press the “Source” Button (4) to select USB Mode).
I) COPYING A SINGLE TRACK
1. Select the music file you wish to copy and start playback.
2. Press the “ Rec “ Button (13) during playback of the track.
3. “
“ & “ “ will flash on the LCD Display (2). The music track will be copied from USB to SD Card
(or vice versa).
4. After copying has finished, the unit will stop automatically.
II) COPYING ALL TRACKS
1. Make sure the storage device you wish to copy from is connected to the unit.
2. Insert the USB storage device or SD/MMC Card to copy the files to (max. up to 2GB). The contents will be
read, but do not play it back.
3. After the contents of the device/card has been read, press the “
Rec“ Button (13) – the unit will display
“
“ & “ “ and flash. All tracks will be copied now.
4. After copying has finished, the unit will stop automatically.
NOTES:
- If you press the “
Rec “ Button during playback of USB or SD source, the file will be copied from USB to SD
or SD to USB.
- The system will create an “FCOPY” folder store for copied tracks.
C) ENCODING BITRATE (BY REMOTE HANDSET)
You can select the desired bit rate during encoding from Phono to USB/SD, the selectable range is from
32/64/96/128/192/256 KBPS.
1) Select the “Phono” function (9) but remain in Stop Mode.
2) Press the “Info” Button and the LCD Display will show the default bit rate (128KBPS).
3) Press the “Up”
or “Down” buttons to select the desired bit rate for encoding.
4) Press the “Info” again to confirm the setting and the LCD Display(2) will show “Phono” Mode again.
D) TRACK SEPARATION (BY REMOTE HANDSET)
While recording vinyl records, the music tracks would normally be recorded as one long track. If you wish to
separate the tracks while encoding/recording from Phono to USB/SD, press the “
“ (Track Separation)
Button once on the remote control handset after each track, the system will generate a new track and continue
the recording – the word “PHONO” flashes up once on the LCD Display (2) to indicate the unit is successfully
creating a new track.
E-5