6947400000
18
MIG WELDING WITH GAS
Machine preparation
MIG welding can be performed in various ways,
depending on the specific needs of the operator. In
this case, proceed as follows to prepare the machine:
a) Connect the ground cable to the negative socket of
the generator.
b) Connect the bundle of cables to the front of the
generator, inserting the power cable into the positive
socket and the circular connector into the appropriate
socket.
c) Connect the bundle of cables to the wire feeder,
inserting the power cable on the Dinse socket (ref.L),
the gas pipe on the relative connection (ref.H), the 14-
pin connector on the appropriate socket (ref.G)
d) Connect the gas cylinder to the appropriate
connector using the supplied commissioning kit.
e) Place the reel of chosen wire on the appropriate
reel.
f) Open the wire drive compartment and pass the wire
through the drive rollers
WARNING
WELDING WIRE AND DRIVE PARTS FOR THE
FIRST 4 SECONDS ARE AT WELDING
VOLTAGE.
KEEP HANDS AWAY.
Insert the wire into the wire feeder making it
adhere to the groove of the roll (ATTENTION: the
roll has two grooves because by turning it it is
possible to use it for another diameter of wire. See
Rolls Specifications paragraph). When changing
the section of the wire it is necessary to change:
roller and current holder tube (it is the end part of
the torch from which the wire can be seen
emerging).
Unscrew the external termination of the torch
(nozzle) and the current tube to facilitate the
passage of the wire. Unwind the torch lead so that
the lead has as few bends as possible. Insert the
plug into a suitable socket (see connection
chapter).
g) Insert the power plug of the generator into a
socket suitable for current regulations.
h) Turn on the machine by activating the switch
located on the rear panel.
i) Connect the torch to the wire feeder, inserting the
Euro coupling on the front connector.
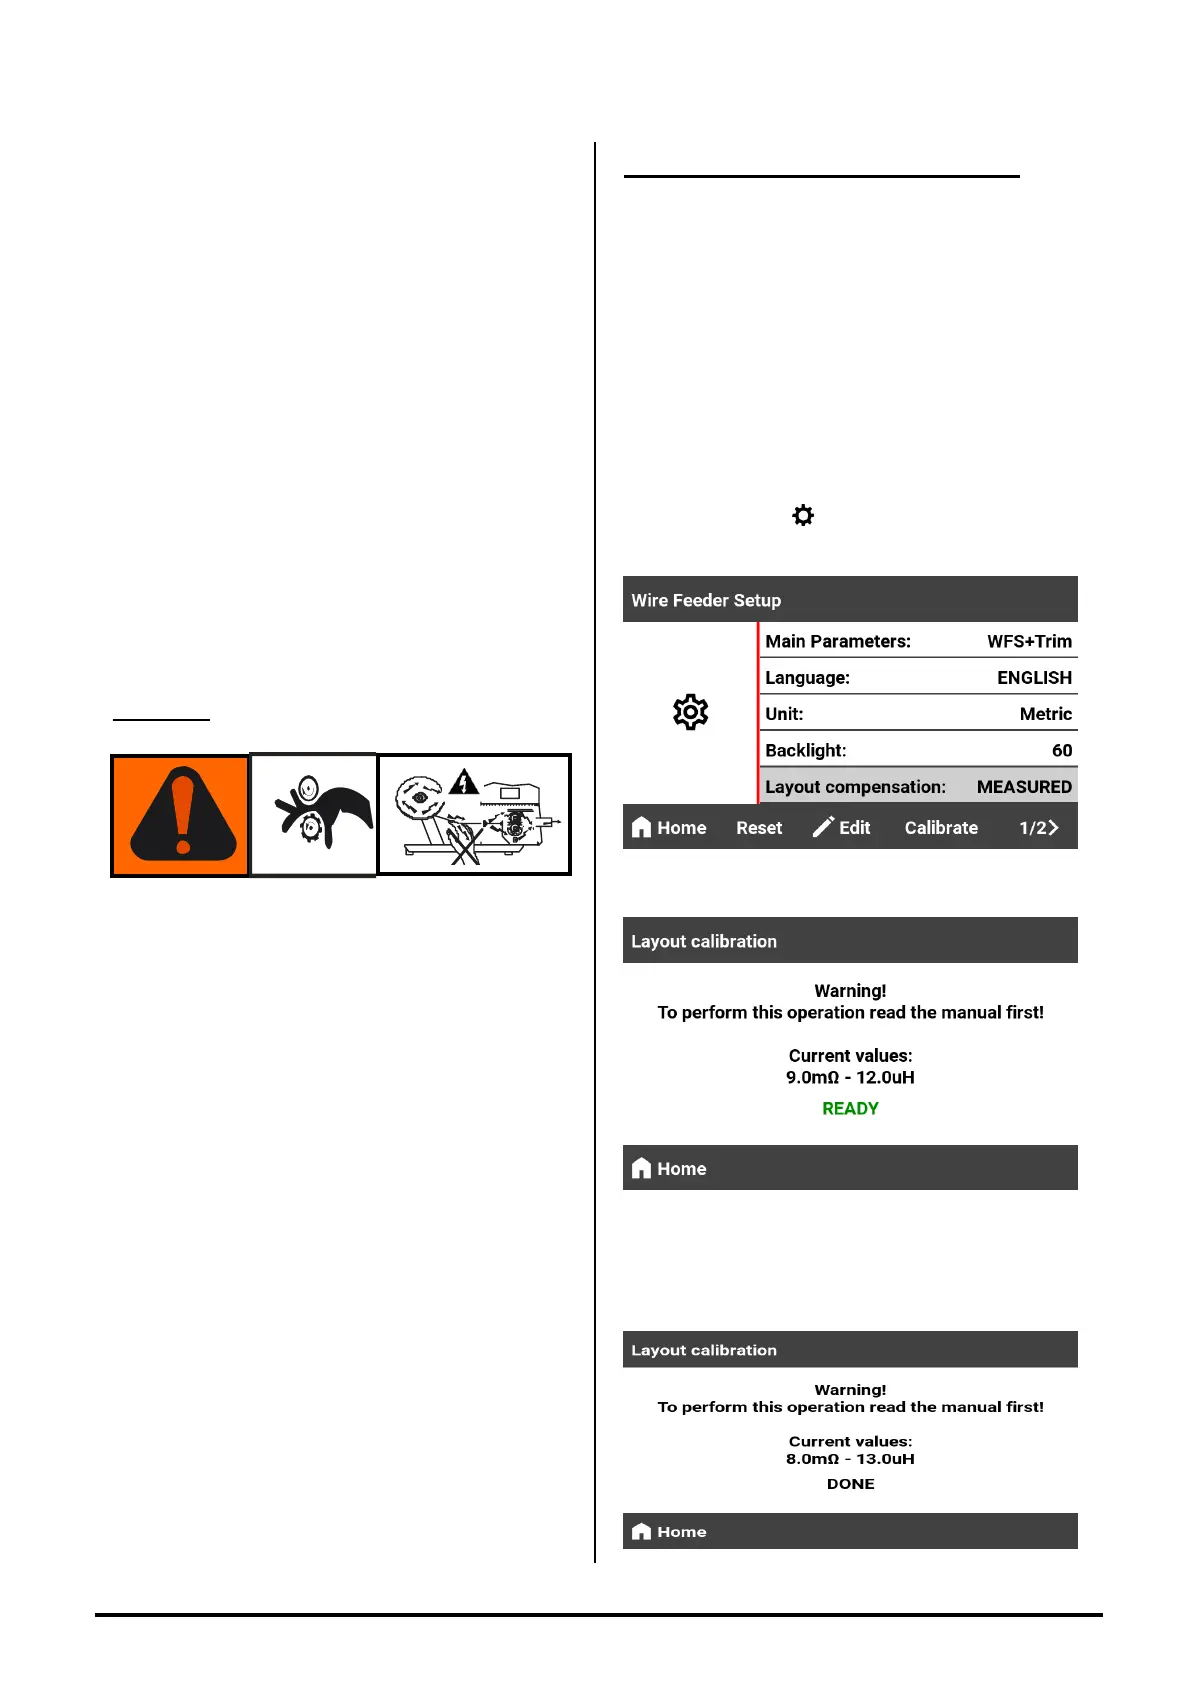
LAYOUT COMPENSATION
ATTENTION : Before starting to weld it is
advisable to carry out the LAYOUT
COMPENSATION to obtain a better welding
performance.
This operation must be done every time
the torch is replaced or the length of the
interconnecting cable or earth cable is
changed.
1) Connect the ground cable to the piece ;
2) Remove the gas nozzle from the torch;
3) Push the button Fig.1 rif.6 to access the
Wire Feeder Settings screen.
4) Push the button CALIBRATE
4) Rest the contact tip on the piece to be welded
and press the torch trigger;
5) After a few seconds if the measurement has
been done correctly the display will show this :
 Loading...