6947400000
19
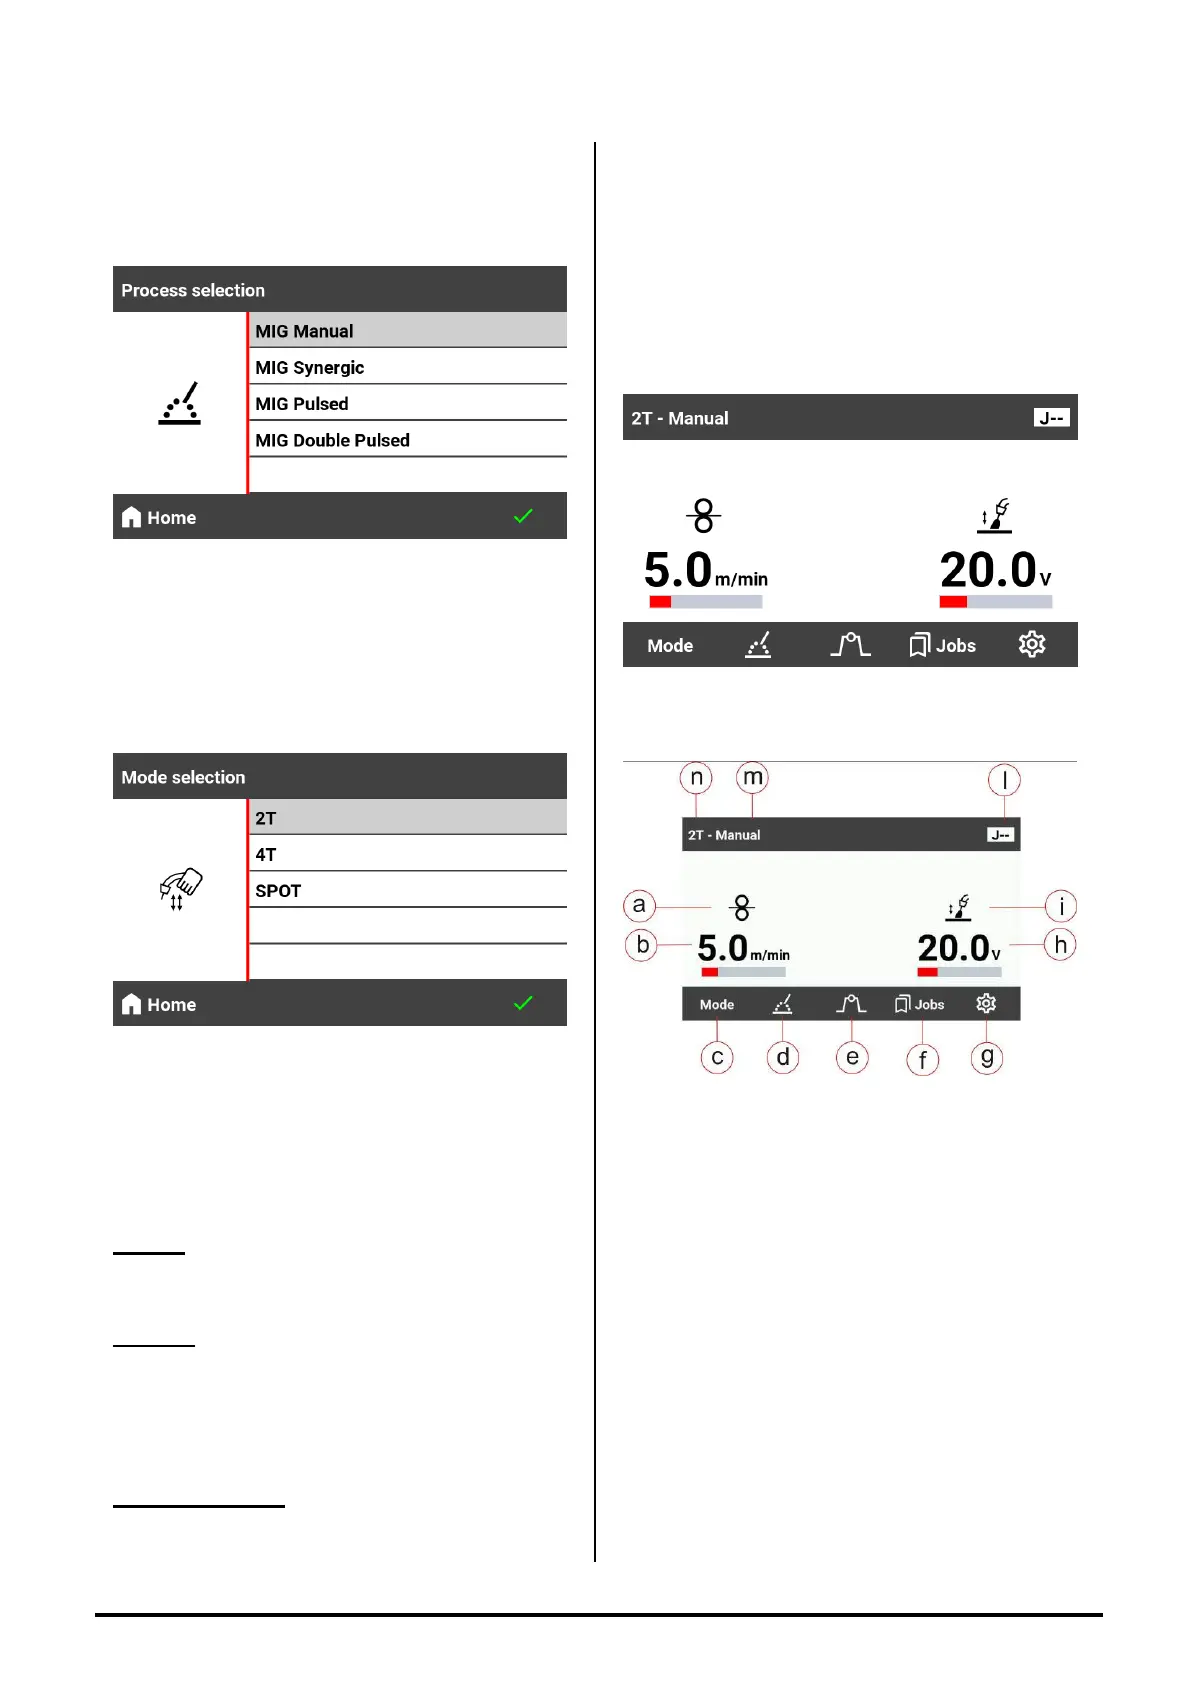
MIG MANUAL MODE
- Push the button SELECT MODE (rif.3);
- The following screen will appear;
- Turn the encoder (Fig.2,rif.7) and select MIG
MANUAL ;
- Push the button
Ѵ
(Fig.2,rif.6 ) to confirm the
choice of the welding process ;
- Push the button MODE (Fig.2,rif.2);
- The following screen will appear;
- Turn the encoder (Fig.2,rif.7) and select
the welding mode MIG 2T , MIG 4T ,
SPOT ;
DEFINITIONS :
MIG 2 T: in this function the arc start when the wire
goes in contact with the piece. When you press the
torch button the wire start come out and it stops
when you leave the button
MIG 4T : when you press the torch button the gas
comes out ( pre gas ). When you leave the button
the wire start come out, and goes in contact with
the piece and the arc start. Pushing again the
button the arc stops and the gas continue flowing
until the torch button is pressed. When you leave
the button start the post time pre setted.
SPOT WELDING : this mode works exactly like the
MIG 2T only that the welding duration time is pre-
set by the operator before starting to weld. Time
ON adjustable from 0.1 to 10 sec.
By setting a time OFF time different from 0, it is
possible, by keeping the torch button pressed, to
have automatic welding where the pre-set times
are managed
- Press the button
Ѵ
(Fig2,rif.6 ) to confirm the
choice of the welding mode selected;
- After confirming the choice, the MANUAL MIG will
be ready
EXPLANATION OF MANUAL MIG SCREEN
SYMBOLS:
a Wire Speed Symbol;
b Wire Speed Value;
c MODE Button ;
d Welding Process Choice;
e Welding Functions ( XL , Pre Gas, Post Gas
. );
f JOBS Button ;
g SETUP MENU;
h Arc Voltage Value;
i Arc Length Symbol;
l JOB number;
m Welding Process;
n Welding Mode;
Subsequently :
1) Set the wire speed with the A/Vel encoder
(Fig.2,rif.1);
2) Set the welding voltage with the V/SET encoder
(Fig.2,rif.7);
3) Proceed with the welding.