18
User’s manual
EN
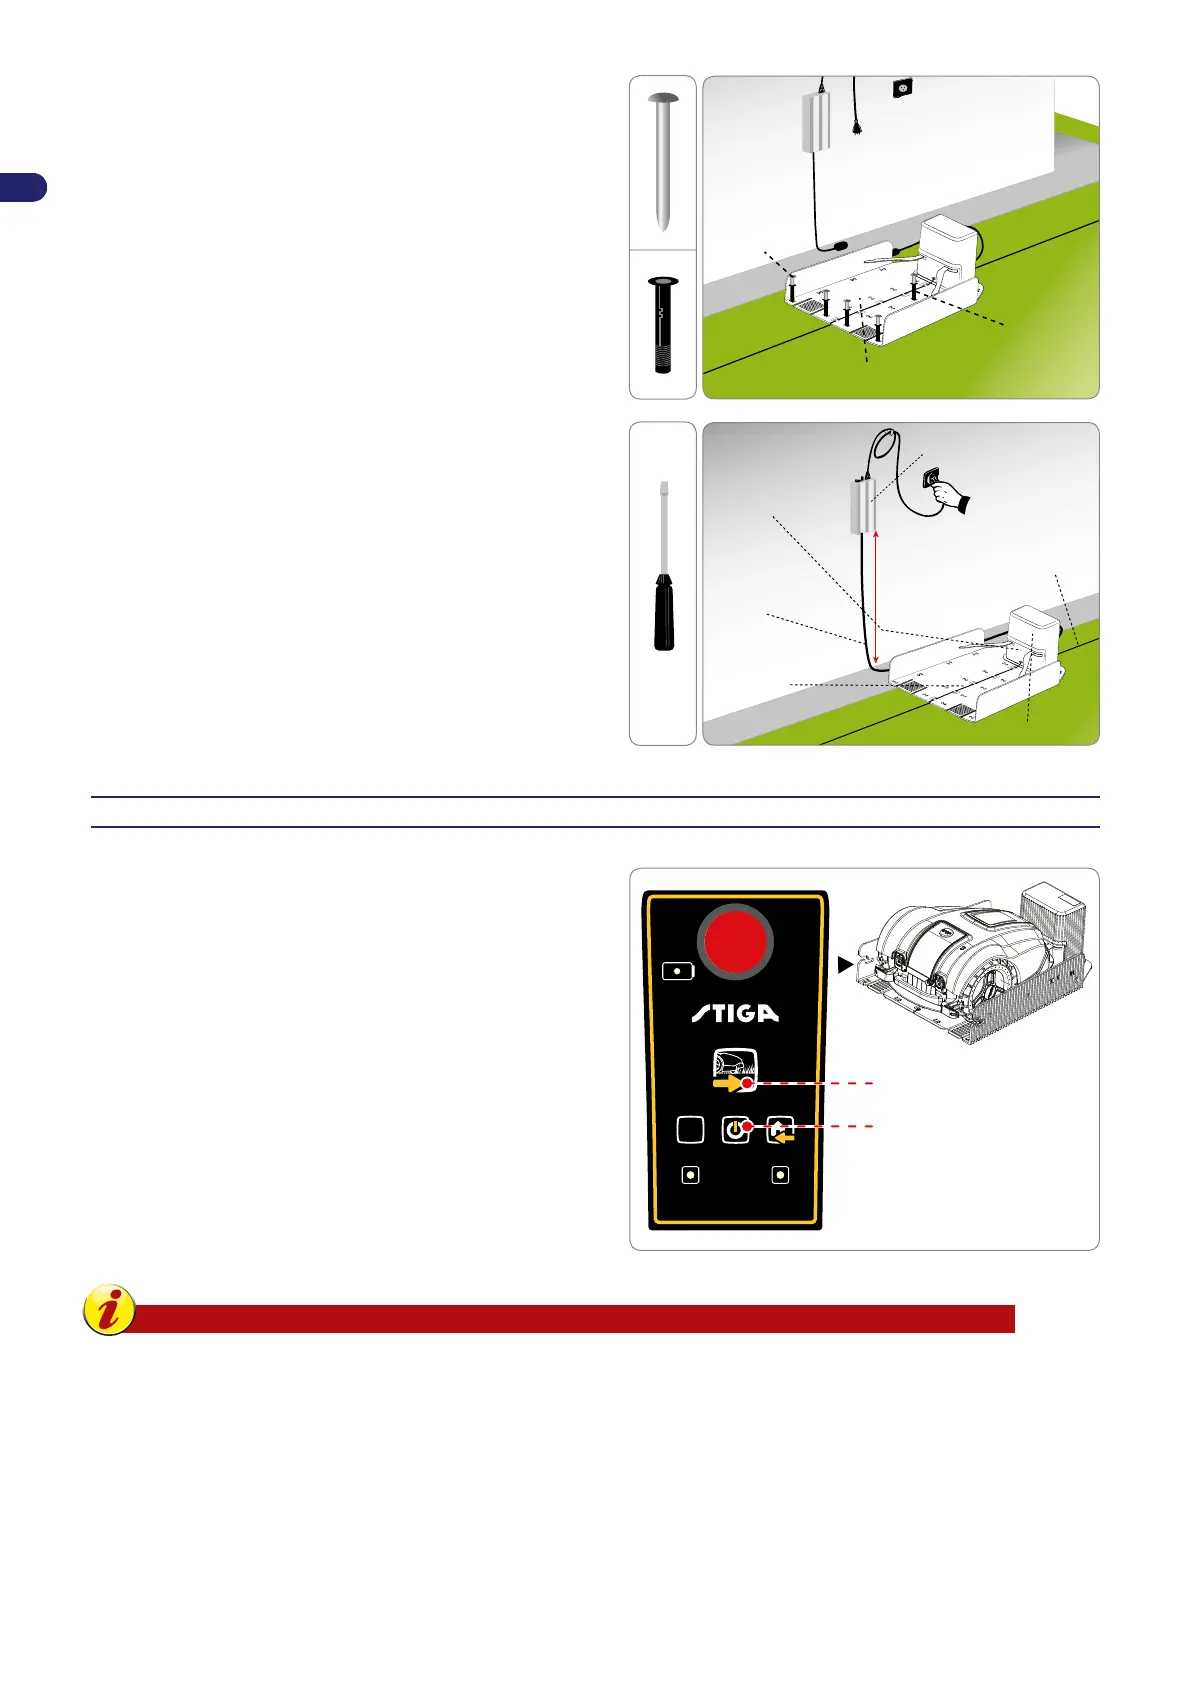
5. Fasten the charging station (N) to the ground with the pegs (P).
If necessary, secure the charging station with screw anchors
(Q).
pegs (P)
screw anchors (Q)
charging station (N)
6. Install the power supply unit (A).
7. Connect the power cord (E) of the charging station (N) to the
power supply unit (A).
8. Connect the plug of the power supply unit (A) to the electrical
outlet.
9. If the LED of the transmitter ashes, the connection is correct.
Otherwise, nd the anomaly (see “Troubleshooting Guide”).
10. Replace the protection (L).
current power
supply unit (A)
power cord (E)
Perimeter
wire
charging station (N)
transmitter (T)
H. min. 160 cm
(63.00 ")
protection (L)
BATTERY CHARGING ON FIRST USE
1. Place the robot inside the charging station.
2. Press the ON/OFF key and wait a few seconds for the robot to
turn on completely.
3. The battery LED turns orange and remains xed for a few
seconds during recognition of the charging station.
4. Make sure the AUTO LED is off, if necessary press the AUTO
key to turn it off.
5. At the end of charging, the robot can be used or programmed
for initial start-up (see “Programming Mode”).
AUTO
START / PAUSE
HOME
ALERT
AUTO
ON / OFF
S TOP
“ON” KEY
“PLAY/PAUSE” KEY
Important
On rst use, always charge the batteries for at least 4 hours.

 Loading...