27EN
3. INSTALLATION
POSITIONING UNDERGROUND
(CARRIED OUT ONLY BY AUTHORIZED RETAILER)
Turning to a STIGA retailer, the perimeter wire can also be installed using a specic wire-laying machine,
without using pegs.
3.5.1. INSTALLATION OF THE PERIMETER CABLE
POSITIONING WITH PEGS
CAUTION:
Danger of cutting hands.
CAUTION:
Danger of dust in the eyes.
Requirements and obligations:
• Low grass all the way • Hammer
• Perimeter cable • Gloves
• Fixing pegs • Glasses
• Joints for perimeter cable • Electrician's scissors
• Pliers
GLOVES OBLIGATION:
Use protective gloves to avoid
cutting your hands.
GLASSES OBLIGATION:
Use safety glasses to avoid the
danger of dust in the eyes.
Procedure:
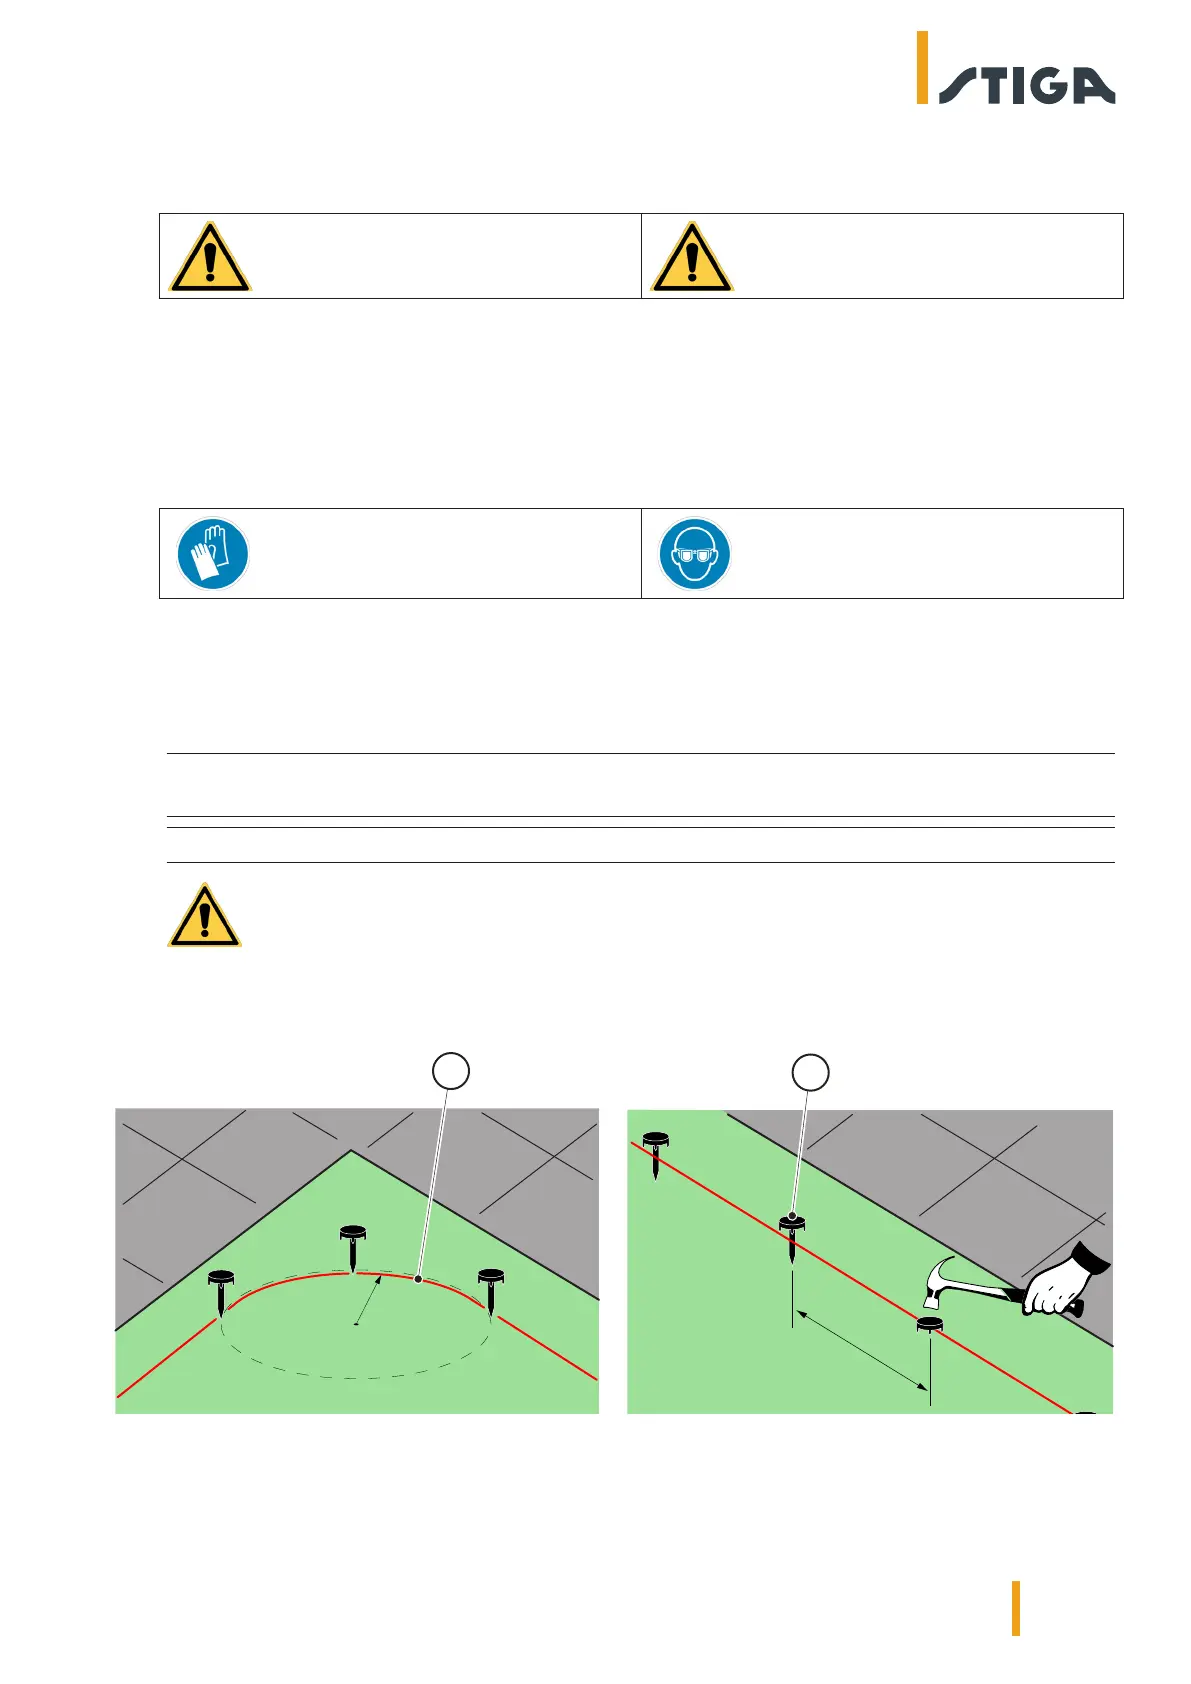
1. Place the perimeter cable (A) starting from the charging base installation area.
2. Place the cable along the entire path, xing it with the suitable pegs (B) spaced approximately
100 cm apart, and observing the installation requirements given (see Par. 3.3 and Par. 3.4).
3. Leave 2 m of cable or more to subsequently cut it to size in the nal phase of connection.
NOTE: In non-straight sections, make sure that the cable (A) does not get tangled. Position the
cable in such a way as to form a regular curve with a radius of about 20 cm.
NOTE: The perimeter cable used for installation must have a length of at least 40 m.
WARNING:
Make sure that the cable is in contact with the ground along its path to prevent
the robot lawn mower from damaging it.
R=20 cm
A
100 cm
B