26 BT 130
– Inspect the flat springs and
replace if necessary.
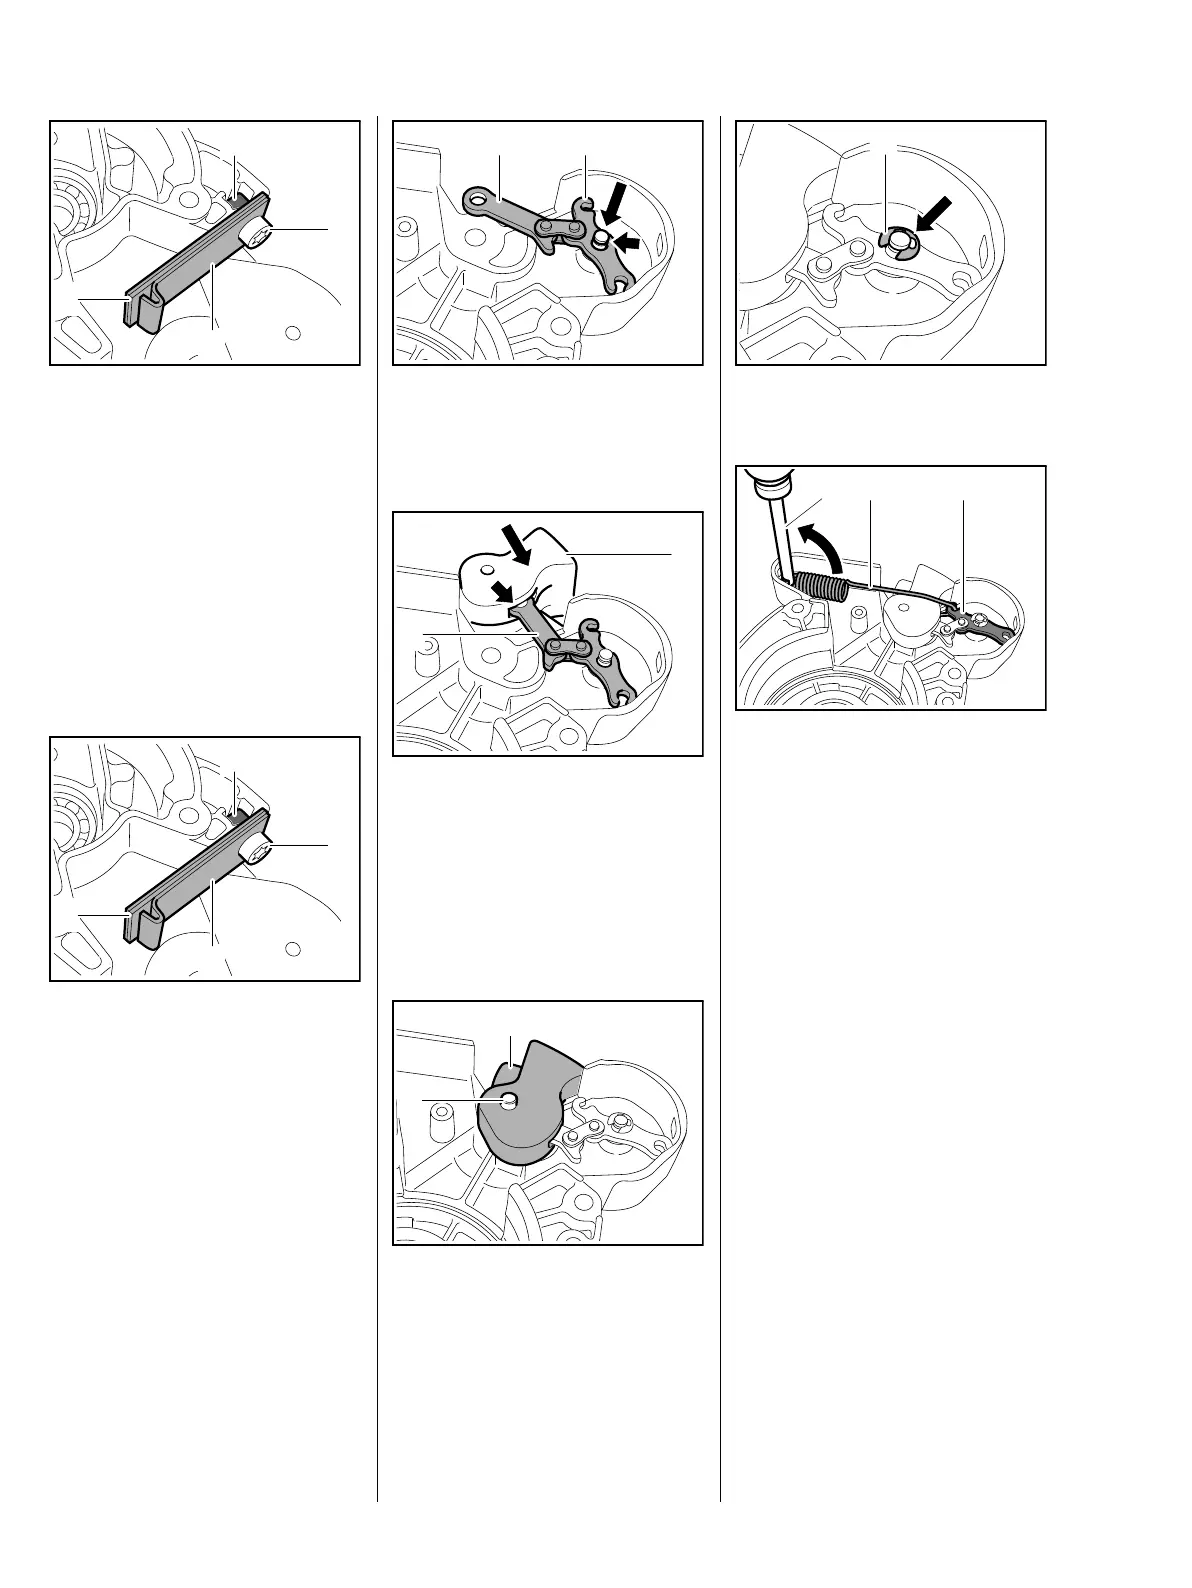
: Take out the screw (1)
: Remove the 2 straight flat
springs (2) and the hooked flat
spring (3).
: Remove the square nut (4).
Installing
: Fit the 2 straight flat springs (2)
behind the hooked flat spring (3).
: Insert the screw (1) and attach
the nut (4).
: Push the nut (4) into its seat and
tighten down the screw (1) firmly
while holding the flat springs
steady.
– Turn the clutch housing over,
clean pivot pins and coat them
with STIHL multipurpose grease,
b 13
2
9912RA044 TG
1
3
4
2
9912RA044 TG
1
3
4
: Fit the brake lever (1) on the pivot
pin (arrow) – hook (2) for brake
spring faces edge of housing.
– Coat brake lever with STIHL
multipurpose grease, b 13
: Push the retainer (1) sideways
into position and side the brake
lever (2) into the slot (arrow) at
the same time.
: Insert bearing pin (1) from the
other side of the retainer (2) and
tighten it down firmly.
9912RA040 TG
1 2
9912RA041 TG
2
1
9912RA038 TG
1
2
: Fit the E-clip (1).
: Attach the brake spring (1) to the
brake lever (2) and use the
assembly tool (3) 1117 890 0900
to attach it to the anchor pin.
– Install the brake band, b 5.2
– Install the clutch drum, b 4.1
– Check operation, b 5.1
– Reassemble all other parts in the
reverse sequence.
9912RA042 TG
1
9912RA043 TG
1 23
 Loading...