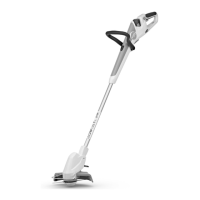
► Insert the ends of the bump guard (1) into the
holes (2) in the housing.
The bump guard (1) need not be removed.
7.2 Attaching the deflector
► Switch off the brushcutter and remove the bat‐
tery.
The line limiting blade (1) has already been
installed in the guard (2) and must not be
removed.
► Push the guard (2) into the guides on the
housing until it hits the limit stop.
The guard (2) is flush with the housing.
► Insert and tighten the screws (3).
The guard (2) must not be removed.
7.3 Mounting the loop handle
► Switch off the brushcutter and remove the bat‐
tery.
► Position the loop handle (2) so that the recess
for the star knob nut (1) is on the right –
viewed from the control handle.
► Ease the ends of the loop handle (2) apart and
place the loop handle (2) on the control handle
until the loop handle (2) snaps into place.
► Insert the screw (3) through the hole.
► Fit the star knob nut (1) and tighten it down.
The loop handle (2) must not be removed again.
7.4 Mounting and Removing the
Mowing Head
7.4.1 Mounting the mowing head
► Switch off the brushcutter and remove the bat‐
tery.
► Push the fanwheel (2) onto the shaft (3) until
the vanes of the fanwheel (2) point downward.
If the fanwheel is not fitted, the electric motor
will not be cooled properly and the brushcutter
will cut out during operation.
► Hold the fanwheel (2) steady with one hand.
► Fit the mowing head (1) on the shaft (3), turn it
clockwise by hand and tighten it down firmly.
7.4.2 Removing the mowing head
► Switch off the brushcutter and remove the bat‐
tery.
► Hold the fanwheel (2) steady with one hand.
► Unscrew the mowing head (1) counterclock‐
wise.
► Remove the fanwheel.
7.5 Attaching and removing the
blade
7.5.1 Installing the blades
► Switch off the brushcutter and remove the bat‐
tery.
► Place the blades in a container filled with
water for 12 to 24 hours before using.
This makes the blades supple.
7 Assembling the Trimmer English
0458-039-0101-A 13

 Loading...