68 MS 210, MS 230, MS 250
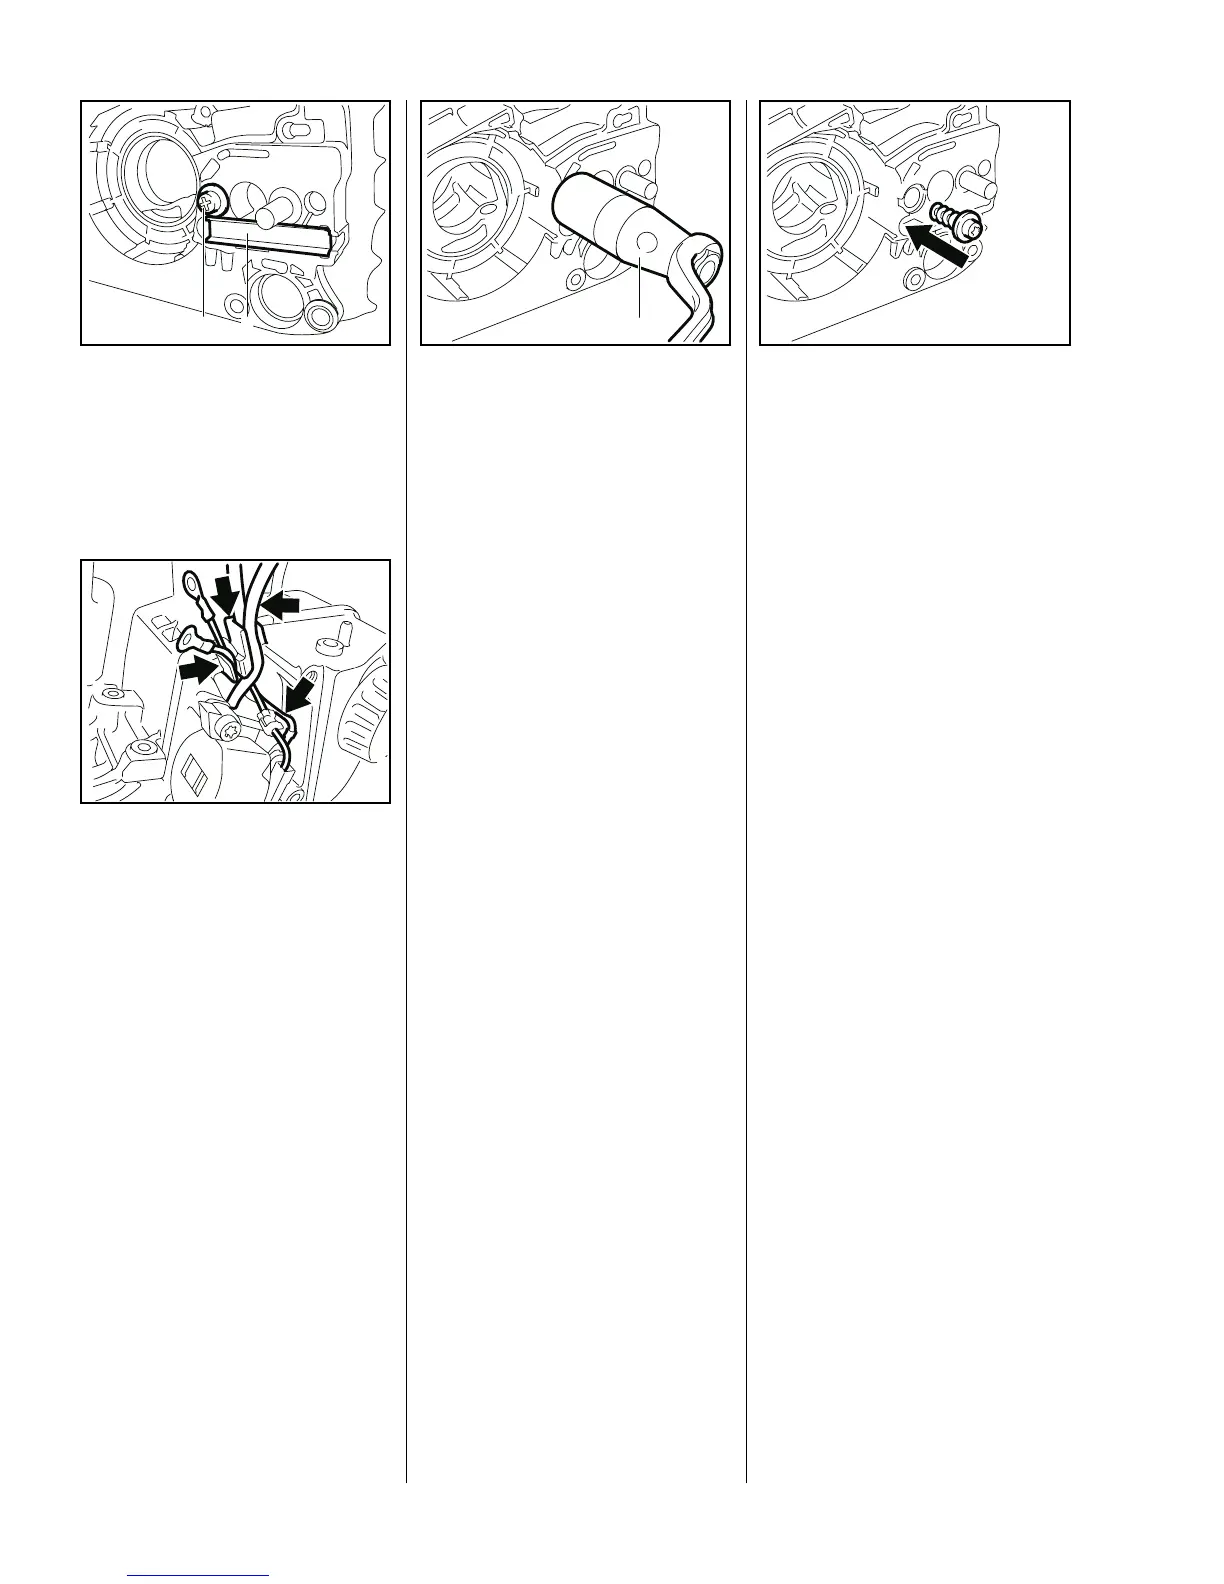
: On machines with quick chain
tensioner, remove the stiffener
(1) and take out the rear collar
screw (2).
VA
135RA229
2 1
Reassemble in the reverse
sequence.
: Position ground wires, short
circuit wire and ignition lead in the
housing slots.
– After assembling, set air gap
VA
135RA232
between ignition module and
flywheel – b 8.
– Coat the fuel hose flange with a
little oil to simplify installation.
– Straight side of hose flange must
be in line with the tank joint.
Replacement engine housings are
supplied with two collar screws of
the same length.
: To install engine housing in a
machine with a quick chain
tensioner, use stud puller (1)
5910 893 0501 to slowly unscrew
VA
135RA234
1
the rear collar screw.
Thread in engine housing can be
damaged if stud puller is turned too
fast.
– Apply a little oil to the thread of
the new or original collar screw.
: Insert collar screw in the bore of
the replacement engine housing
and turn it counterclockwise until
it engages the thread.
VA
135RA231
– Then screw it home clockwise
and torque down to about 8.0 Nm
(5.9 lbf.ft).
– Tighten down mounting screws
on spiked bumper to 3.7 Nm
(2.8 lbf.ft).
Reassemble all other parts in the
reverse sequence.
 Loading...