0478 131 8354 D - EN
68
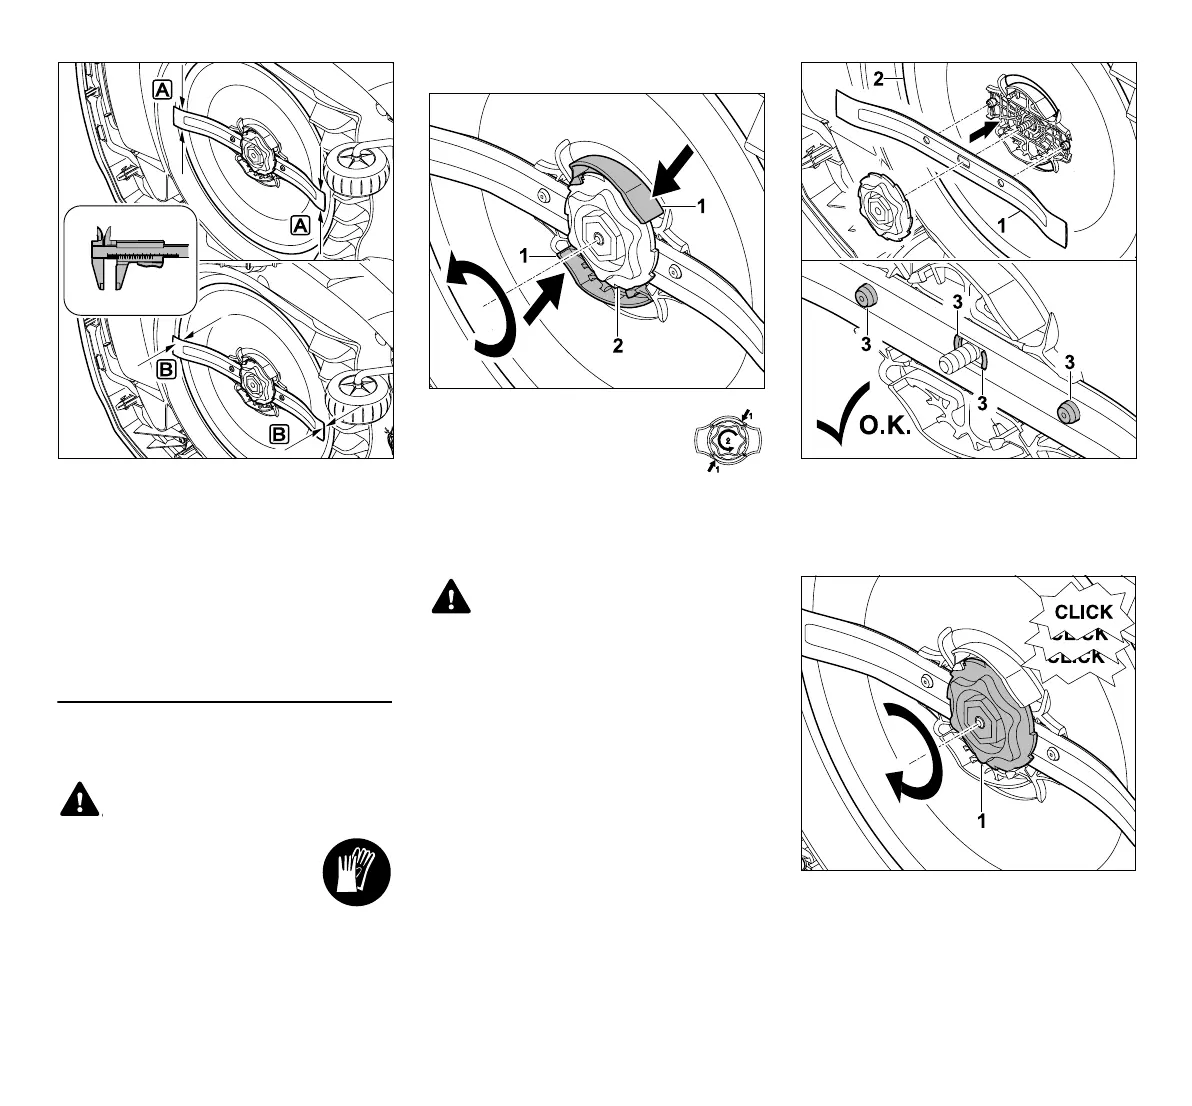
Check the blade width A and blade
thickness B using a slide calliper.
A > 25 mm
B > 1,3 mm
The blade must be replaced if the
measured values are achieved at one or
more points or are outside the permissible
limits.
16.4 Removing and installing the
mowing blade
● Activate the disabling
device (Ö 5.2) and wear
gloves.
● Tilt the robotic mower onto its
side and lean it securely against a
stable wall. Carefully clean the mowing
deck and mowing blade. (Ö 16.2)
Removing the blade:
Push in both tabs (1) on the
carrier plate with one hand and
hold. Remove the fastening
nut (2) with your other hand.
Remove the mowing blade together with
the fastening nut.
Installing the mowing blade:
● Clean the blade, carrier plate and
fastening nut prior to installation.
Fit the mowing blade (1) on the carrier
plate (2) as illustrated. Ensure the correct
position of the retainers (3) in the mowing
blade.
Screw on the fastening nut (1) as far as
possible. Several clicks are audible during
tightening. Ensure secure seating of the
mowing blade by shaking carefully.
The mowing blade is designed for a
service life of 200 hours.
Risk of injury!
Check the blade for damage before
installation. The blade must be
replaced if notches or cracks are
detected or if it is worn. (Ö 16.3)
The carrier plate and the
fastening nut must also be
replaced if damaged (e.g. broken,
worn). The fastening nut in
particular must engage cleanly in
the carrier plate.
 Loading...