SR 430, SR 450
English
16
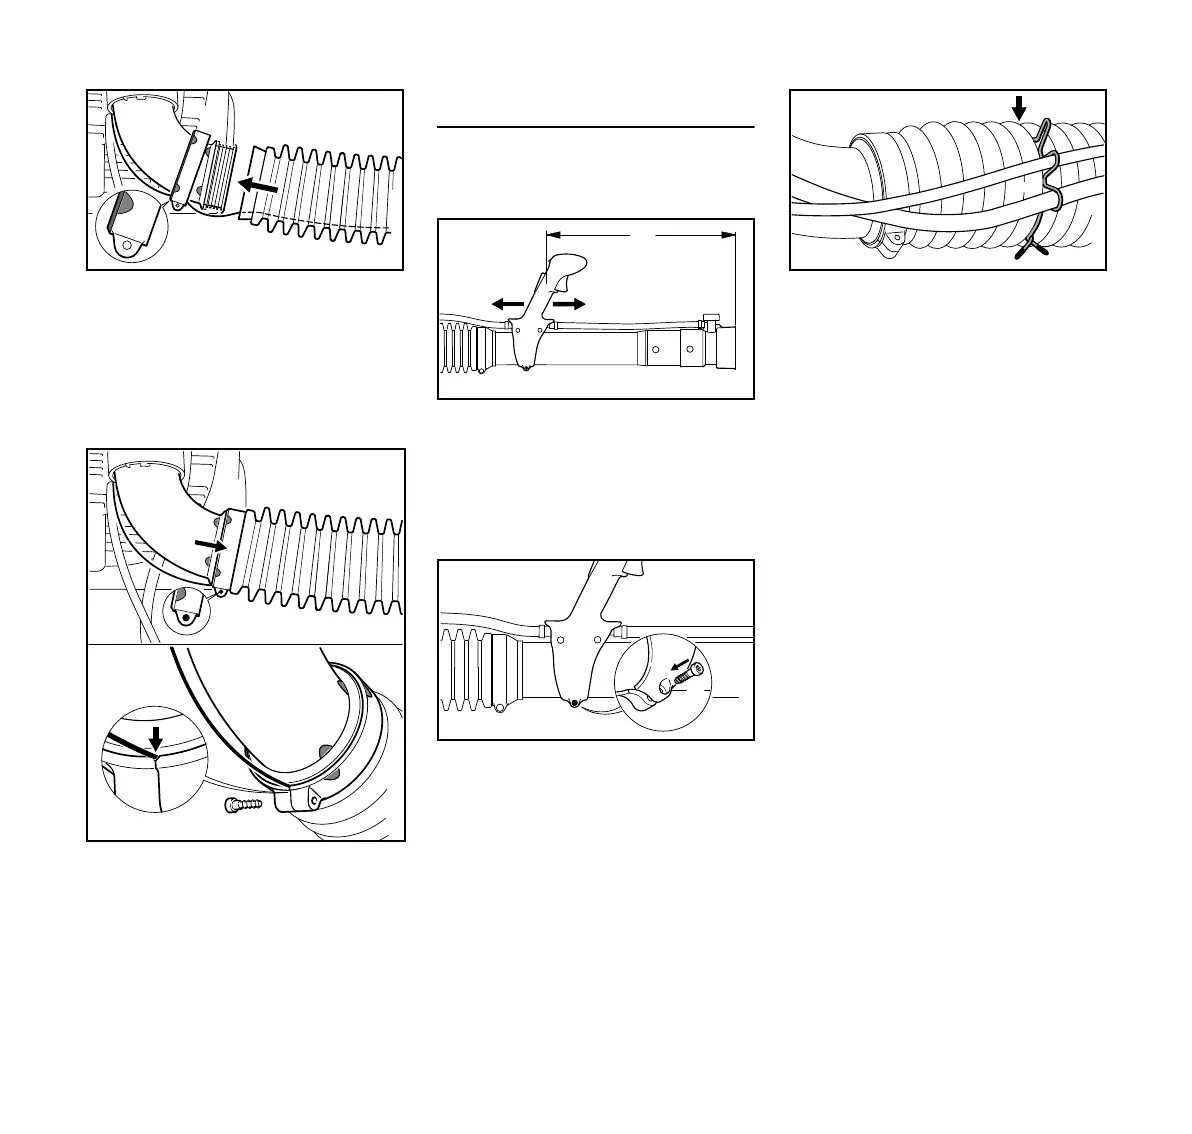
N Push narrow hose clamp (3), marks
facing left, onto the elbow (4).
N Route the antistatic wire (1) through
the slot in the hose clamp (3).
N Push the pleated hose (2) onto the
elbow (4).
N Push the hose clamp (3) onto the
pleated hose (2).
N Line up the marks on the hose
clamp (3) and elbow (4) – as shown.
N Secure the hose clamp (3) with the
screw (5) – make sure the antistatic
wire is located in the notch.
Adjusting and securing the control
handle
N Put the machine on your back and
adjust the harness – see "Harness".
N Slide the control handle (1) along
the tube to the most comfortable
position – distance between nozzle
outlet (2) and the control handle (1)
must be at least 19.7 in (500 mm)
('a').
N Secure the control handle (1) with
the screw (3).
N Use the retainer (4) to secure the
hose and throttle cable, and
metering unit's operating cable on
the SR 450, to the 6th pleat (arrow)
on the pleated hose.
 Loading...