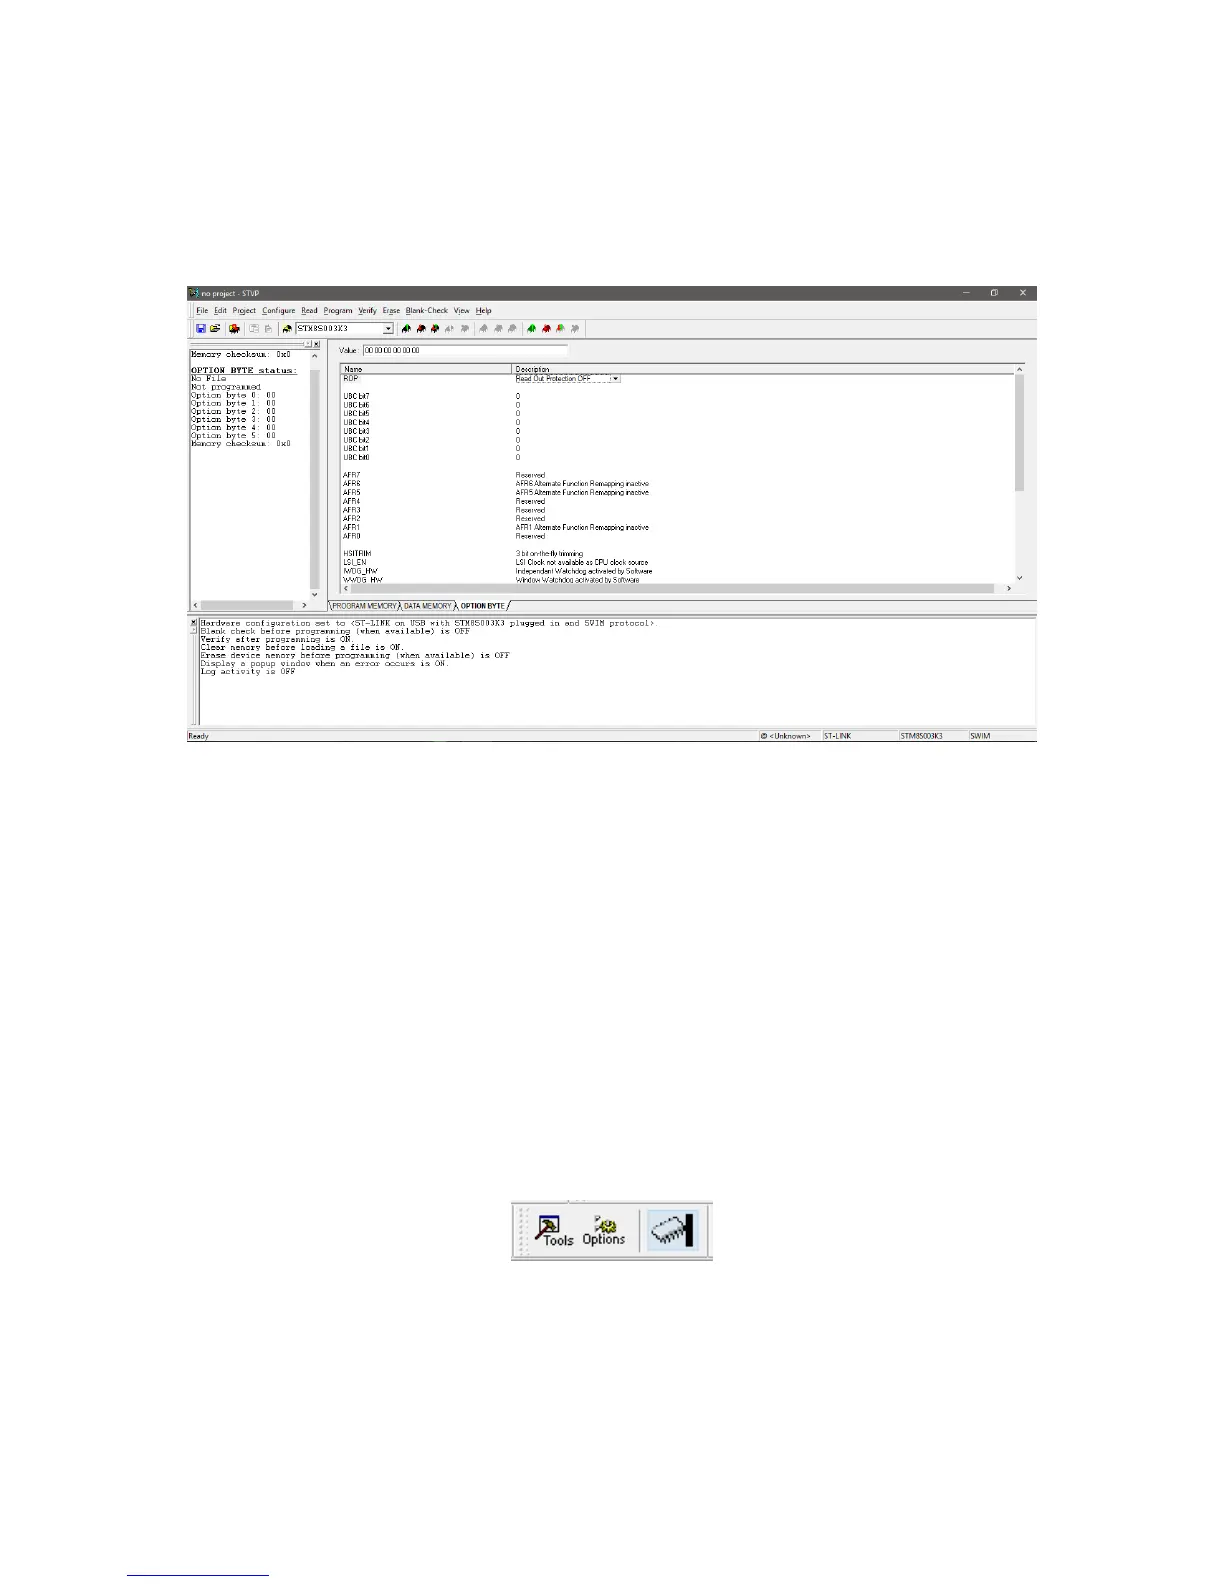
Notice the mid tabs at the bottom of the hex values. From here we can see the hex values for program
memory, data/EEPROM memory and configuration settings. The configuration setting bits are
intended for setting some special hardware configurations or extending features of the target as well
as setting memory readout protection.
Try not to mess with security or protection bit at first or during tests as it will lock your chip up,
rendering it useless. You won’t simply be able to write it again until you unlock it. Unless needed, we
won’t be changing any default configuration bit. One thing to note is the fact that upon new
compilation and build, the newly generated output file is automatically reloaded. The rest of the stuffs
like loading or saving a s19 file, reading, writing and others are as simple as like with other
programmers. I won’t be explaining these steps as I assume that readers of this article already know
how to do all these from their previous experiences with other MCUs.
Now we will explore how we can upload a code to our target using STVD. After compiling and building
a project successfully without any error, the compiler will generate a s19 output file either in Debug
or Release folder depending on which mode of compilation selected. By default, Debug mode is
selected unless the coder changed it and so our desired s19 file will be in this folder. First, we need to
open the programmer interface. We can do that either by clicking the icon as shown below:
or we can go to Tools >> Programmer.