Cooking with a fan oven
If you have been used to cooking with
a conventional oven, you will find a
number of differences to cooking with
a fanned oven, which will require a
different approach:
There are no zones of heat in a
fanned oven, the convection fan at the
back of the oven ensures an even
temperature throughout the oven. This
makes it ideal for batch baking - eg;
when planning a party or stocking the
freezer, as all items will be cooked
within the same length of time.
Foods are cooked at a lower temperature
(between 10˚C and 20˚C lower) than
a conventional oven, so conventional
recipe temperatures may have to be
reduced.
Pre-heating is generally not necessary
as a fan oven warms up quickly.
There is no flavour transference
in a
fan oven, which means you can cook
strong smelling foods such as fish at
the same time as mild foods - eg; milk
puddings.
When batch baking foods that will rise
during cooking - eg; bread - always
ensure that enough space has been left
between shelves to allow for the rise.
Notes:
When 2 or more shelves are being
used, it may be necessary to increase
the cooking time slightly.
Because the 2 oven shelves are wider
than in many ovens, it is possible to
cook 2 items per shelf - eg; 2 victoria
sandwiches or 2 casseroles. Although
you need to keep in mind the point
from the previous page ‘To help the air
circulate freely’ with careful choice of
dishes and tins, it is possible to cook a
complete meal and perhaps something
else for the freezer in the oven at the
same time.
When roasting meats, you will notice that
fat splashing is reduced, which is due
in part to the lower oven temperatures,
and will help keep cleaning of the
oven to a minimum.
Because a fan oven has an even
temperature throughout the oven, no
shelf positions have been given in the
following baking guide, and there is
no need to interchange dishes onto
different shelves part way through
cooking, as with a conventional oven.
14
USING THE MAIN OVEN
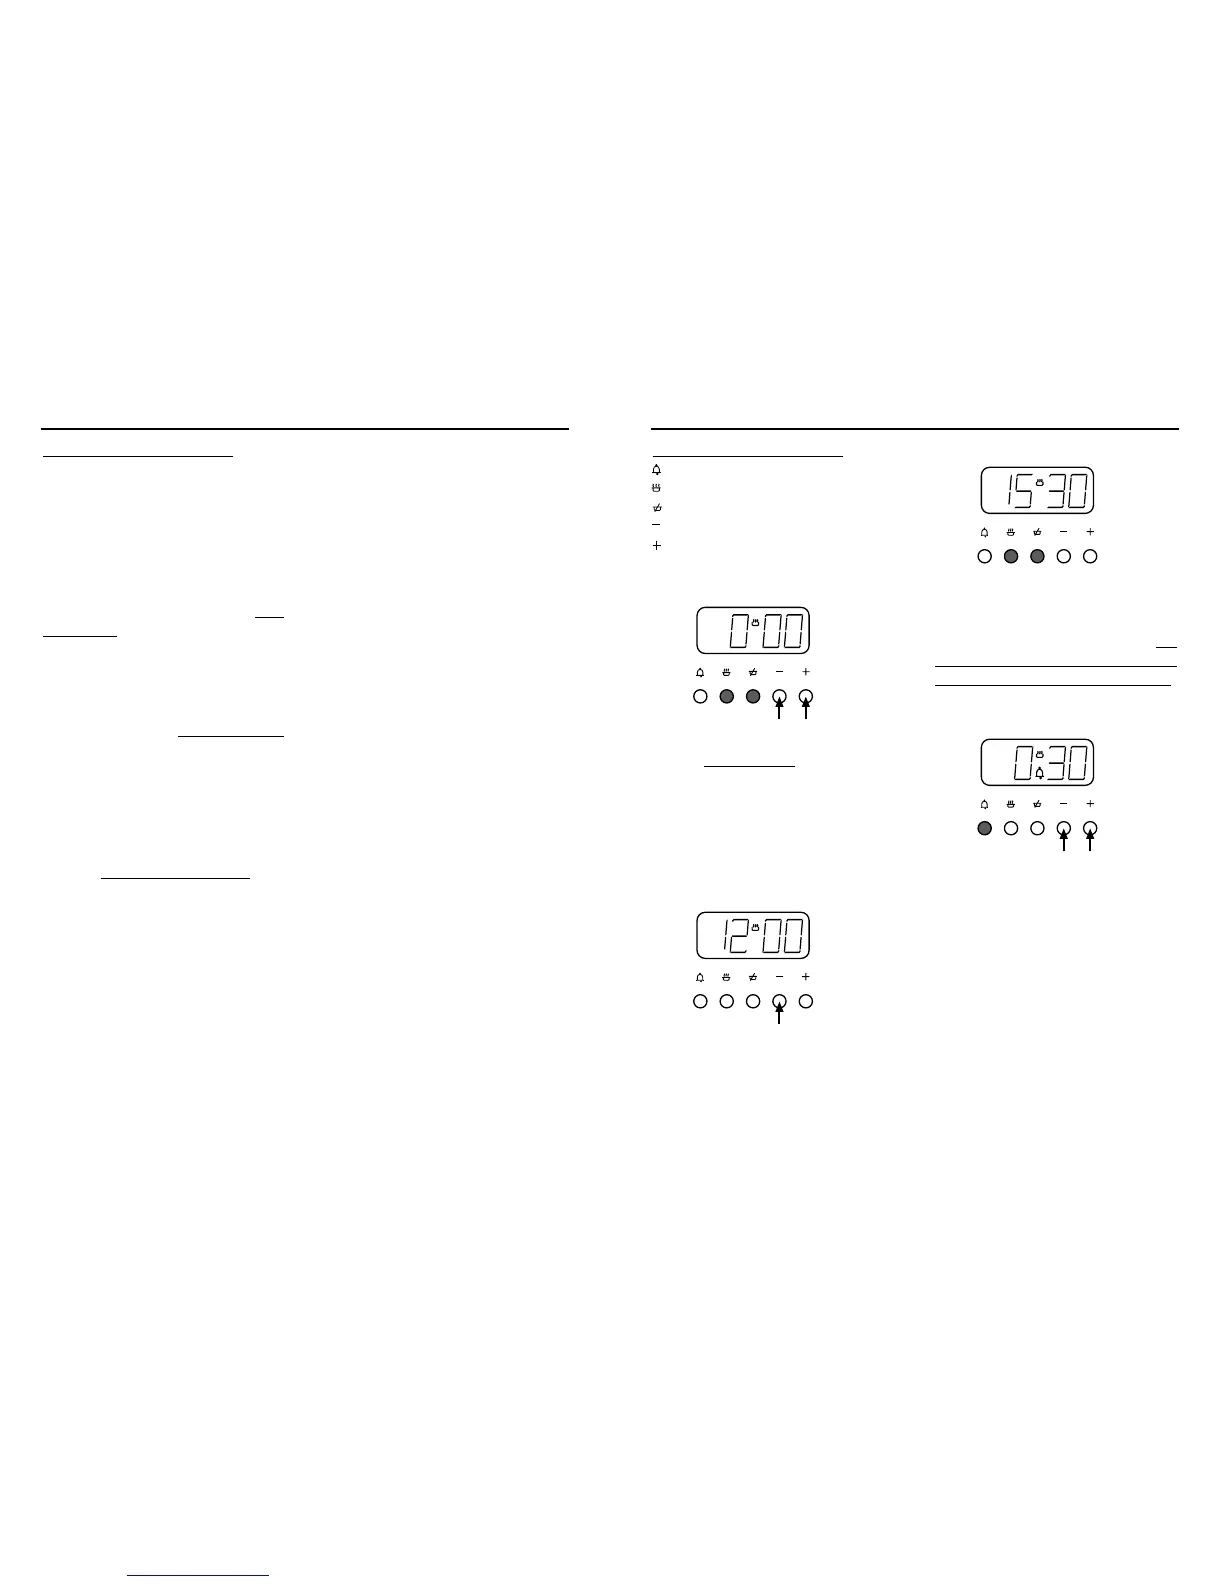
The Programmer Buttons
minute minder
cook time
ready time
minus
plus
To set the “Time of Day”
Press the cook time and ready time
buttons simultaneously
, and keep the
buttons depressed. Use the plus and
minus buttons to set the time of day,
eg; 12.00.
A (Auto) symbol goes out, cookpot
symbol comes on.
To select an alarm tone
Press the minus button to listen to the
first tone.
Release the minus button and press it
again to listen to the second tone, etc.
Releasing the minus button after the
tone has sounded will automatically
select that tone.
Manual operation
To set the programmer to manual
operation at any time (cancelling any
automatic setting), press the cook time and
ready time buttons simultaneously. The
programmer must be set to manual before
the appliance can be used manually.
Setting the minute minder
Press the minute minder button, then
use the plus and minus buttons to set
the required time.
The minute minder (bell) symbol will
appear on the display.
You can cancel the minute minder at
any time by pressing the minute
minder button and the minus button
until the display returns to 0.00.
After setting, the display will revert to
show the time of day, but you can press
the minute minder button, and the
display will show the minutes remaining.
The tone will sound at the end of the
time set - to cancel the tone, press the
minute minder button.
23
PROGRAMMER / CLOCK