8
Post
Duramax General
Purpose Epoxy or
equivalent
Brick
Figure 4.0
Figure 4.1
10gx30 stainless steel
countersunk screws
M12x120 anchor bolt
100x100 Post Shoe
50x50x6.0mm Washer Plate
Post
3
0
mm
3
0
mm
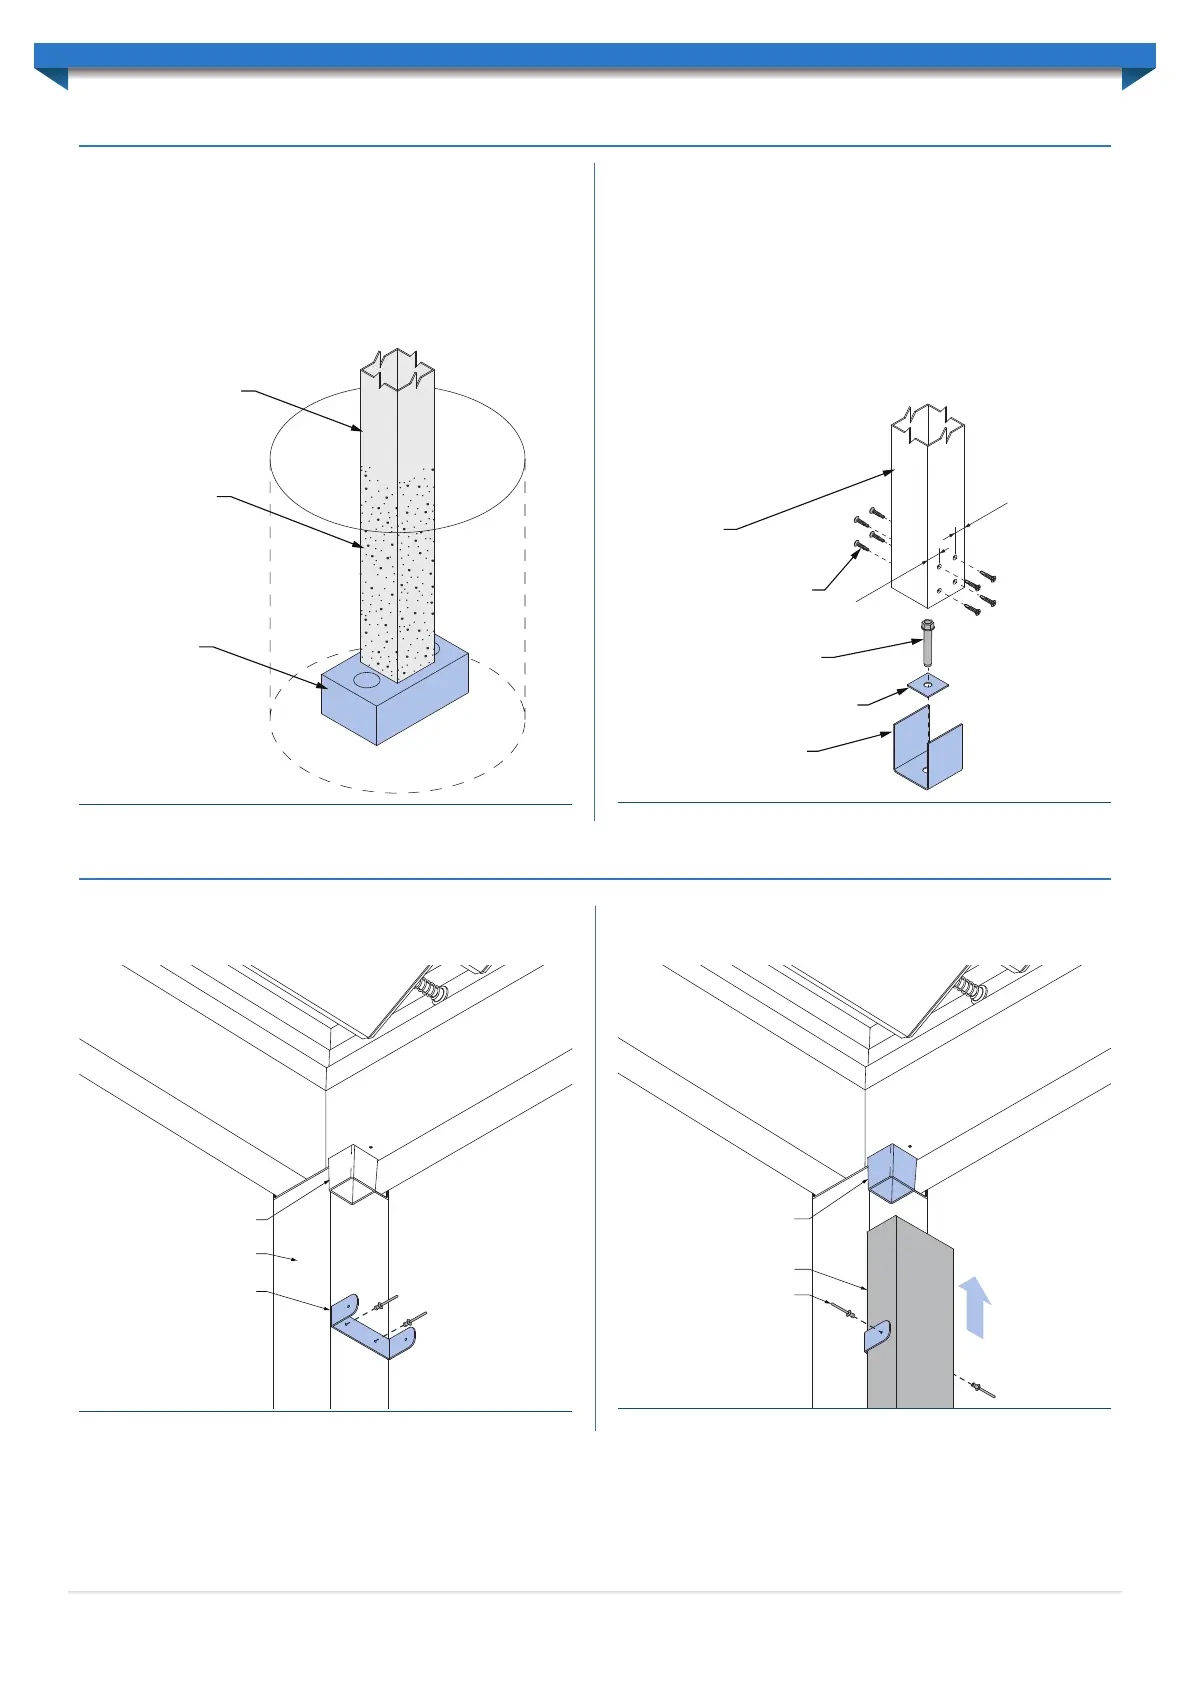
FOOTING INSTALLATION
Into Concrete Footings
If fixing the columns into the ground, dig the holes to the specified size. Place a half brick
in the bottom of the hole (Figure 4.0). Measure from the underside of the beam to the
top of the half brick and cut posts to this length at each post location. Any area of the
posts in contact with the concrete must be coated with Duramax General Purpose
Epoxy (or an equivalent).
Use construction props or bracing to hold columns in position, but do not concrete
the post-holes at this stage.
Onto Concrete Footings
Where posts are fixed onto concrete a Post Shoe will be used.
Fix the Post Shoe to concrete using one M12x120mm Anchor Bolt in conjunction with
a 50x50x6.0mm washer plate (Figure 4.1). Fasten the post to the Post Shoe with four
10gx30mm stainless steel countersunk self-tapping screws on either side (Figure 4.1).
Ensue screws are 30mm in from the Post edges. Countersinks should have an outside
diameter of approximately 8mm to allow the screw head to sit flush.
Note: All screws within the unit must be fastened by hand using a screw-driver, or a
low-torque, low-speed drill.
Use construction props or bracing to hold columns in position, but do not bolt to the
concrete slab at this stage.
100x50mm downpipes must be installed beneath each downpipe outlet. Downpipes will
run in-line with unit posts.
Fix the downpipe strap to the post using the rivets provided (Figure 5.0).
Downpipe
Downpipe outlet
Secure downpipe
with rivets
Figure 5.1
Post
Downpipe strap
Downpipe outlet
Figure 5.0
Slide the downpipe up and around the downpipe outlet (Figure 5.1). Secure 100x50mm
downpipe to the downpipe strap using rivets.
DOWNPIPE INSTALLATION