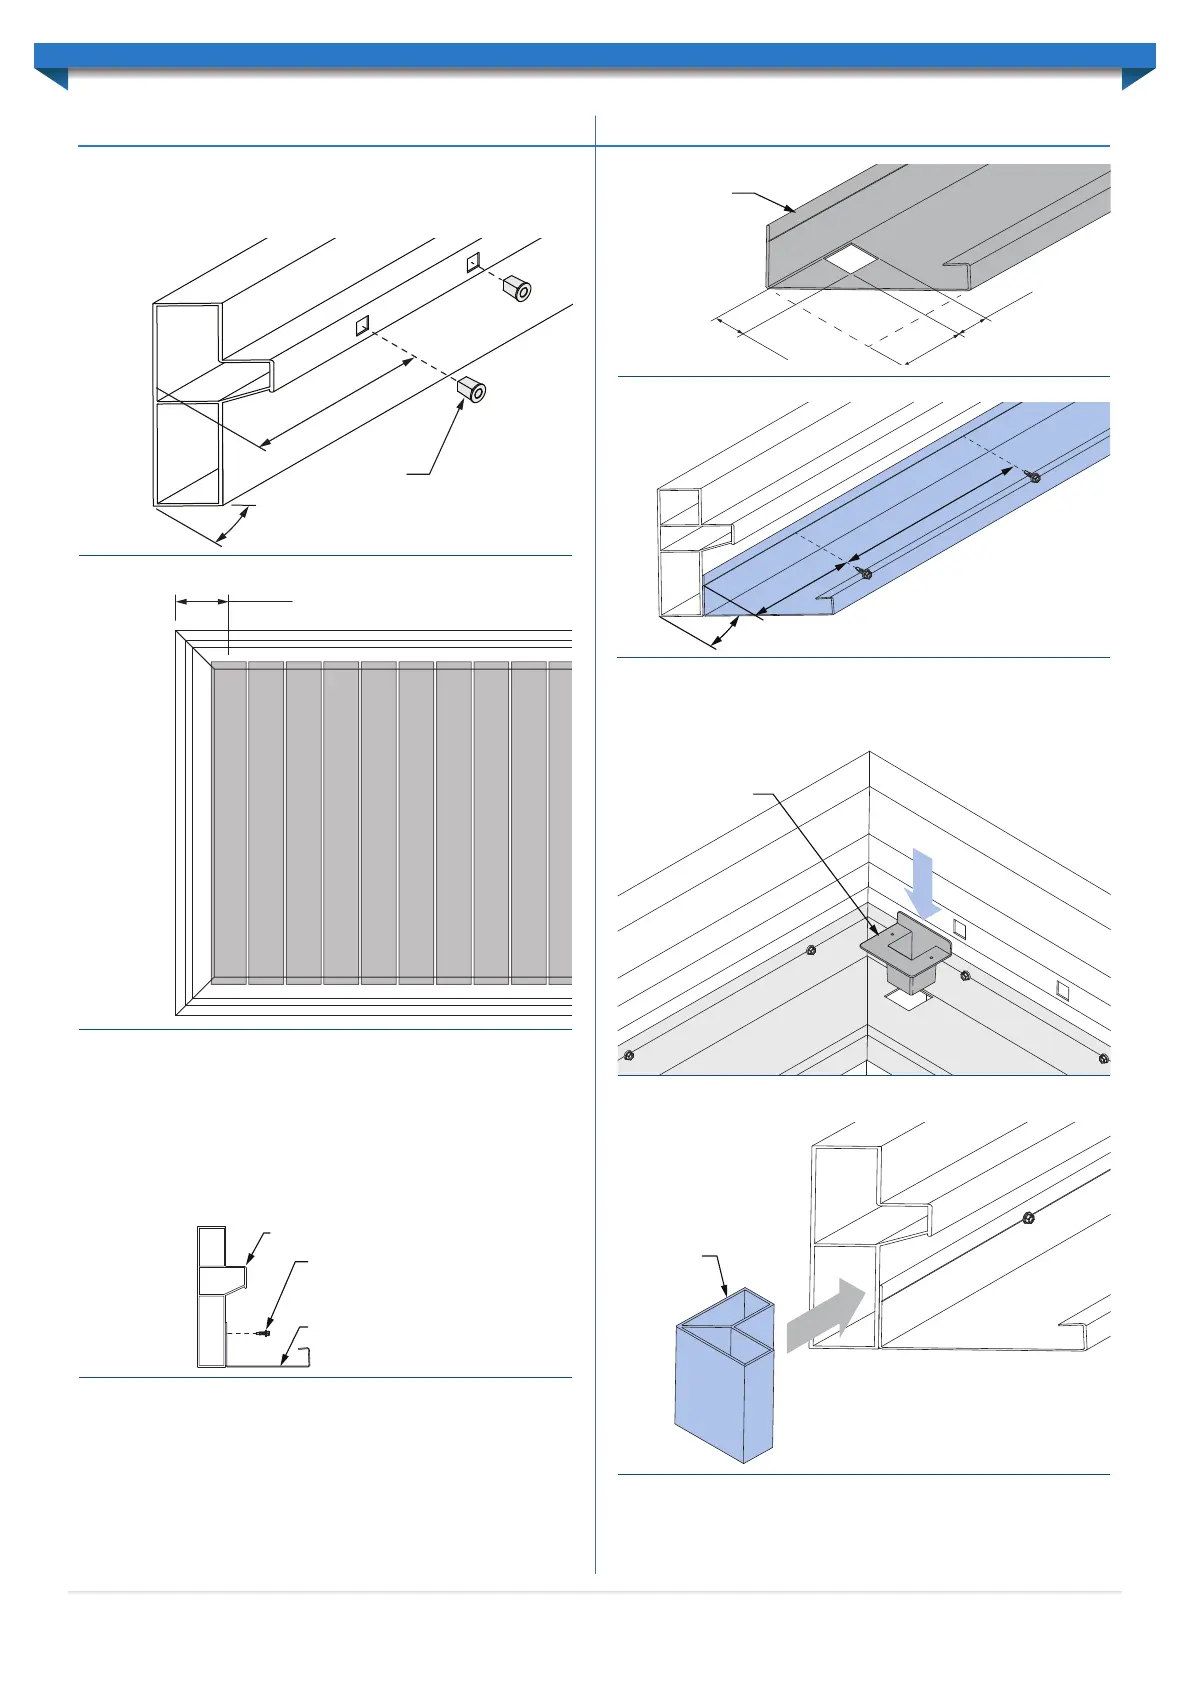
Note: Please ensure to follow the site plans supplied to ensure the mounting beams
are installed in the correct orientation. The Datum end of beams will be identifiable by
measuring the first mounting hole centre 270mm in from the end of the beam (Figure
2.0 & Figure 2.1).
Beam Preparation
The framework must be assembled out from the fascia beam already fixed to the
structure. If the unit is Freestanding the beams must be propped with two posts secured
as per the section ‘Post Installation’.
Internal box gutters will sit inside the assembled framework with the bottom face of the
gutters flush with the bottom face of the beams (Figure 2.2). Gutters will be supplied
already mitred to suit the frame size. Gutters must be fixed to each beam before the
framework can be erected.
Before installing the gutters the downpipe outlet location(s) must be determined. A
rectangular 45x45mm cut-out must be created on the header-beam gutter (Figure 2.3).
Make sure the cut-out is aligned with the rear internal face of the gutter.
Begin gutter installation by placing & clamping a length of the pre-mitred gutter against
the corresponding beam. Secure the gutter to the framework using 12x20 Self-Drilling
screws with Neoprene washers at 500mm centres (Figure 2.4). The end fixings must be at
least 100mm in from each end. All gutter end mitres should be flush with the beam mitres.
Continue installing the remaining gutters using the same method. Insert the Downpipe
Outlet(s) within the pre-cut holes and secure using two 3.2mm rivets (Figure 2.5). Seal
around the outlet with silicone as required.
At each Beam-to-Beam join a Corner Knuckle must be internally fitted (Figure 2.6).
Create ø3.2mm pilot holes with countersinks and fix the Corner Knuckle through
the external face of the Fascia beam using two 10gx30mm stainless steel countersunk
self-tapping screws (Figure 2.7). Countersinks should have an outside diameter of
approximately 8mm to allow the screw head to sit flush.
12x20 self-drilling screws
with neoprene washers at
500mm centres
Gutter
Beam
Figure 2.2
5
0m
m
4
5m
m
4
5m
m
Gutter
Figure 2.3
Figure 2.4
45°
5
0
0m
m
c
e
n
t
r
e
s
10
0m
m
m
i
n
.
Downpipe Outlet
(rivet from
underside of gutter)
Figure 2.5
Corner
Knuckle
Figure 2.6
270mm
@
Datum
45°
Mounting
Bushes
Figure 2.0
Figure 2.1
270mm
DATUM
5
FRAMEWORK ASSEMBLY
 Loading...