Do you have a question about the Strom SSRTPR06 and is the answer not in the manual?
Explains the function and benefits of a programmable room thermostat for homeowners.
Explains timed control of central heating and programming options like 24hr, 5/2 Day, and 7 Day.
Advises users to have the initial configuration set by an installer for optimal performance.
Details the default heating programs available: 24 Hour, 5/2 Day, and 7 Day.
Provides templates for users to record their personalized heating schedules for Zone 1 and Zone 2.
Step-by-step guide on how to review the currently active heating schedule on the thermostat.
Detailed instructions on how to modify programmed times and temperatures for heating events.
Explains how to temporarily boost the temperature until the next programmed event.
Details how to switch the thermostat to manual mode, overriding programmed schedules.
Instructions on how to exit manual mode and return the thermostat to automatic operation.
Guide on enabling and using Holiday Mode to save energy while away, and how to cancel it.
Step-by-step instructions for performing a factory reset on the thermostat controller.
Information regarding the 12-month default guarantee and the 3-year parts guarantee registration.
Lists specific conditions and damages that are excluded from the product guarantee.
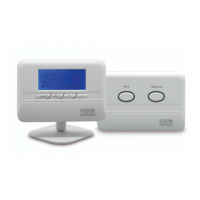
Details the power source for the controller unit.
Specifies the available programming modes (7 Day, 5/2 Day, 24 Hours).
Indicates the number of timed events the controller can manage per day.
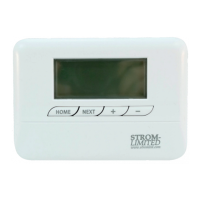
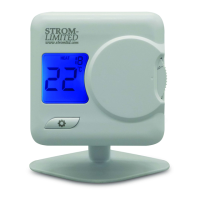
States the material composition of the controller.
Provides the physical dimensions of the controller unit.
Details the power requirements for the receiver unit.
Specifies the electrical load capacity of the receiver's contacts.
Indicates the maximum unobstructed distance for wireless communication.
States the radio frequency used for wireless communication.
Provides the physical dimensions of the receiver unit.
Critical warning about isolating the AC mains supply before installation or maintenance to prevent death.
States that instructions from this point onwards are for qualified electricians and users should contact one for adjustments.
Specifies that installation must be done by a competent electrician according to regulations.
Indicates that the unit is designed for fixed electrical wiring installations.
Mandates appropriate fusing for the system, not exceeding 6 amps and using a Class A switch.
Recommends using cable sizes between 1.0mm² and 1.5mm² for wiring.
Emphasizes the need to earth metal surfaces where the unit is mounted.
Advises that the product is not designed for mounting onto a standard back box.
Specifies that maintenance should be performed by a qualified engineer every 12 months.
Stipulates that maintenance requires reading instructions and disconnecting the mains supply.
Advise against placing the thermostat near external doors or draft sources.
Warns against mounting the thermostat on exterior walls or cold surfaces.
Instructs not to position the thermostat near or above heat sources.
Recommends mounting the thermostat at approximately 1.5m above floor level for accurate readings.
Outlines the procedure for replacing an existing wireless receiver with a new one.
First step in replacing an existing receiver: isolate the mains power supply.
Second step: carefully remove the old wireless receiver from its backplate.
Guidance on checking old backplate compatibility, integrity, size, and wiring configuration.
Advises replacing the old backplate with the new one if there are any doubts about compatibility.
Highlights the importance of adequate clearance around the backplate for receiver installation.
Instruction to mount and secure the new receiver onto the backplate.
Directs users to proceed with the controller commissioning process after installation.
Provides the installation procedure for new setups without an existing receiver.
First step for new installations: ensure all mains power supplies are isolated.
Details preparing the installation area, including clearances and wiring entry points.
Advises on ensuring the receiver back is not exposed and the surface is suitable for mounting.
Instructions on marking fixing points, drilling, and securing the wall plate.
Instructs to wire the backplate according to the provided wiring diagram.
Directs users to proceed with the controller commissioning process after wiring.
Safety reminder to isolate mains AC supply before wiring or maintenance.
Recommendation for using 1.0mm² or 1.5mm² cabling for wiring connections.
Visual diagram illustrating the wiring connections on the backplate.
Schematic representation of the electrical connections for the system.
Overview of the commissioning process: fitting, wiring, testing, and pairing.
Ensures that power has been restored to the receiver unit.
Verifies that the controller powers on and responds to user interactions.
Confirms the wireless pairing between the thermostat controller and the receiver.
Checks and sets the correct date and time on the controller.
Configures the backlight timeout settings for the controller display.
Sets the user's heating schedule, referencing pages 11 and 9.
Instructs to leave the FUNCTION SLIDER in the 'AUTO' position.
Ensures a copy of the manual is left for the homeowner.
Step-by-step guide for setting the correct time and date on the controller.
Instructions on how to adjust the controller's backlight timeout duration.
Procedure for testing the wireless communication link between the thermostat and receiver.
Steps to re-establish the wireless connection if communication is lost.
Explanation of symbols indicating the status of the wireless link.
Instructions on how to enter the advanced functions menu.
Configuration option for the 'Optimum Start' feature.
Configuration option for the 'Optimum Stop' feature.
Configuration option for 'TPI' (Chronoproportional Control).
Adjusts the temperature sensitivity (swing) of the thermostat.
Allows calibration of the thermostat's temperature sensor.
Sets the number of timed events per day (4 to 6).
Adjusts the contrast of the controller's LCD screen.
Explains how Optimum Start works by monitoring temperature and adjusting start times.
Explains Optimum Stop's function in manipulating heating stop times.
Highlights benefits of TPI for energy saving and carbon emission reduction.
Explains TPI as a load compensator balancing boiler output with heat loss.
Discusses limitations of systems without TPI regarding condensing boiler efficiency.
Details benefits of TPI including accurate control and fuel cost savings.
States the requirement for landlords to service heating equipment annually.
Guide on accessing the landlord functions menu using the FUNCTION SLIDER.
Explains the password protection for landlord functions and default code.
Procedure for entering the security code using adjustment selectors.
Describes how to enable or disable the service function.
Details how to enable and set the service phone number.
Explains setting the period (1-450 days) before the next service is due.
Defines the number of days notice provided before the service is due.
Describes three settings (0, 1, 2) for restrictions when service is overdue.
Instructions for changing the service menu access code.
| Brand | Strom |
|---|---|
| Model | SSRTPR06 |
| Category | Thermostat |
| Language | English |