6 www.stryker.com
EN 700000544314 Rev-AD
To Set the Power Mode
Upon initial connection to facility power, the power mode indicator illuminates
solid green to indicate that the charger is operating in standard mode.
1. Choose the ongoing power mode for the charger. See Power Modes for
mode descriptions.
- To operate the charger in standard mode, no further action is needed.
The charger is ready to use.
- To operate the charger in eco (economy) mode, hold the cycle button
for 7 seconds. The power mode indicator will turn solid blue.
NOTE - Change the power mode any time by holding the cycle button for 7
seconds.
Using Your Product
To Charge a Battery
CAUTION - When battery packs require postsurgical sterilization, always allow
the battery packs to cool for one hour before charging. Excess heat buildup
from sterilization and charging will damage the battery packs.
NOTE
▪ For maximum capacity, charge the battery between each use.
▪ A typical charging sequence takes between 5 and 30 minutes. A fully
expended, large battery may take up to 150 minutes to charge. Ensure the
battery is at room temperature before charging.
1. If operating in eco (economy) mode and the charger is on standby (the
power mode indicator is flashing blue), first press the cycle button to wake
up the charger.
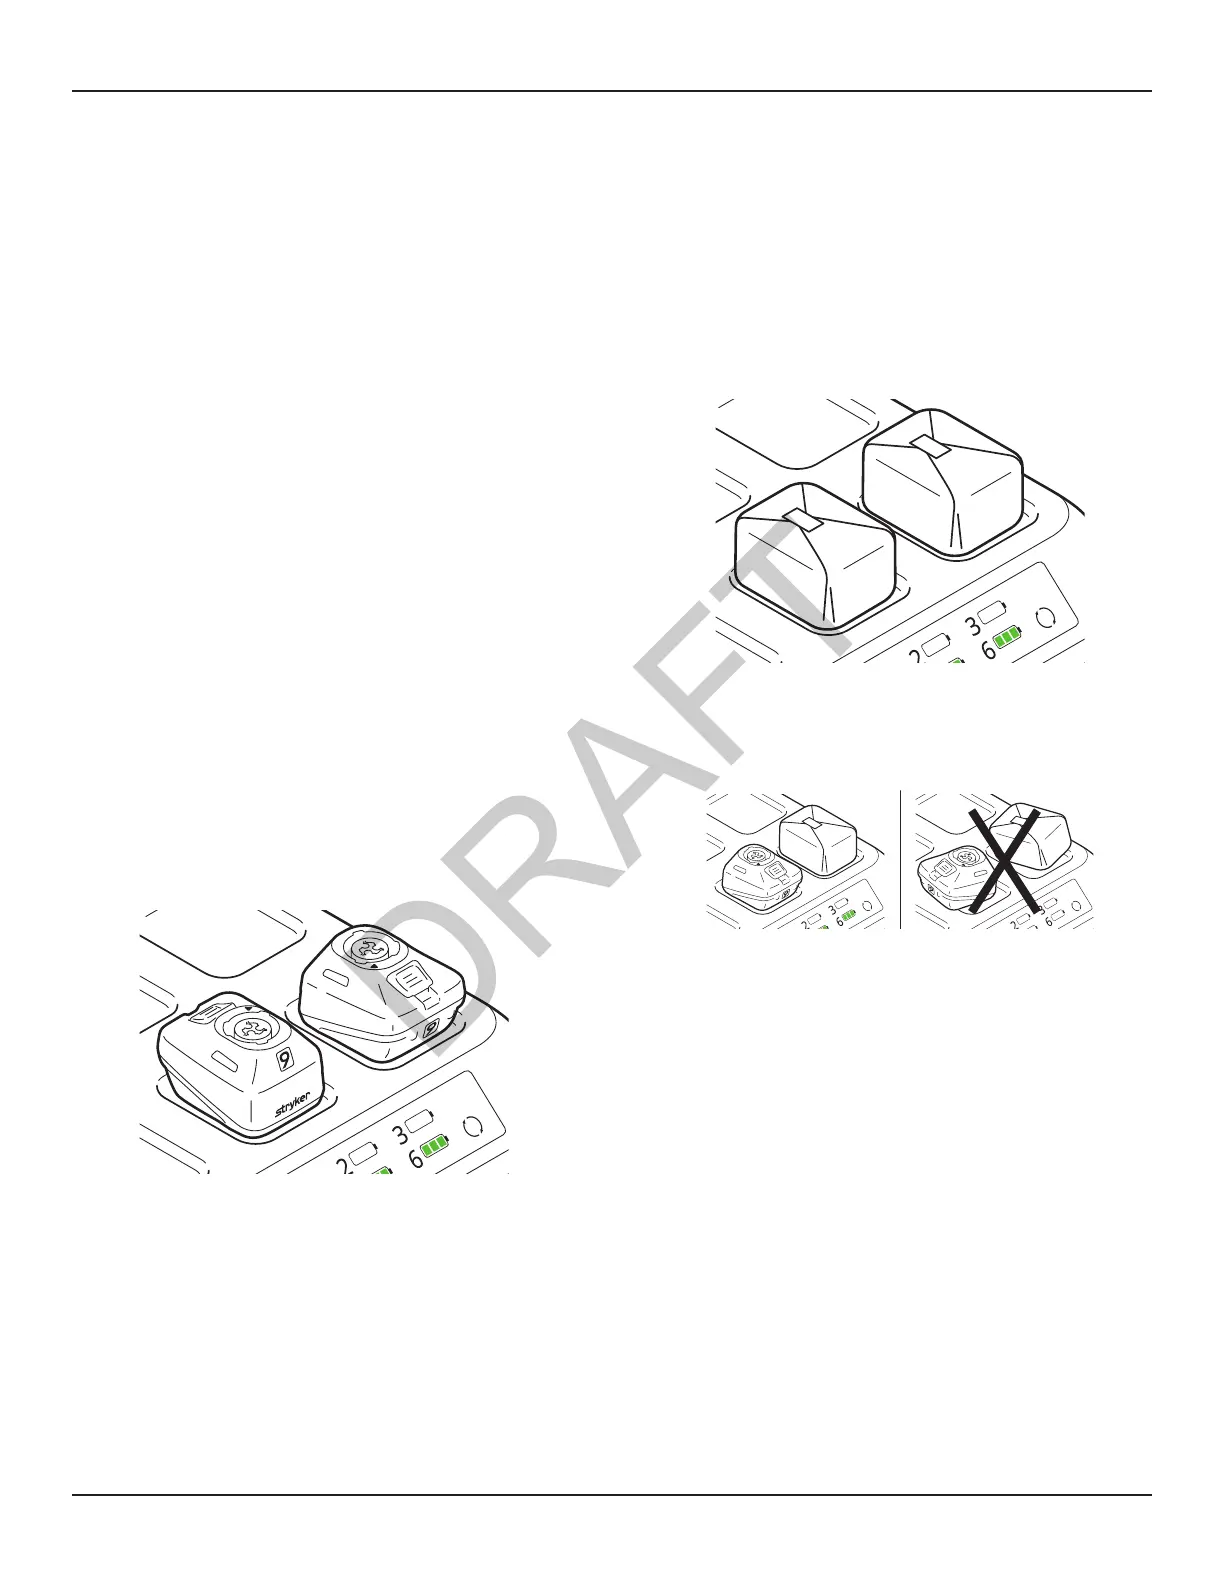
2. Load the clean, dry battery(s) onto the charger in any one of the following
configurations:
Before sterilization (Figure 3):
- individually, unwrapped
Figure 3 – Load battery before sterilization
After sterilization (Figure 4):
- individually, wrapped in sterilization wrap
NOTE - For wrapped battery packs, ensure the sterilization wrap is:
- approved by an applicable regulatory body
- labeled for use with the validated sterilization parameters in the
System 9 Processing Instructions manual supplied with the handpiece
- wrapped flat and tight across the bottom of the battery
WARNING - If a metal-backed sterilization indicator is included in the
sterilization wrap, make sure the indicator is not positioned near the bottom
(charger side) of the battery. Failure to comply will result in a metal detection
error, the battery will not charge, and the metal object may get hot; see
Troubleshooting.
Figure 4 – Load battery after sterilization
3. Make sure the flat bottom of the battery pack is completely situated within
the charger bay and fully in contact with the charger surface (Figure 5).
Figure 5 – Ensure correct battery placement
4. Upon contact with the battery, the battery status indicator for the occupied
charger bay flashes green while the battery communicates with the
charger.
NOTE - If the charger detects a misaligned battery or a metal object between
the battery pack and the charger bay, the battery status indicator for that bay
displays 3 solid amber bars, and the bay status indicator (bar) flashes amber;
see Troubleshooting.
5. After a few seconds, the battery status indicator displays the state of
charge; see State of Charge.