www.SteamPoweredRadio.Com
1. Encend1do
del
aparato
1.1
.
Antes
de
encender
Es
importante comprobar
la
posici6n del
selec-
tor
de voltaje antes
de
encender
el
aparato.
El
valor que indique
el
selector debe corresponder-
se
con
el
valor nominal del voltaje del local
donde
se
va
a utilizar. No
se
debe olvidar,
si
fuera necesario,
el
cambio del fusible
(vease
puntos @ a @ anteriores).
Debe mencionarse que
la
frecuencia
de
la
corriente,
de
50 a 60 Hz, no afecta
en
nada
al
funcionamiento del B77.
1.2.
Enchufe del aparato a
la
red
Conecte
el
cable que
se
sumistra, a
la
toma
@
del aparato y al enchufe
de
la
red.
Con ayuda de un
cab
le
adecuado,
conectese
la
salida
OUTPUT
@ a
la
entrada
para magnet6fono (TAPE INPUT) del equipo
de
amplificaci6n que
se
utilice.
Los
ajustes de nivel
@ y @ deben estar girados totalmente
en
sentido de
las
agujas del reloj.
En
forma
ana
l
oga,
conectense
las
salidas
del equipo
de
amplificaci6n a
la
entrada del
aparato Esto puede hacerse a traves
de
las
tomas
AUX
INPUT @
y/o
de
la
toma
DIN
@. Utilicense
las
tomas @ para conexi6n
con otros aparatos R EVOX.
Para
mas
detalles sobre
la
forma de
conectar
el
aparato y l
as
distintas posibilidades,
consultense
las
ilustraciones del
capitulo
13.
Si
el
magnet6fono no
esta
conectado a
un
equipo de amplificaci6n,
se
pueden
controlar
la
grabaci6n y reproducci6n con
cascos,
conec-
tados a
la
toma PHONES @.
Cuando
se
use
un micr6fono, conectese
a
la
toma MIC @
en
el
panel RECORD
LEFT.
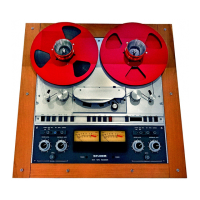
1.3.
Colocacion
de
la
cinta
Bobinas de colocacion directa
(de
agujero central pequeno y tres ranuras)
Colocar
una
bobina vacia
en
el
soporte derecho
y una llena
en
el
izquierdo. Asegurarse que
las
ranuras
de
las
bobinas entran
en
los salientes de
los
ejes
de
los soportes hasta
el
fondo (puede
ser
util
para
esta
operaci6n girar ligeramente a
derecha e izquierda la bobina mientras
se
pre-
siona ligeramente). Tirar del eje del soporte que
sobresale
de
las
bobinas hacia afuera y girarlo
60 grados a fin
de
dejarlas perfectamente
su-
jetas.
Bobinas tipo
NAB
Estas
bobinas necesitan adaptadores
tipo
NAB
que
se
fijan previamente como
en
el
caso
anterior. Una
vez
colocados los adaptadores, y
las
bobinas encajadas
en
ellos,
se
gira
la
parte
que sobresale del adaptador
en
sentido
de
las
agujas del reloj hasta
el
bloqueo total. Con
ambos tipos de bobinas, la sujeci6n
esta
asegura-
da
y
el
aparato puede trabajar tanto
en
posici6n
1. Operatinq the equipment
1.
1.
Before switching on for the fir
st
tim
e
Do
not
forget
to
check the setting
of
the voltage
selector on the recorder's back panel. The figure
positioned opposite the marking must cor-
respond
with
the nominal line voltage
of
your
local electric current supply. Depending on the
range
into
which the supply voltage falls,
re-
placement
of
the mains fuse may be necessary
as
wel
l.
For
additional
information,
please
check @ and @ on the index list.
In
case
you are taking
your
B77
re-
corder
to
different
countries,
you
should pay
particular
attention
to
the above-mentioned
points. There
is
no
need
to
worry
about the
power line's frequency, because the equipment
will
work
equally well on either 50
Hz
or
60 Hz
without
conversion.
1.
2.
Connecting
to
the
AC
supply
Connect the supplied power cord
to
the mains
inlet
@ and plug its
other
end
into
a nearby
AC wall
outlet.
-
Usi~
suitable audio cable, connect the
OUTPUT
\2.V
to
the tape
input
of
an
amplifier
or
receiver. The
LEVEL
controls @ and
@ may be turned
fully
clockwise
for
the
time
being.
Similar
to
the above, connect the ampli-
fier's (or receiver's) tape
output
to
the
input
of
the tape recorder. This
is
possible in
two
ways:
Connect either
to
AUX
I
NPUT
@
or
to
the
DIN socket
@. When interconnecting
with
other
REVOX
equipment, always
use
the phono
socket
@.
The complete system hook-ups
as
illus-
trated in chapter
13 will show the various pos-
sible forms
of
interconnection.
In
case
you are not using
an
amplifier,
monitoring
of
the
input
and
output
signal
is
possible
with
headphones
as
well. Connect the
headset
to
the jack PHONES
Q§.
- When
usi~a
microphone, connect
it
to
the jack M IC @ on the RECORD
LEFT
panel.
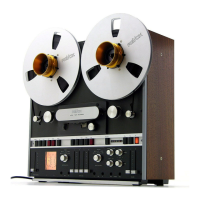
1.3. Loading the recorder with tape
Cine
reels
Pl
ace
a
full
tape
reel
onto
the
left
reel support
and
an
empty
reel
onto
the right
reel
support.
Lift
the three-pronged shaft sections which pro-
trude
from
the center
of
each
reel
and
turn
them
by
60°
to
lock the
reels
on
their
support.
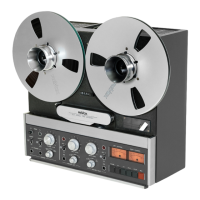
NAB
reels
If
NAB
reels are
to
be
used
two
NAB
adaptors
must first be placed
onto
the
reel
support.
Lift
the three pronged shaft sections
which
protrude
from
the center
of
each
adaptor and
turn
them
by
60° to lock the adaptors
onto
the
reel
sup-
ports. Place
NAB
reels
over the adaptors and
lock the
reels
by
rotating the upper
portion
of
each
adaptor in clockwise direction
until
a
snap
Messa
in
funz1one
1.
1.
Prima di mettere sotto tensione
E
molto
importante verificare, in modo parti-
colare
la
prima volta che
si
mette
sotto
tensione,
la
posizione del selettore di tensione. 11 valore
indicato deve corrispondere a quello della rete
locale.
Se
una correzione e necessaria non di-
menticarsi di cambiare anche ii fusibile rete.
Vedere
l'indice
alle voci @ e @.
Ouesto
controllo
e sempre piu im-
portante
se
Voi
viaggiate in
altri
paesi
con
ii
Vostro B77. Non occorre invece alcuna regola-
zione per
la
frequenza della rete, l'apparecchio
lavora
da
50/60
Hz
senza
commutazione.
1.2.
Collegamento dell'apparecchio
Con
l'aiuto
del cavo rete, collegare
la
presa
@
dell'apparecchio alla
presa
rete.
L'uscita
OUTPUT
@
sara
collegata
all'entrata registratore di un amplificatore o di
un apparecchio di commando.
Le
regolazioni
LEVEL
@ e @ sono normalmente aperte
al
massimo e cioe girate a destra
lino
alla fine.
L'uscita registratore dell'ampli ficatore
sara
collegata all'entrata del B77. Due possibili-
ta:
presa
Cinch
AUX
INPUT @ o
presa
DIN
@. Utilizzare
la
presa @ per ii collega-
mento con un apparecchio REVOX.
Per
maggiori dettagli sulle possibilita del
collegamento, consultare
le
illustrazioni del
paragrafo
13.
Se
ii registratore non e collegato a un
amplificatore, potete controllare
la
registrazione
e
la
lettura a mezzo di una cuffia inserita alla
presa
PHONES @.
II
microfono
si
collega alla
presa
MIC
@ (blocco registrazione sinistra RECORD
LEFT)
1.3.
Messa
a punto del nastro magnetico
Bobine a tre tacche
Mettere una bobina vergine
sul
piatto
sinistro e
una bobina vuota
sul
piatto
destro. Assicurare ii
blocco chiusura delle bobine sollevando ii perno
d' arresto facendolo ruotare di
60°.
Bobine
NAB
Per
queste bobine necessita l'impiego di due
adattatori
che
si
fissano come
le
bobine a tre
tacche. Piazzare in seguito
le
bobine e bloccarle
girando
la
parte superiore dell'adattatore nel
senso
delle lancette di un orologio
fino
al
bloc-
caggio.
Nei
due
casi
ii fissaggio delle bobine e
ben assicurato
sia
in
posizione orizzontale
che
verticale dell'apparecchio.
11
 Loading...