12
Screws from bottom side Screws from bottom side
5.0 PSU PCB removal
5.1 Perform procedure 1.
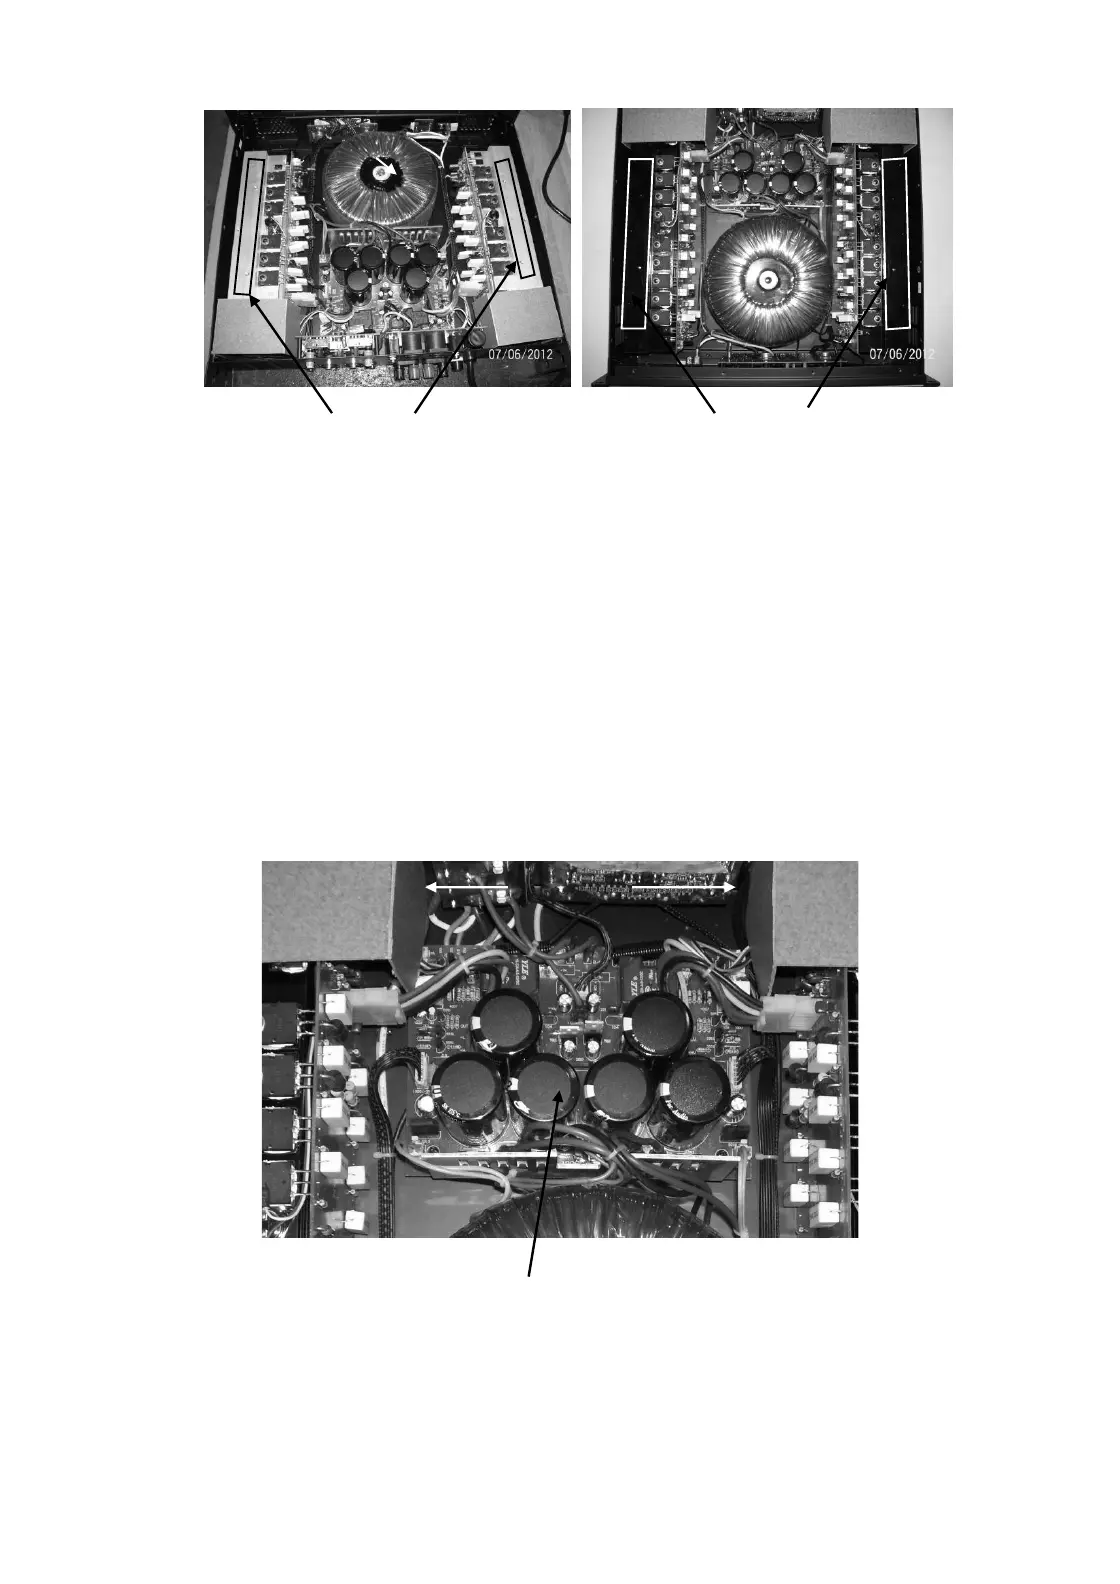
5.2 Disconnect the wire harness going from PSU to Power amp, Input board, Output board, Front Control board
& Transformer. Also remove fan tunnel.
5.3 Remove 4 X M3X6 Pan Head Black Machine screws fitted at corners.
5.4 Lift the board upward carefully.
6.0 PSU PCB Replacements
6.1 Place the PSU board and align mounting holes.
6.2 Re-fit the hardware as mentioned in 5.3
6.3 Re-connect harnesses as mentioned in 5.2
PSU Board
Fantunnel