-
29
-
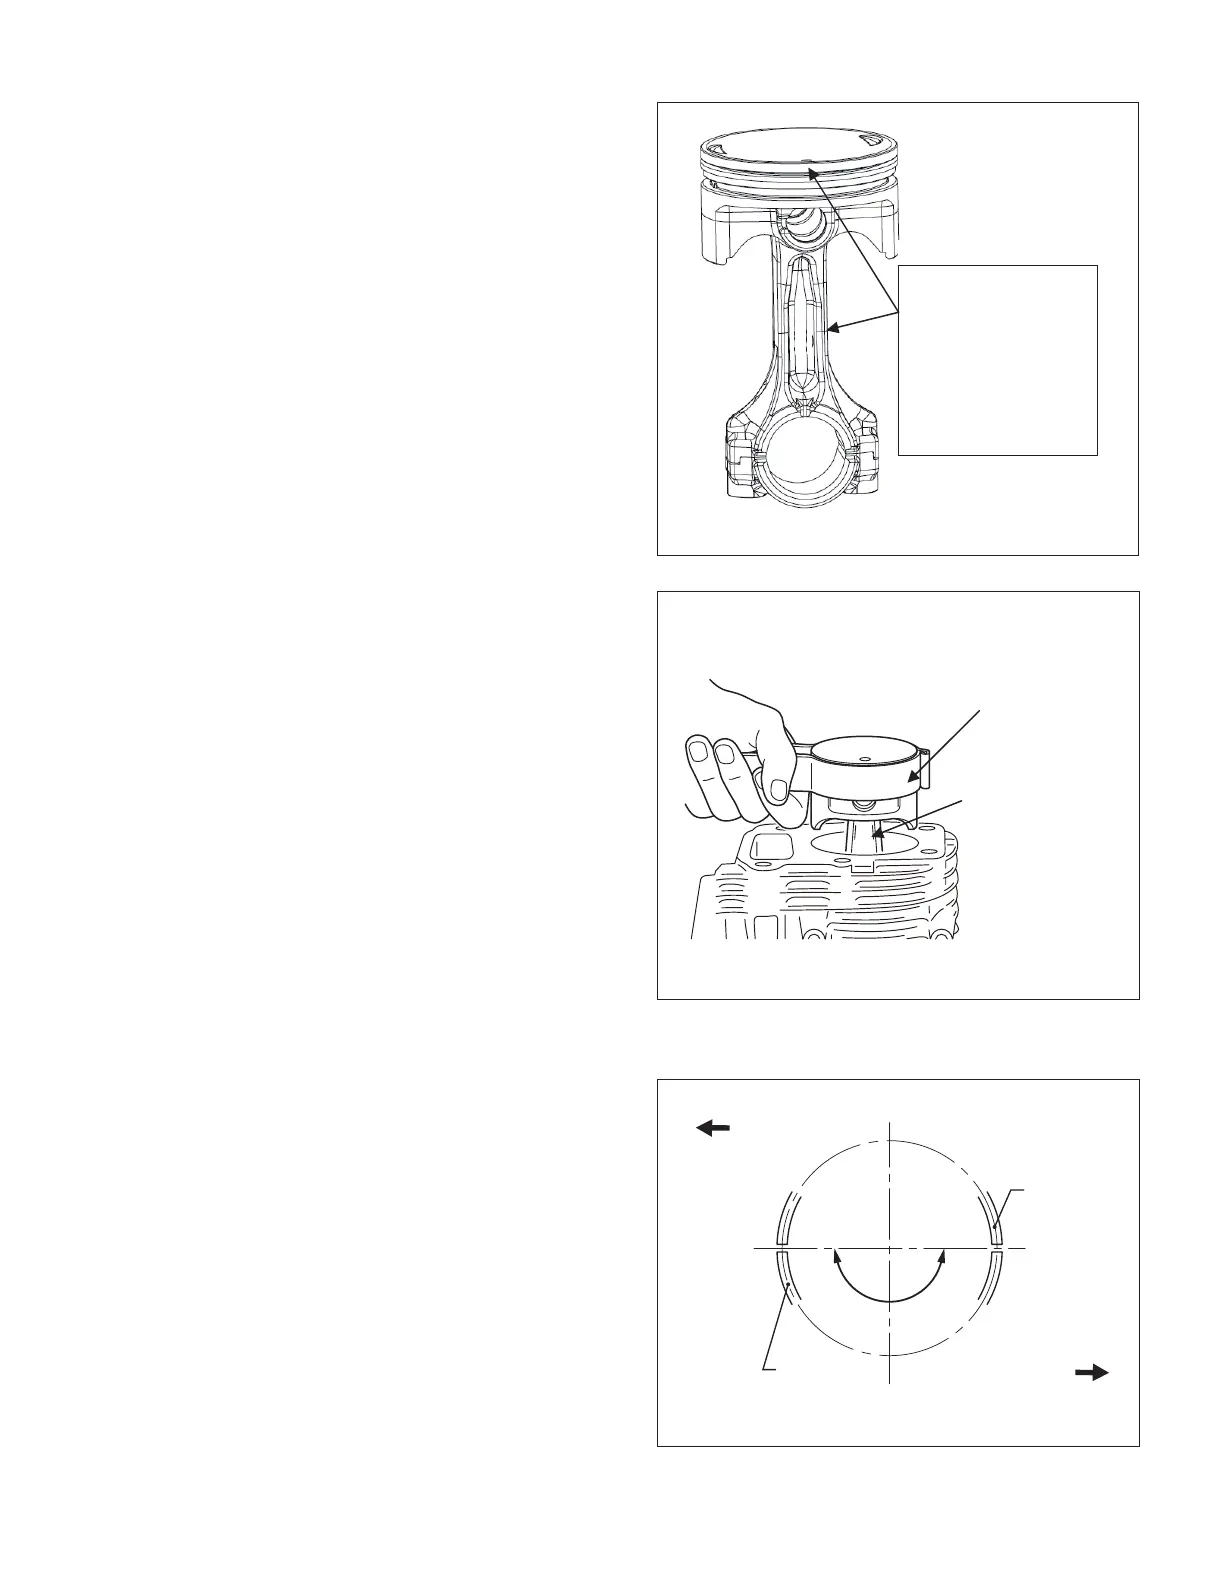
(3) PISTON AND CONNECTING ROD
The piston is attached to the connecting rod by
the piston pin
When assembling the piston and connecting
rod, make sure to align the mark on the piston
head with the ‘JCC’ mark on the connecting rod
NOTE 1: Before assembling the connecting rod,
apply oil to its small end
NOTE 2: Be sure to insert the clips in the two
ends of the piston pin and check the
clips for any play
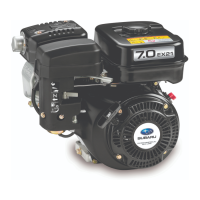
(4) CONNECTING ROD
(a)Installthepistonandconnectingrodassembly
intothecylinderbyholdingthepistonrings
withtheringguide,withthe‘JCC’markon
theconnectingrodontheflywheelside.(Ifyou
donothavearingguide,holdthepistonrings
withthefingersandtaptheupperpartofthe
pistonwithapieceofwood.)
NOTE1:Applyoiltothepistonrings,thelarge
endoftheconnectingrodand
cylinderbeforeinstallingthe
connectingrodintothecylinder.
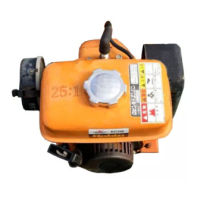
NOTE2:Thepistonringgapsshouldbe
positionedaroundthepistonat
180-degreeintervals.
When assembling
the piston and
connecting rod,
make sure to align
the mark on the
piston head with the
“JCC”mark on the
connecting rod.
JCC
PISTON RING GUIDE
AND PISTON RING
FLYWHEEL SIDE
“JCC” MARK
JCC
OIL RING
FLYWHEEL SIDE
("JCC" MARK SIDE)
P.T.O SHAFT SIDE
TOP RING
180°