2-4
#7013455 - Revision A - April, 2009
Installation Information
International W
International W
ine Storage
ine Storage
(ICBWS)
(ICBWS)
Series
Series
Anti-Tip Bracket Installation
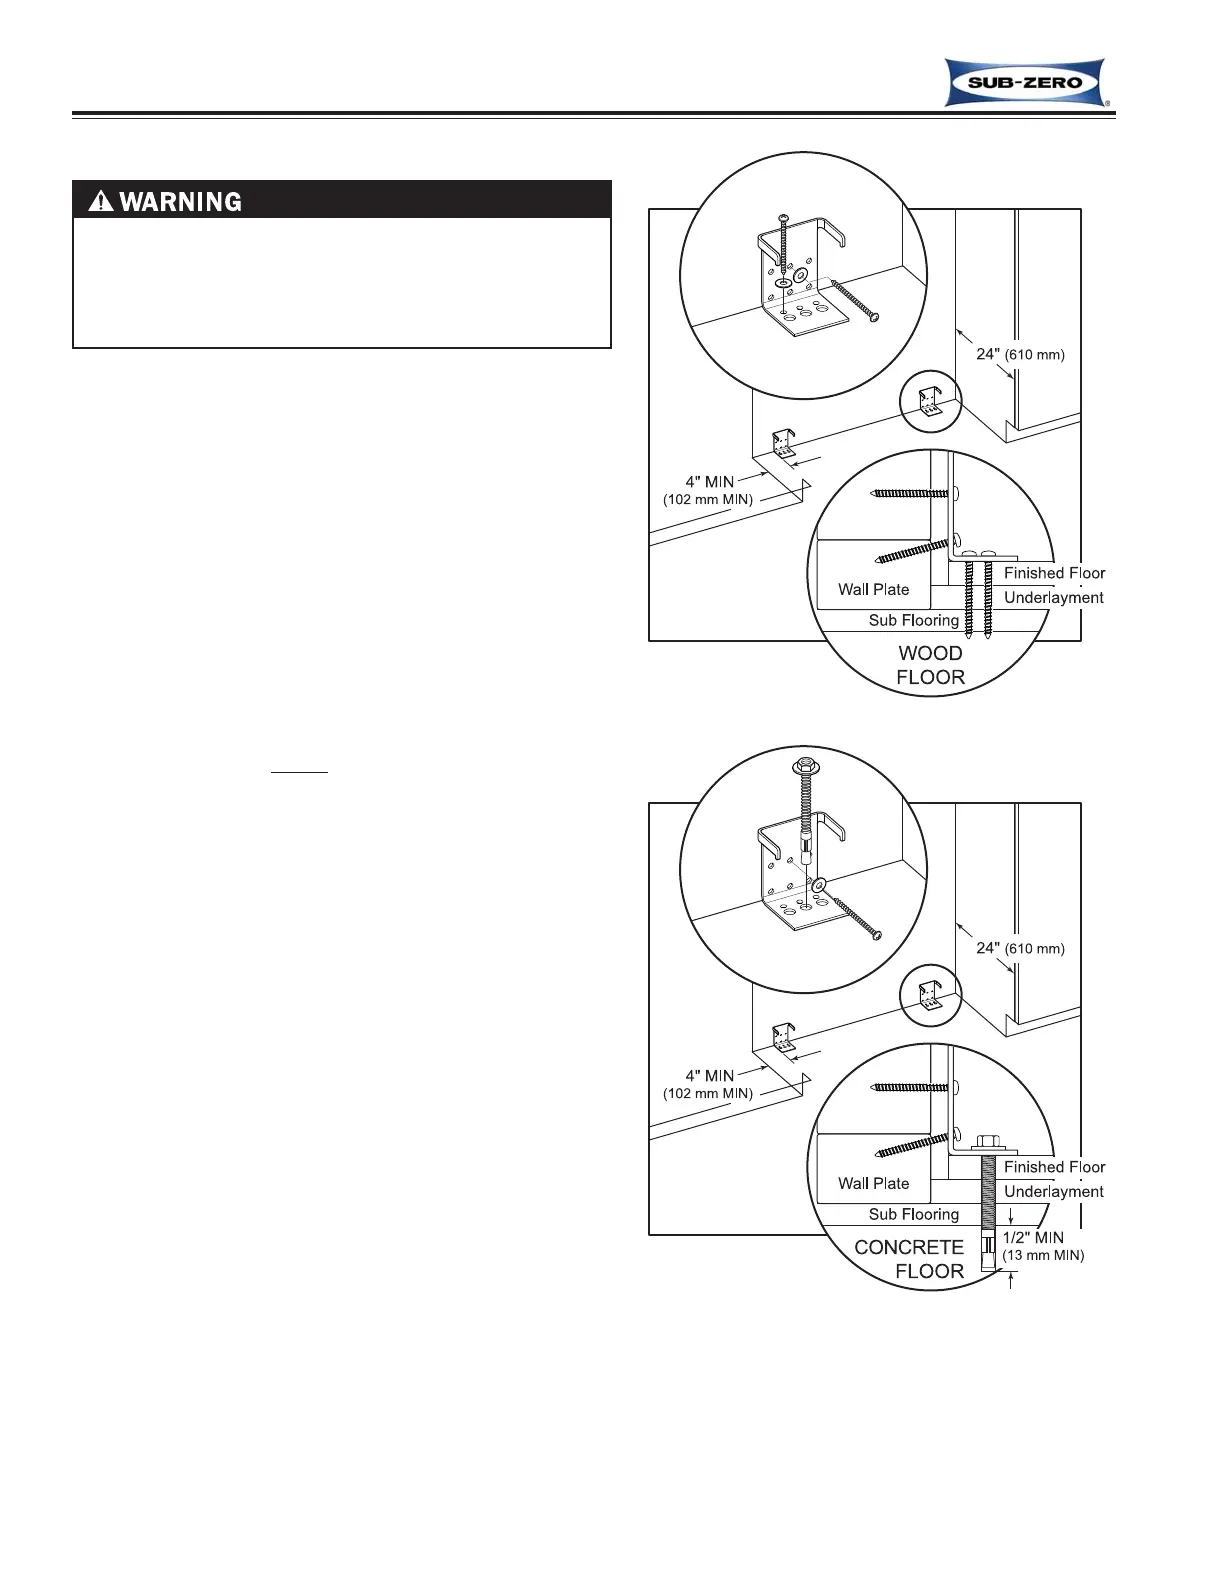
Figure 2-1
Figure 2-2
THE UNIT COULD TIP FORWARD UNDER CERTAIN
LOAD CONDITIONS. FAILURE TO INSTALL BOTH
ANTI-TIP BRACKETS AND EXTEND LEVELERS TO
FLOOR ACCORDING TO INSTALLATION MANUAL
COULD RESULT IN SERIOUS INJURY OR DEATH.
IMPORTANT NOTE: Placement of the two anti-tip brackets
is critical. They must be installed exactly 24" (610 mm)
from the front of the rough opening to the back of the brack-
ets and a minimum of 4" (102 mm) from the sides of the
rough opening. This depth will increase to 26-3/16" (665
mm) for a flush inset installation based on 3/4" (19 mm)
thick decorative panels. Failure to properly position the
anti-tip brackets will prevent them from engaging the unit
should it tip forward.
Standard Installation Procedure:
The two anti-tip brackets must be located 24''(610 mm)
back from front of rough opening and a minimum of 4” (102
mm) from sides of rough opening. This will ensure that ant-
tip brackets properly engage anti-tip bar at back of unit.
NOTE: Both brackets MUST
be used.
Wood Floor Applications: (See Figure 2-1)
After properly locating anti-tip brackets in rough opening,
drill pilot holes 3/16'' diameter maximum. Then, use the
#12 X 2-1/2” PH Pan HD Zinc Screws and #12 Flat
Washers to secure the brackets in place.
NOTES:
• Make sure screws penetrate flooring material and wall
stud or wall plate a minimum of 3/4'' (19 mm).
• If #12 X 2-1/2'' screws do not hit a wall stud or the wall
plate in any of the brackets back holes, use the #8-18 X
1-1/4” PH Truss HD Screws and #12 Flat Washers with
the Nylon Zip-It Wall Anchors.
Concrete Floor Applications: (See Figure 2-2)
After properly locating anti-tip brackets in rough opening,
drill pilot holes 3/16'' diameter maximum in the wall studs
and/or wall plate, then drill 3/8” diameter holes into the con-
crete a minimum of 1/2“ (13 mm) deep. Then, use the #12
X 2-1/2” PH Pan HD Zinc Screws and #12 Flat Washers to
secure the brackets to the wall, and use the 3/8”-16 X 3-
3/4” Wedge Anchors to secure the brackets to the floor.
NOTES:
• Make sure screws penetrate wall stud or wall plate a
minimum of 3/4'' (19 mm).
• If #12 X 2-1/2'' screws do not hit a wall stud or the wall
plate in any of the brackets back holes, use the#8-18 X
1-1/4” PH Truss HD Screws and #12 Flat Washers with
the Nylon Zip-It Wall Anchors.