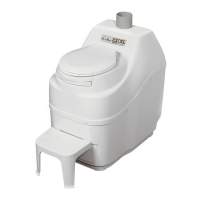
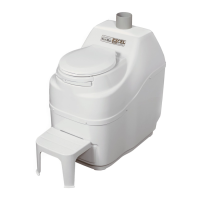
What’s in the box?
CENTREX 3000 CENTREX 3000 NE
1-Owner’s Manual
1- Warranty Card
1- Rake
6 - 2”x31” Vent pipes (PVC)
1- 4” Diffusor
2- Compost Sure Blue
1- Hardware Kit
1- 1” x 8’ Drain Hose
1-Collection Chamber
1- Owner’s Manual
1- Warranty Card
1- Rake
5 - 4”x31 Vent pipes (ABS)
1-
2- Compost Sure Blue
1- Hardware Kit
1- 1” x 8’ Drain Hose
1-12volt 2.4 watt Fan
1-Collection Chamber
** Please note that the Collection Chamber will be shipped as a second box.
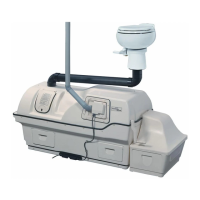
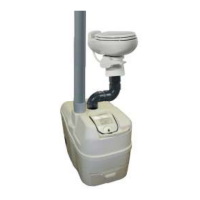
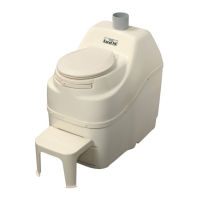
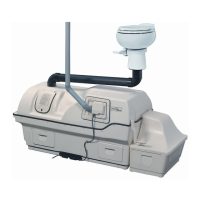
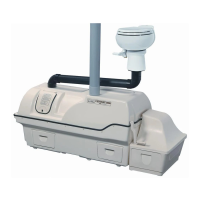
Parts and Functionality
Familiarize yourself with your new toilet
1) Turn the drum handle clockwise to rotate the Bio-drum™ for mixing and aeration. (The drum
rotates counter-clockwise and the drum door closes). This is how you will rotate the drum during
regular operation.
2) Lift and remove the access door and rotate the drum until the drum opening is visible through the access
door opening for adding “Compost Sure Blue”. This is how you will add “Compost Sure Blue” bulking
mixture to the drum during regular operation.
3) Pull the drum locker button, (located on the side, near the handle), hold it out and turn the handle
counter-clockwise to simulate removal of compost from Bio-drum™ to the finishing drawer. This is how
you will remove compost during regular operation. (see page 12)
4) After the toilet has been plugged in for ten minutes, remove the compost finishing drawer at the bottom
front of the toilet. Place a hand inside the drawer opening, on the surface of the evaporating chamber
(the area under the finishing drawer) to check it is warm to the touch, and that the heater is working
properly (CENTREX 3000 electric).
5) Line the bottom of the collection chamber with the plastic bag (provided). Place the collection chamber
base on the right side of the CENTREX 3000 so that the base rests under the opening in the patented
bio-drum. Place the top of the collection chamber on the base. SUN- MAR Autoflow™ technology allows
compost to automatically deposit into the collection chamber.
6) The unit must be installed so that the base is protected from weather. The rubber “u” channel at the bottom
of the unit is well-sealed, but if the unit is sitting in water, has snow melting against it, or rain pouring on it,
this may eventually wear through and short out the heating element. This seal is water resistant; it is not
water-proof.
Note: The composting unit should be placed on a level surface, or sloping slightly toward the safety
drains assembly to ensure drainage of effluent. Do not install the unit in a pit where water can
accumulate around the composter.
3