Part # 4515558 (02/29/08)Page 8
4. Check pilot ame on installation. If pilot adjustment is
required at any time, please ensure the pilot adjustment
screw is sealed and there are no leaks.
5. Light the oven pilot.
6. Set the thermostat to 260°C. Leak test all valves and
ttings as described at the beginning of this section.
Correct any leaks as required and recheck.
7. Shut o all valves and set thermostat dials to “OFF” or
lowest position.
All units are tested and adjusted at the factory, however,
burners and pilots should be checked upon installation and
adjusted if necessary.
CAUTION: Gas will ow to the top section burners even if
top section pilots are not lit. Gas will not be interrupted. It
is the responsibility of the operator to conrm the proper
ignition of each burner as it is turned on. Should ignition
fail to occur 5 seconds after turning a burner on, turn the
burner o, wait 5 minutes, and try again.
Adjustments
The top and oven orices are xed and cannot be adjusted.
Proper rate is attained if the gas supply pressure is adequate.
Pressure may be checked by 1/8” N.P.T. manifold pressure tap.
A properly adjusted air shutter will provide for a distinct blue
ame over the entire port area of the burners when at full
rate.
Pilot Adjustment
All pilot adjustment valves are mounted on the range to
manifold. When properly adjusted it should neither lift of the
burner nor should it show a yellow tip.
Burner Gas/Air Adjustments
Variations in eld conditions or rough handling of the
equipment in transit may indicate the need for adjustment of
primary air to the burners.
TESTING & ADJUSTMENT Continued
1. Check operation and adjust as below to provide a sharp
blue ame at full rate.
2. On the burner (open top and oven burners) locate the air
shutter.
3. Loosen the lock-nut so that the air shutter turns freely.
4. Reinstall burner. Turn on gas and ignite burner.
5. Rotate the air shutter to obtain stable, sharp inner blue
cones. (Slight yellow tips on oven).
If the burner ames are sharp but lift of the burner ports,
reduce the amount of primary air by closing the air shutter. If
the burner ames are lazy and yellow in appearance, increase
the primary air by opening shutter. If poor performance
persists check for proper gas pressure.
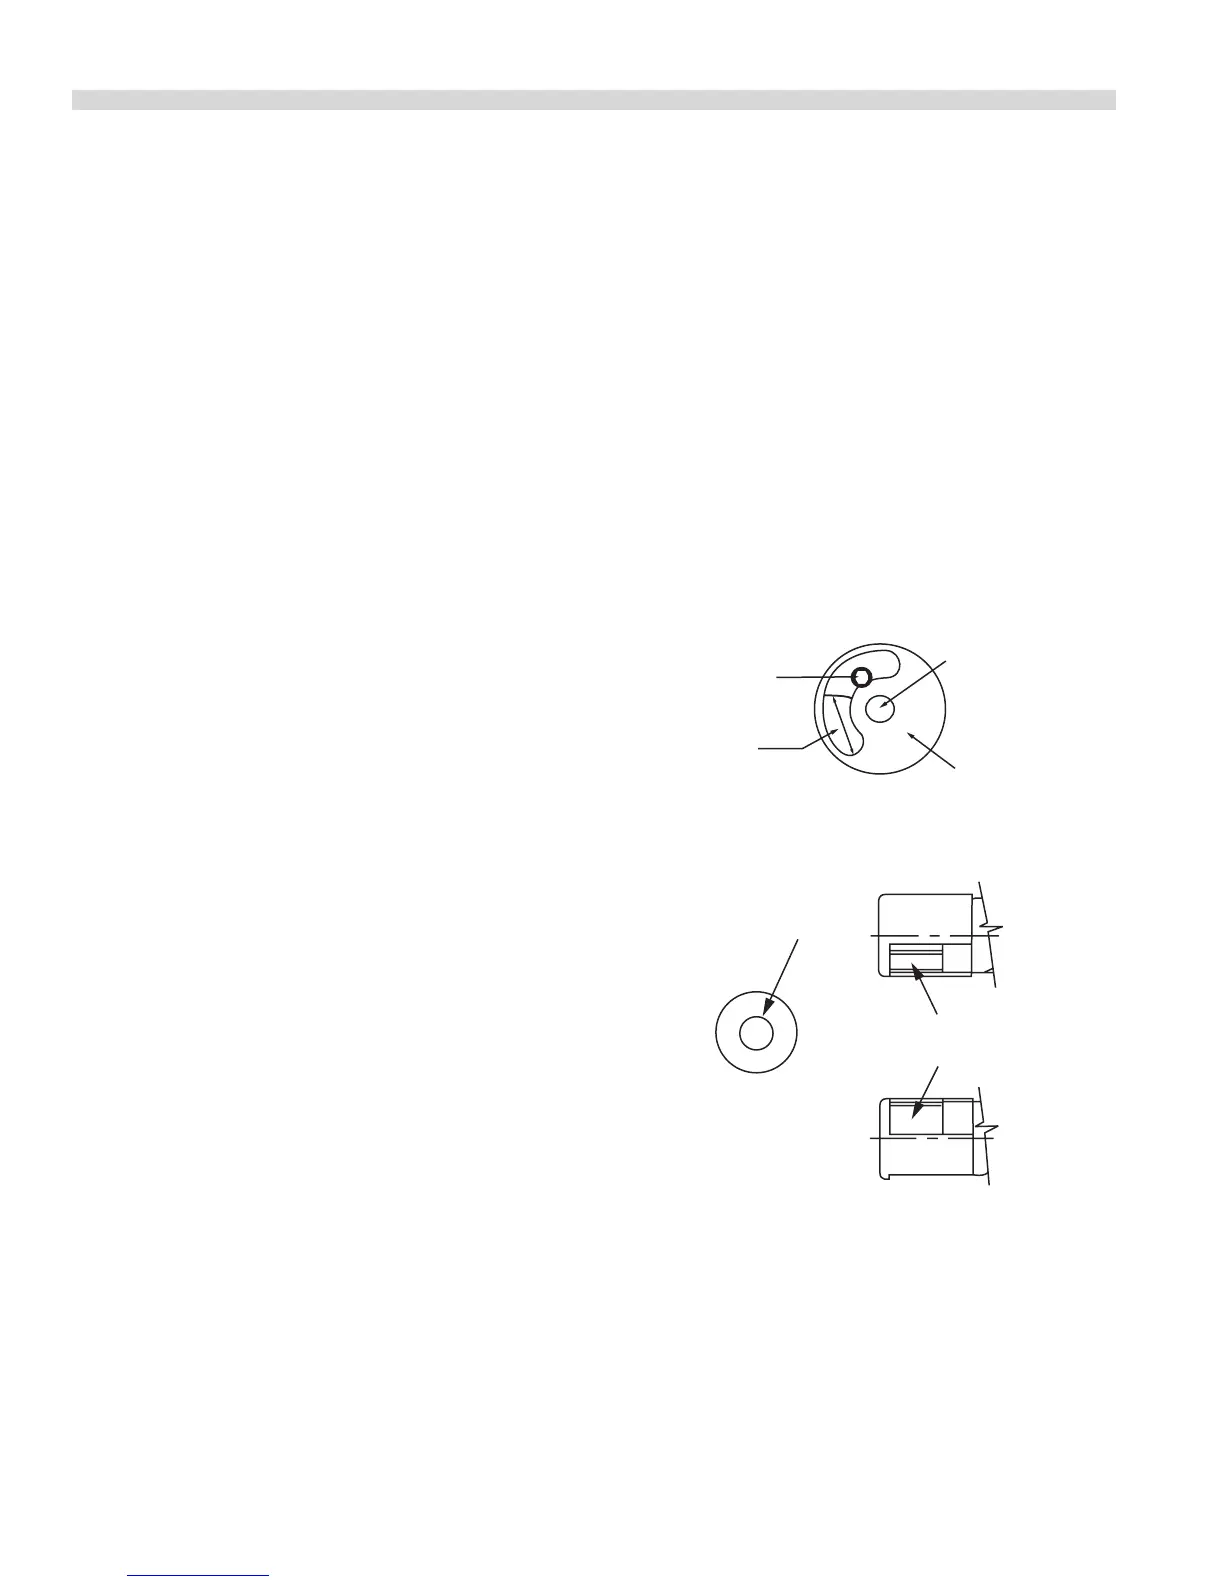
Injector Location
Fixing Screw
Required Length
of Opening
Aeration
Shutter
INJECTOR
LOCATION
OPENING
OVEN BURNER SHUTTER
SKSHUT