- 12 -
2. Before conducting initialization, firmly close the head-cover to the optical sensor part. When
closing the head-cover, be sure to get the upper and lower parts correctly placed.
3. During initialization, make sure that the head cover to the measure part doesn't move.
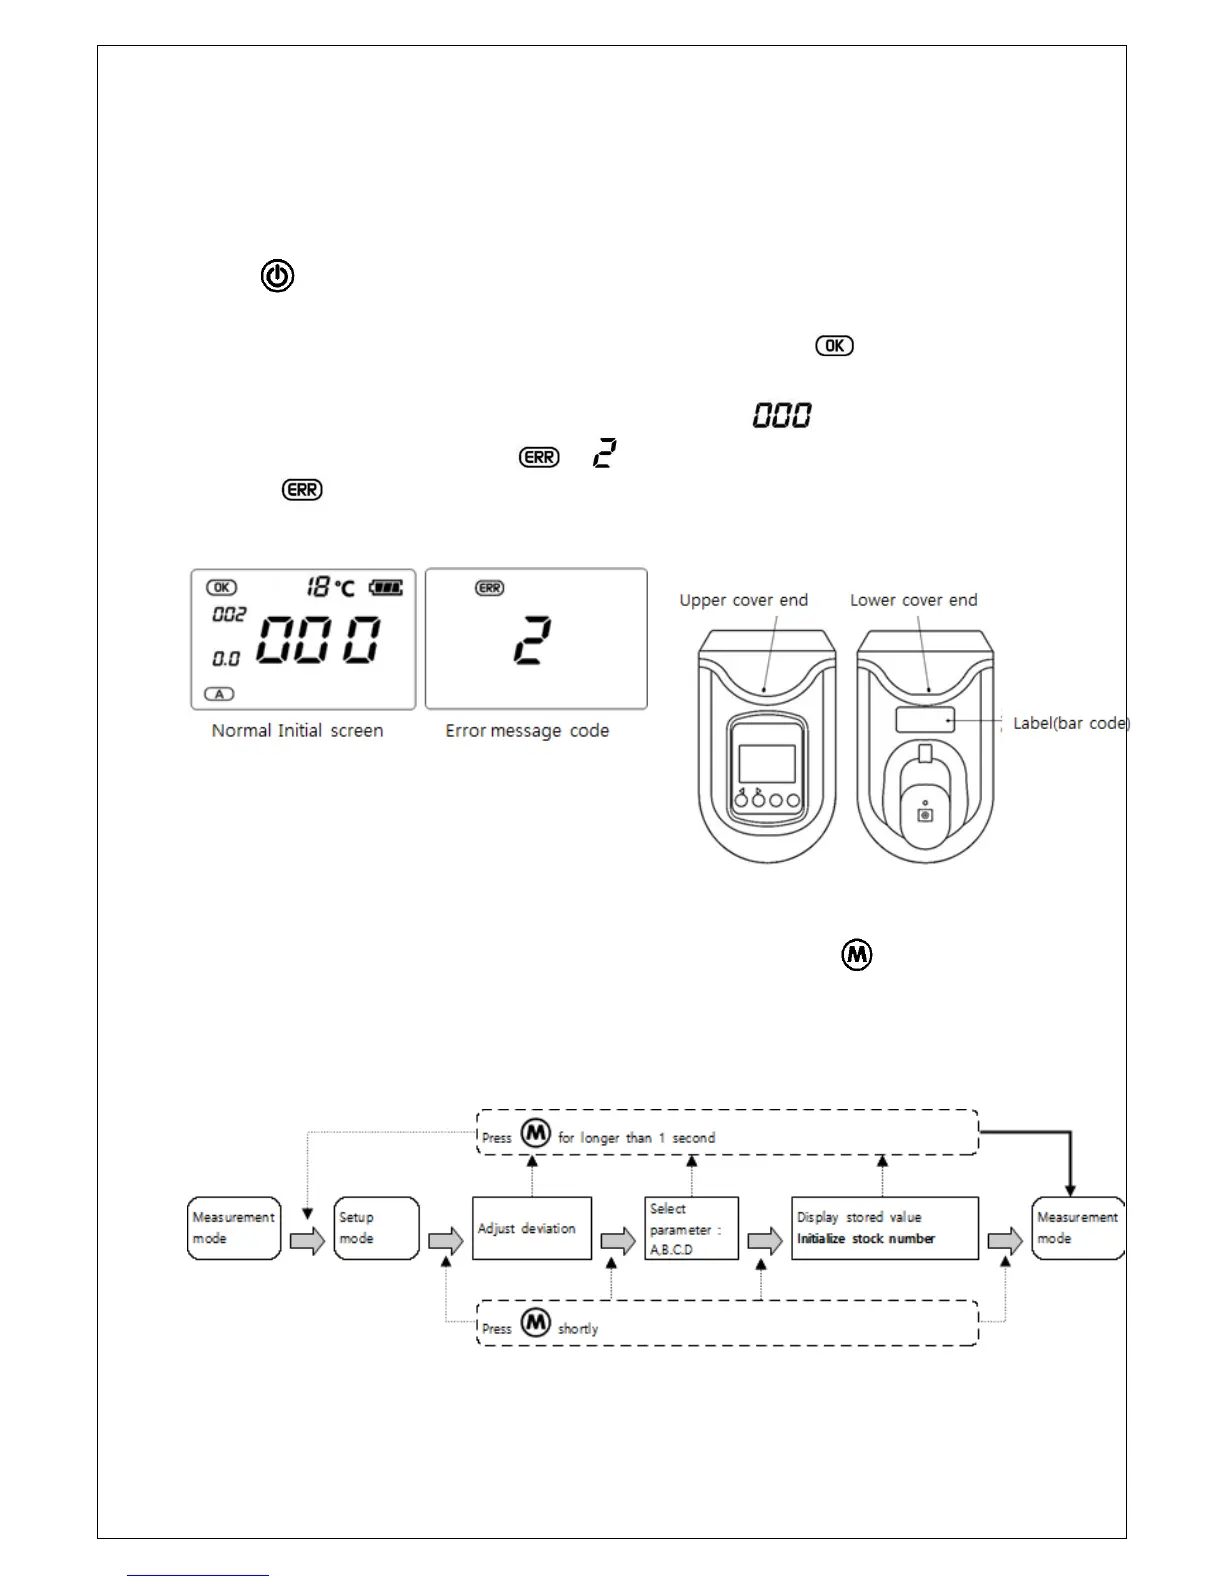
4. Press button, and then the LCD screen will show sequentially shifting number "5-4-3-2-1"
while initialized. Initialization takes about 5 seconds and ends with a 'beep' sound.
5. When initialization completed successfully, the LCD screen will show and turn into home
navigation menu. When initialized, data displayed on the home menu shows the most recently
used parameter, stock number and measurement value shows as . In case the initialization
improperly completed, an error code ( + ) will appear.
6. In case appears, see the troubleshooting or checkup methods described in this user's
manual and follow the instructions, or contact a service representative for checkup.
■ How to set up measuring condition
1. Measurement mode and Setup mode
The instrument changes from Measurement mode to Setup mode, when button is pressed
down for longer than 1 second.
In the setup mode, user can set up measuring conditions (adjustment of measurement deviation,
selection of calibration model) and find past measurement data and initialize stock number to zero.