SunFounder GalaxyRVR Kit for Arduino, Release 1.0
And the coolest part? With our command, all the LEDs on this strip can change their colors at once! It’s like having
our own light orchestra at the tip of our fingers!
So let’s get ready to play some light music! In our next step, we’ll learn how to control these LEDs to display the colors
we want. It will be like conducting a symphony of light!
Step 3: Light Up the Show - Coding to Control the RGB LED Strips
We’ve stepped into the realm of colors, it’s time to bring our Mars Rover to life. Brace yourself to paint the darkness
with a spectrum of colors using RGB LED strips. Think of this as a chance to transform your Mars Rover into a mobile
disco party!
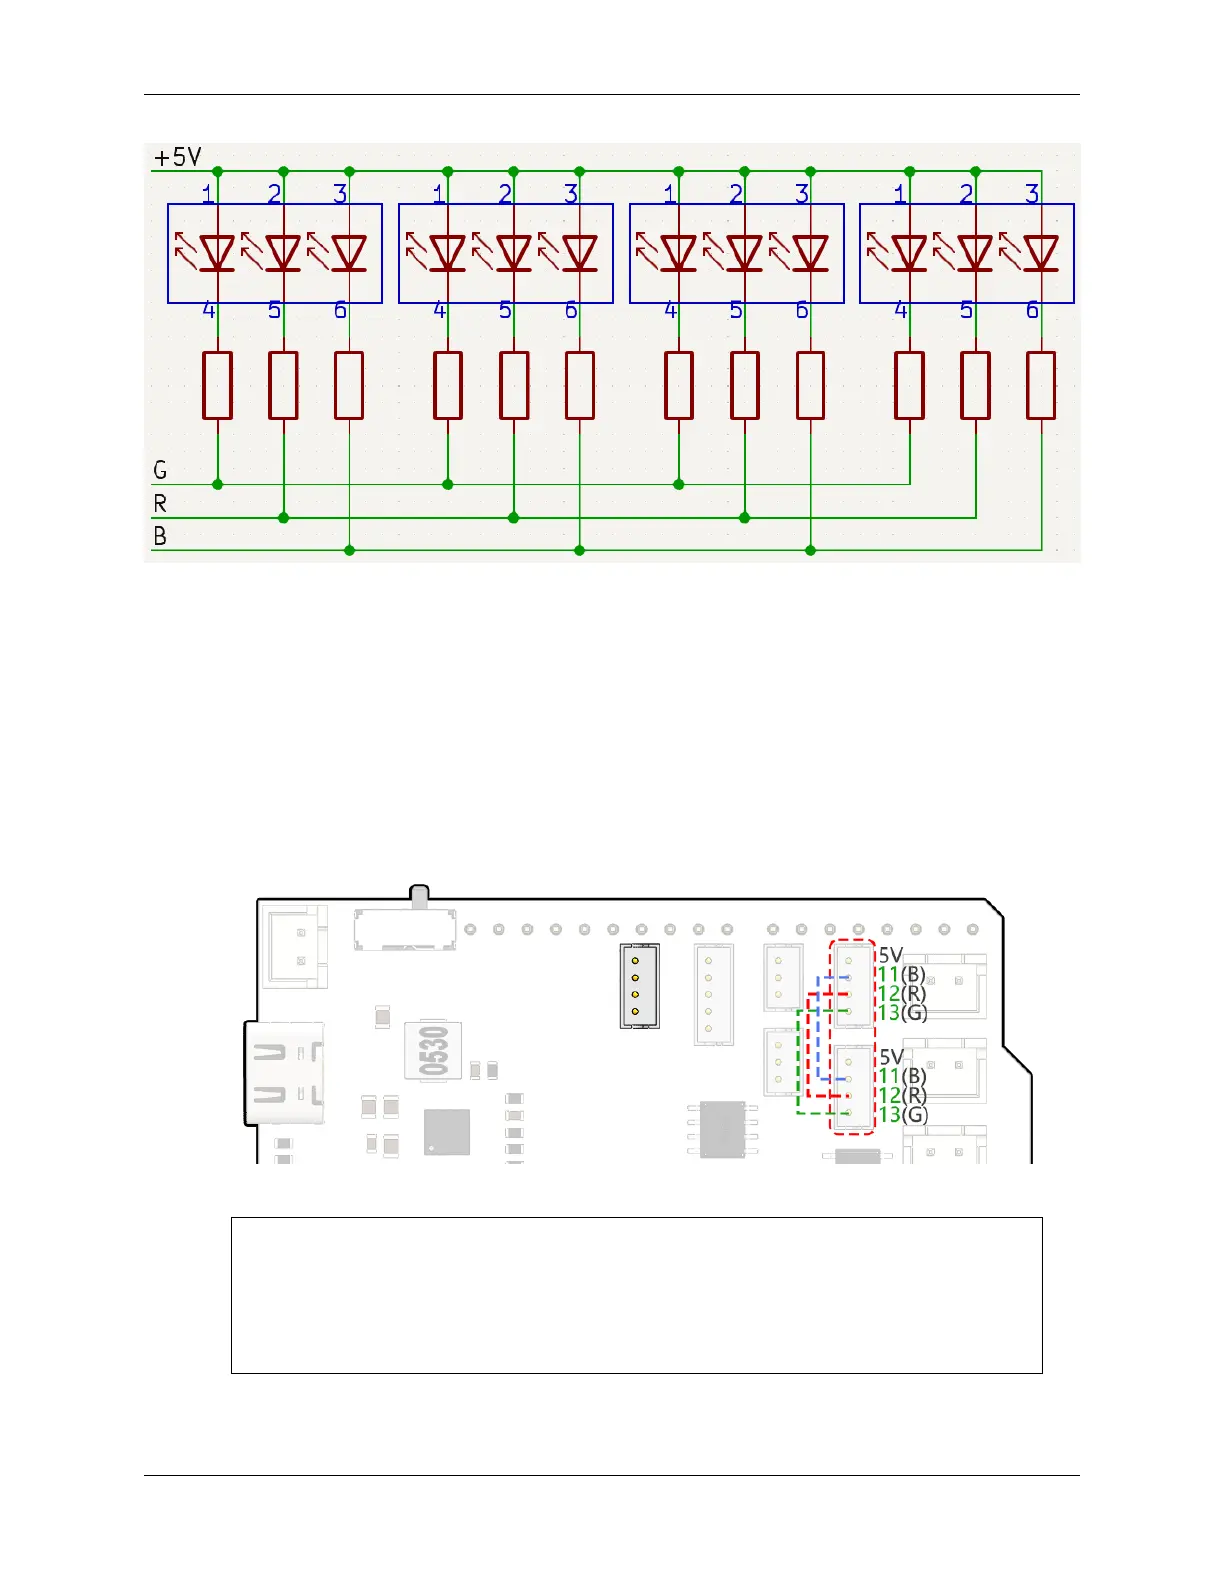
• Before we dive into the fun part, let’s understand that even though we have two LED strips, they are both con-
trolled by the same set of pins. Think of it as having two dazzling dancers moving in perfect synchronization!
• It’s time to summon our coding magic. We’re going to initiate our pins with the Arduino code.
#include <SoftPWM.h>
// Define the pin numbers for the RGB strips
const int bluePin = 11;
const int redPin = 12;
const int greenPin = 13;
• With our pins in place, we’ll now use the SoftPWMSet() function to control these pins. To make the RGB strip
display red, we turn the red LED on and switch off the others.
3.9. Lesson 9: Lighting the Way with RGB LED Strips 73